REVIEW · QUEENSTOWN
Small-Group Zipline Adventure in Queenstown
Book on Viator →Operated by Ziptrek Ecotours · Bookable on Viator
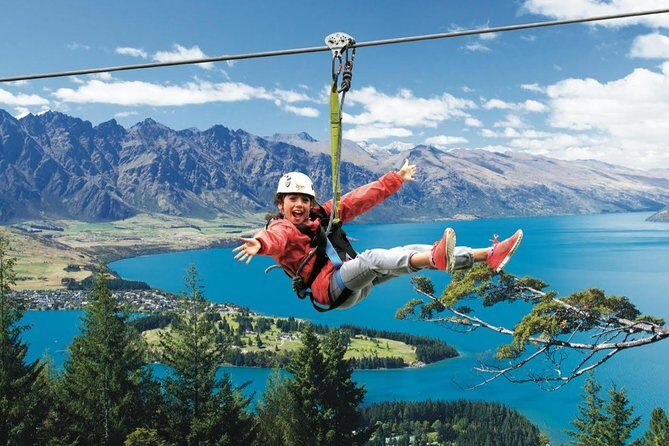
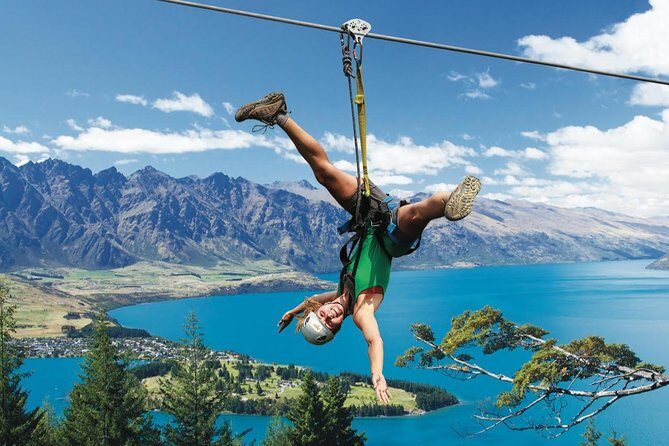
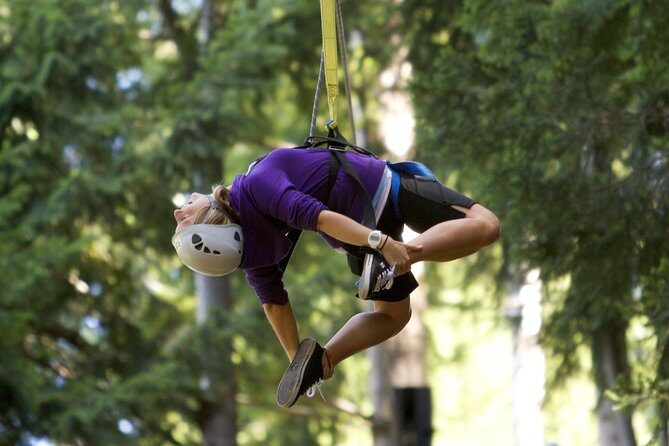
Two hours, one big grin? This small-group Ziptrek zipline adventure launches from the Skyline Gondola summit and sends you tree-to-tree across Queenstown’s forest canopy. You’ll get panoramic views of Lake Wakatipu and the Remarkables range while guides keep the whole ride smooth and safe.
I especially love the way this tour handles first-timers. When I hear guides like Nic and Jacob talk you through each launch, it feels less like guessing and more like being coached step-by-step. I also like the mix of thrill and nature education, from forest ecology to little Queenstown history as you move between platforms.
One possible drawback: the Skyline Gondola ticket isn’t included, and you’ll want extra time to get up there. If your schedule is tight, build in buffer so you don’t feel rushed at the check-in platform.
In This Review
- Key things I’d clock before you go
- Queenstown ziplining from the Skyline summit: why this one works
- Picking the right course: thrill level without the guesswork
- What the 2-hour ride feels like, step by step
- 1) Check-in at Ziptrek Treehouse (top of Gondola)
- 2) Gear up and learn the basics
- 3) Zipping through the beech forest canopy
- 4) The view payoff
- 5) Wrap-up back at the meeting point
- Safety and guides: the reason it feels easy to trust
- Price and value: what you’re really paying for
- Logistics that can make or break your day
- Gondola time buffer
- Finding the meeting point
- No pickup, pack shoes for walking
- Consent form and limits
- Who this zipline tour is best for
- Great fit if you’re:
- Might feel less ideal if you:
- The most praised parts: what tends to impress people most
- Should you book Ziptrek in Queenstown?
- FAQ
- Is Skyline Gondola included in the zipline price?
- How long is the zipline adventure?
- Where do I meet for the tour?
- What’s included in the zipline tour?
- What should I wear or bring?
- Are there weight limits?
- Can I cancel for a full refund?
Key things I’d clock before you go
- World-steep tree-to-tree zipline views from up high over Queenstown
- Three course options with different adrenaline levels, including a 68-foot drop
- Two professional guides who supervise every launch and keep the rhythm going
- Safety gear included, plus warm hat and gloves in winter
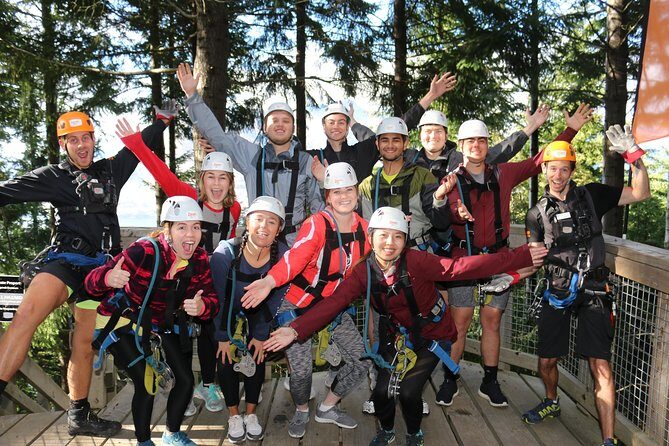
- Max 10 travelers, so it stays personal and not chaotic
- Closed-toe shoes matter, because you’ll be walking before you zip
Queenstown ziplining from the Skyline summit: why this one works
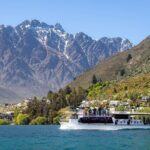
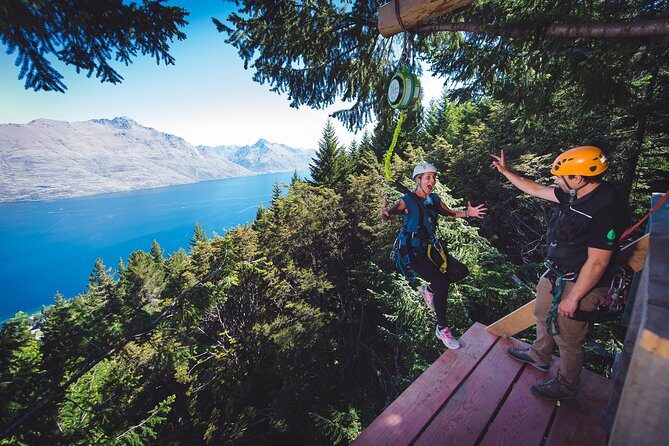
Queenstown calls itself an adrenaline capital for a reason, and this is one of the most direct ways to tap into that energy. You start near the top of Skyline Gondola at the Ziptrek Treehouse, then move through a beech forest canopy on a series of ziplines. The whole setup is designed so the views are part of the fun, not just background scenery.
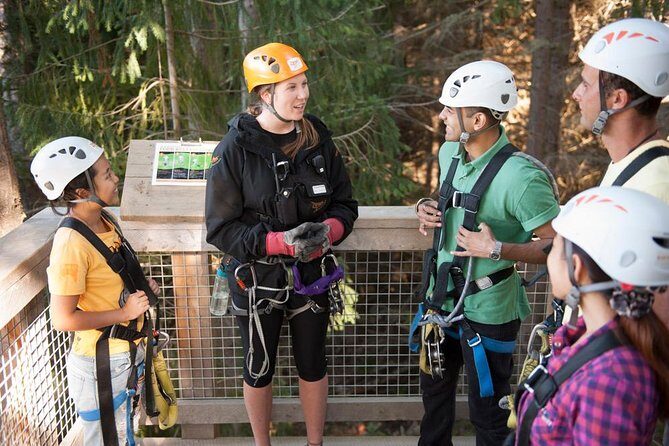
What makes this tour feel especially good for most people is the structure. You’re not dropped into chaos and told to figure it out. The guides supervise launch from each aerial tree-house platform, explain what you’ll do next, and keep you moving between lines at a steady pace.
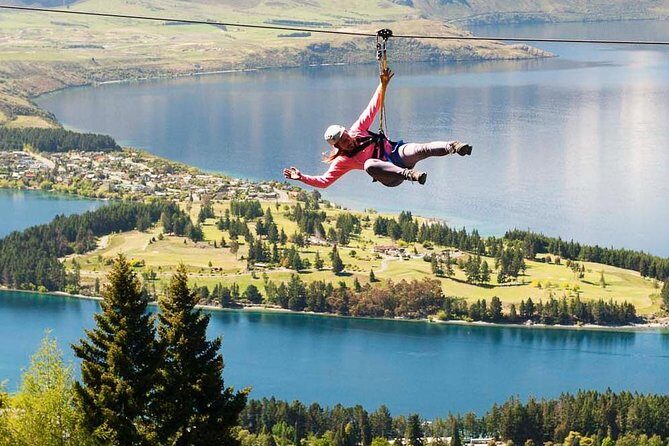
And yes, the views are real. From high above, you look out over Lake Wakatipu and toward the Remarkables mountain range. Even if you’re nervous about heights, the guides’ pacing can help you focus on the moment rather than the edge.
You can also read our reviews of more tours and experiences in Queenstown.

Picking the right course: thrill level without the guesswork
One big value point here is choice. You don’t have to force yourself into the most intense option if you’re unsure. The tour offers three different courses, which is great because “ziplining” can mean different things to different people.
Here’s how the courses fit together based on what’s described:
- A beginner-friendly / toned-down option for families and people wanting more comfort
- A higher-adrenaline option that’s described as the world’s steepest tree-to-tree zipline
- The Kereru option featuring a 68-foot (21-meter) drop
If you’re traveling with kids or you want to keep the day from going too intense, I’d lean toward the longer, more gradual-feeling route. If you’re chasing big “whoa” moments, the steepest option and Kereru are the ones to aim for.
A few people also talk about different “line counts,” like doing four or six lines. That’s a helpful sign: if you want more time zipping (and not just one or two runs), pick the package with more runs.
What the 2-hour ride feels like, step by step
The activity runs about 2 hours. That includes the time getting checked in at the top, getting fitted, hiking between parts of the route, and doing multiple zipline segments.
1) Check-in at Ziptrek Treehouse (top of Gondola)
Your meeting point is at Ziptrek Treehouse, at the top of the Gondola. In other words, you’re starting from the same high platform area people visit for Skyline views. That’s convenient because you can plan your day around being up there, but it also means your gondola timing matters.
You’ll confirm you’re in the right group and get ready for gear fitting. Bring the clothing you actually want to zip in, because it can be chilly up top even when it’s warmer lower down.
2) Gear up and learn the basics
All safety equipment is included. In winter, you’ll also get hat and gloves. That’s a real comfort upgrade, since cold fingers are no fun when you’re trying to steady your body during braking.
Before you go, expect the guides to walk you through what to do during each launch and landing. In multiple guide-led accounts, the common theme is reassurance plus good humor, including coaching that helps anxious riders settle in.


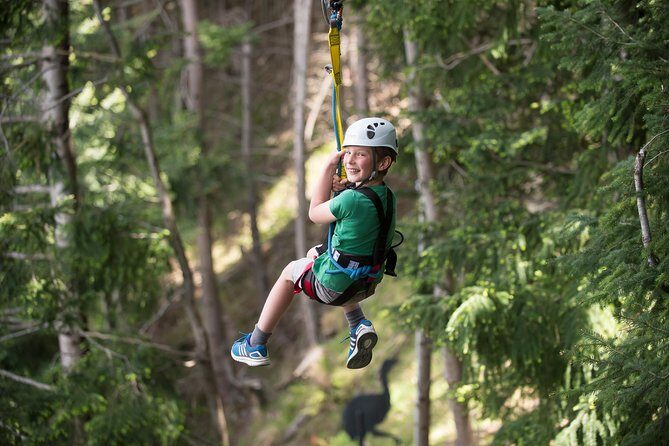
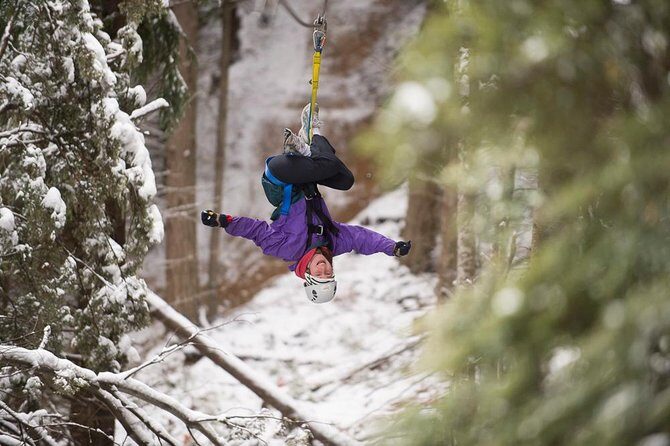
3) Zipping through the beech forest canopy
Then comes the main event: you glide down the mountain through forest canopy. You’ll be moving along a series of ziplines, each starting from a tree-house platform and ending at the next segment.
Between runs, you’ll learn a bit as you go: forest ecology and Queenstown history show up during the tour, and the guides help tie it to what you’re seeing overhead. It’s not a lecture; it’s the kind of short, practical storytelling that makes the scenery feel more alive.
4) The view payoff
At some point, you’ll look out and it clicks why Queenstown packs in thrill seekers. The mix of water, mountains, and forest gives you that instant travel feeling: you’re on a moving vantage point.
You can also expect the adrenaline to ramp. More than one person notes that the pace starts off calmer and then builds toward the higher thrill lines. That helps if you’re nervous, because you get reps before you hit the big moments.
5) Wrap-up back at the meeting point
The tour ends back at the meeting point at the Ziptrek Treehouse. So plan your next activity around being back up there after you finish your last line.
Safety and guides: the reason it feels easy to trust
Let’s talk about safety in the way you actually care about it: will you feel looked after?
The answer here is yes. The guides supervise your launch from each platform, and they run a tight setup process. People consistently call out the guides as fun and professional, with names like Nic, Jacob, Emily, Nick, Rhys, Pearl, and Ava showing up in accounts. Even when someone admits fear of heights, the guides’ approach seems designed to lower panic and increase control.
Also, the smaller group size helps. With a maximum of 10 travelers, you’re not waiting around for a long line of people. That means less time standing on platforms feeling tense and more time actually moving through the course.
Price and value: what you’re really paying for
The zipline tour is priced at $73.85 per person. But to understand value, you need to add the Skyline Gondola ticket, which costs NZ$66.00 per person and is not included.
So what are you paying for, beyond the zipline itself?
1) A guided, safety-supervised high-adventure experience
You’re getting two professional guides and the included gear. That reduces the guesswork risk.
2) Multiple lines and structured pacing
Even if you choose a toned-down route, you’re not just doing one short run. People describe doing packages with different numbers of lines, and the tour is set up to keep you active over the whole two hours.
3) A premium starting location
Starting from Skyline’s summit means you’re already at the scenic height. The zipline experience is built around that elevation and the aerial forest path, not a lower-altitude course that needs extra hiking time.
If you already plan to take Skyline Gondola that day, this can feel like an efficient way to turn “going up” into “doing something.” If Skyline wasn’t on your plan, make sure the added cost still fits your budget.
Logistics that can make or break your day
This is where small details save you from stress.
Gondola time buffer
Plan for time. The gondola ticket timing guidance suggests at least 60 minutes to access the upper Skyline complex from the base terminal, or 90 minutes in peak times. If you arrive late or rush, ziplining stops feeling like fun.
Finding the meeting point
One downside that pops up is clarity on how to reach the meeting point and get to the top. If you’re unsure, I’d treat this as a “show up early and ask questions fast” situation, rather than assuming you’ll figure it out in the final minutes.
No pickup, pack shoes for walking
There’s no hotel pickup or drop-off. You’ll get yourself to the meeting point.
Closed-toe shoes are essential, and sandals, flip-flops, or heels aren’t appropriate. You’ll be walking and moving between segments, so wear something you can grip and step in confidently.
Consent form and limits
You’ll need to complete a Participant Consent Form before arrival (the link is provided in your voucher). There’s also a weight limit: max 125kg (275lbs). The Kea tour has a minimum weight of 30kg (66lbs).
Pregnant women aren’t able to go on tour, and if anyone has a medical condition or recent injury, you should bring that to the operator’s attention.
Youths under 14 must be accompanied by a paying adult (15+). Those 17 and under need a signed waiver by a parent or guardian (18+).
Who this zipline tour is best for
This one is built for a wide range of people, which is rare for “adrenaline” activities.
Great fit if you’re:
- Trying ziplining for the first time and want a guided, step-by-step experience
- Traveling with kids, because the courses can be selected for a more manageable thrill level
- Someone who likes views and wants the scenery to be a major part of the payoff
- Groups that want a tight max size (up to 10) instead of a big crowd setup
Might feel less ideal if you:
- Want a pure thrill-only day with no “nature talk” moments
- Are short on time and don’t want to factor in Skyline gondola timing
- Have strict mobility or health constraints that affect participation (especially given the pregnancy and medical-condition notes)
The most praised parts: what tends to impress people most
When I look across the themes that repeatedly come up, the standouts are pretty clear.
The guides get top marks for making people comfortable. That includes people who were nervous about heights. The common thread is calm coaching plus humor, so you don’t get stuck in your head.
The safety feeling is also a big deal. People mention that everything feels well-maintained and that launch and braking feel controlled. Combined with the smaller group size, it adds up to a “trust the process” experience.
The views are the third major win. The ziplines give you a moving viewpoint over Lake Wakatipu and the Remarkables. Even riders who don’t consider themselves scenery people still end up appreciating how wide the world looks from up there.
Should you book Ziptrek in Queenstown?
If you’re coming to Queenstown and you want one activity that delivers adrenaline, coaching, and epic views in a tidy time block, I think this is an excellent pick. It’s not just about going fast; it’s about being safely guided while you take in the scenery from a unique vantage point.
Book it if:
- You want a beginner-friendly entry to ziplining
- You like options, including the Kereru 68-foot drop
- You’re okay adding the Skyline Gondola ticket to your day plan
- You prefer small-group energy and two-guide attention
Skip or reconsider if:
- You hate logistics and don’t want to manage gondola timing
- Your schedule doesn’t allow buffer to reach the upper check-in point
- You’re outside the weight limits or have a situation that affects eligibility
If you’re the kind of traveler who likes your “adventure” to feel organized, this one delivers.
FAQ
Is Skyline Gondola included in the zipline price?
No. The zipline tour price does not include Skyline Gondola. The gondola ticket is listed separately as NZ$66.00 per person.
How long is the zipline adventure?
It runs about 2 hours (approx.).
Where do I meet for the tour?
You meet at Ziptrek Treehouse at the top of Gondola, Queenstown 9300, New Zealand. The tour ends back at the same meeting point.
What’s included in the zipline tour?
You get the zipline tour, two professional zipline guides, and all equipment. In winter, hat and gloves are included.
What should I wear or bring?
Bring an extra layer year round. Closed-toe shoes are essential (no sandals, flip flops, or heels). Jackets, hats, and gloves are recommended, and winter riders receive hat and gloves.
Are there weight limits?
Yes. The maximum weight is 125kg (275lbs). The Kea tour also has a minimum weight of 30kg (66lbs).
Can I cancel for a full refund?
Free cancellation is available up to 24 hours in advance for a full refund. If you cancel less than 24 hours before the start time, the amount paid is not refunded.