REVIEW · WAITOMO
From Auckland: Spellbound, Waitomo Glowworm Cave Small Group Tour
Book on Viator →Operated by Expedigo Tours and Travels Auckland · Bookable on Viator
Night sky moves under your feet. This full-day trip from Auckland to Waitomo pairs the famous glowworms with a second cave of formations, plus a guided experience that leaves room for questions. I especially like that the glowworm cave allows cameras with no restrictions, and the day is run for a small group (max 11), so you’re not stuck watching through other people’s shoulders.
One thing to plan for: it’s a long day. The drive time is listed as 8–9 hours, but traffic hiccups and incidents on the route can stretch it, so I wouldn’t schedule anything demanding right when you’re back in Auckland.
In This Review
- Key things I’d circle on your itinerary
- Auckland to Waitomo: the road trip part that matters
- Why the small group changes the vibe
- Spellbound Twin Caves: what the 180 minutes feels like
- Glowworm boat ride and camera time: how to plan your photos
- A small detail that helps: guided photo moments
- The second cave walk: stalactites, stalagmites, and fossils
- Keep expectations realistic
- Lunch in Otorohanga: refuel where you choose
- Pickup, timing, and the reality of the long drive
- Comfort tips that actually help
- Price and value: is $201.69 worth it?
- Who should book this glowworm cave day trip
- Should you book Spellbound from Auckland?
- FAQ
- How long is the Waitomo Glowworm Caves small group tour from Auckland?
- What time does the tour pickup start?
- Is lunch included?
- Are cameras allowed inside the glowworm caves?
- How big is the group?
- What’s included in the price?
- What happens if weather affects the caves?
Key things I’d circle on your itinerary
- Small-group pace (up to 11 people) means more guide time and easier photo moments
- Two different caves: glowworms by boat, then a walk with stalactites, stalagmites, and fossils
- Photo-friendly setup in the glowworm grotto, including guidance for longer shots in the dark
- Comfort stops included like coffee/tea and snacks, plus a lunch break you control in Otorohanga
- Local storytelling on the drive (you may hear Māori culture notes and regional history from your guide)
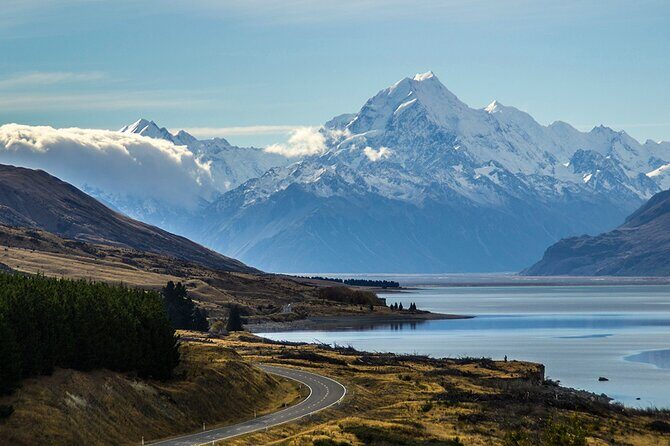
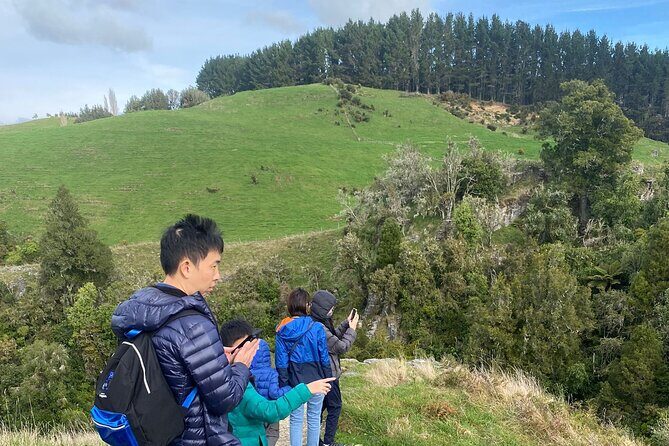
Auckland to Waitomo: the road trip part that matters
This tour starts early from Auckland Central, with pickup beginning at 7:45 am. From there, you’re on the road for roughly 2 hours 45 minutes toward Waitomo. That sounds like “just transportation,” but it often turns into part of the value: your driver/guide shares local context about New Zealand and the Waikato region, plus small sights along the way.
You also get real help for comfort during the long drive. There’s an air-conditioned vehicle, and you’re provided snacks, bottled water, and coffee and/or tea. In practice, that means you’re less likely to arrive at the caves hungry or cranky, which matters because you’ll be underground and doing some walking.
You can also read our reviews of more tours and experiences in Waitomo.


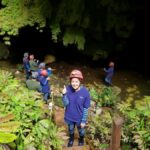
Why the small group changes the vibe
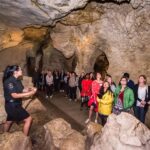
With a maximum of 11 travelers, you’re not fighting a crowd for the “good angle.” It also makes it easier for your guide to work around your questions, including timing for photos and what to expect in the caves’ cooler temps. A smaller group tends to feel more like a day out with people you’ll remember, not a factory tour.
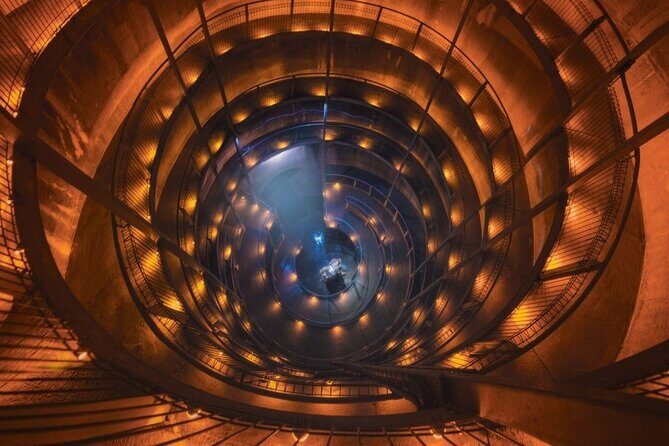
Spellbound Twin Caves: what the 180 minutes feels like
The heart of the day is the fully guided Spellbound 180-minute experience in the Twin Caves. Expect two very different underground environments that complement each other instead of repeating the same thing twice.
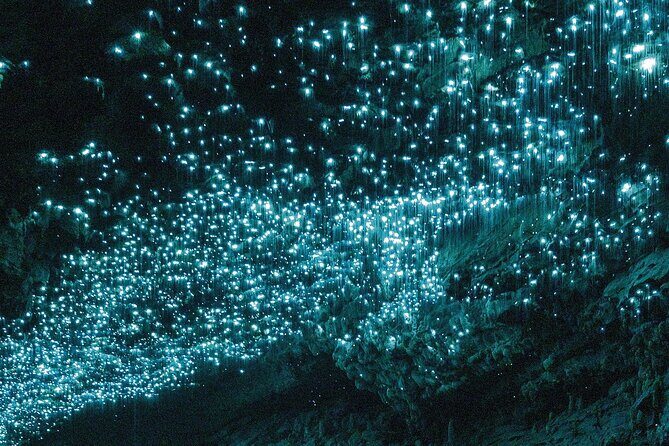
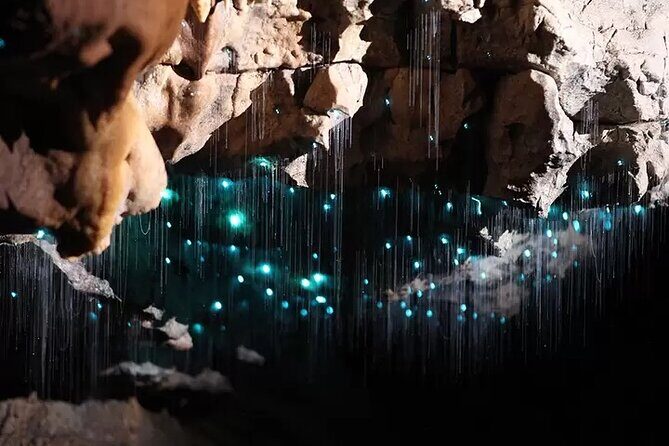
In the first cave, the glowworm display is the main event. You’ll see the bioluminescent light covering cave walls and ceilings, with thousands of glowworms creating that starry effect. In the cave, the guide also explains the ecology and what’s happening biologically—so it’s not only pretty, it’s understandable.
Then you shift to the second cave, which is less about glowworms and more about the geology: stalactites, stalagmites, and even fossils (in at least some cave parts). That contrast is a big reason this tour gets such high marks. After you’ve been wowed by light in darkness, you get to appreciate shape, texture, and time.
Glowworm boat ride and camera time: how to plan your photos
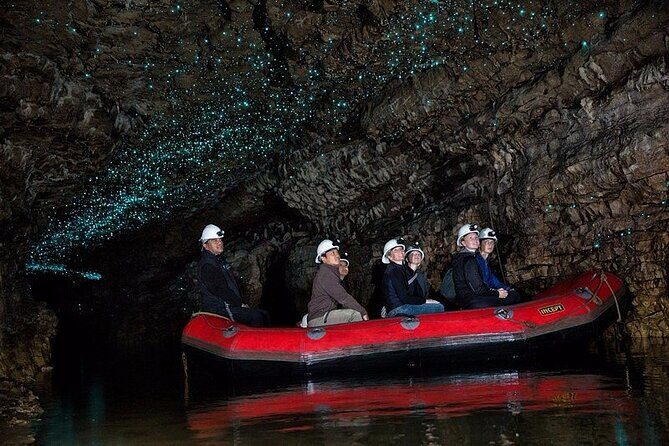
This tour is built around the glowworms, and you’ll experience them from the water on a short boat ride through the grotto. The glowworms can be seen as a glowing blue-green ceiling-and-walls scene, and the most striking moment is the one where the cave feels like a dark sky suspended overhead. Several guides are praised for creating a calm, focused atmosphere during the boat portion.
Now for the practical part you’ll care about if you’re bringing a camera or phone: this experience is photo-friendly. The tour highlights that there are no camera restrictions, and that’s a big deal in places where many tours limit photography. One of the smartest ways guides help is by showing you when to shoot and how to frame the long-exposure look in a dark cave.
If you want a smoother photo session, pack for the conditions:
- a camera that performs in low light (or at least a phone with a night mode you trust)
- a way to keep warm and steady (so you’re not shaking from cold)
- comfort footwear so you’re not rushing during stops
A small detail that helps: guided photo moments
In multiple experiences, guides go beyond “watch me” by offering help with photographs. Some guides even take individual photos for guests with the glowworm backdrop without extra cost (when conditions allow). That kind of help matters more than it sounds, because getting a sharp shot in darkness is hard—even for people who travel with good gear.
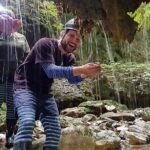
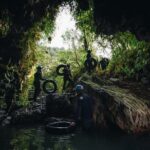
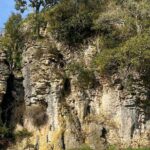
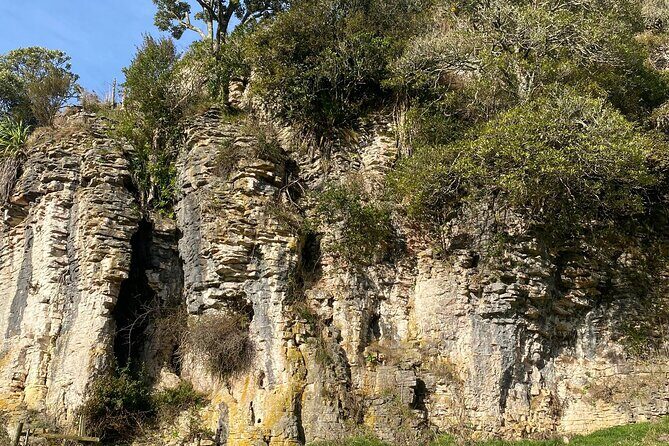
The second cave walk: stalactites, stalagmites, and fossils
After the glowworm highlight, you get a break and then move on to the second cave experience. Here, the focus changes from living light to the carved-in-time shapes of limestone.
You’ll walk through parts of the cave featuring stalactites and stalagmites. That’s the classic “dripping rock” look, but the guide-led explanation is what turns it from a quick photo stop into something you can actually interpret. Fossils are also mentioned as part of the second cave experience in the tour feedback, which adds a science-and-story layer.
Keep expectations realistic
This isn’t an all-day hike, but it isn’t a sit-down show either. You’ll want moderate physical fitness, and you should expect walking and moving in cool, uneven cave conditions. Closed-toe shoes are a smart call. Some tours also get chilly inside the caves, so plan for a jacket layer even if the Auckland weather is warm.
Lunch in Otorohanga: refuel where you choose
On the way back, the schedule includes a stop in Otorohanga for about 30 minutes. You get a chance to recharge with lunch at a local eatery. Lunch is not included in the tour price, but your guide provides suggestions.
In other words, this isn’t a fixed meal included in the ticket. It’s more flexible, and that’s a good thing if you have preferences or dietary needs. The tradeoff is you’ll need to plan a stop that fits your appetite without expecting a full sit-down lunch service.
Pickup, timing, and the reality of the long drive
The big question people ask about day trips from Auckland is always the same: will it feel rushed? In this case, the experience is paced around the underground attractions. You travel out early, get your cave time, and then head back with planned breaks.
Still, I recommend you treat the day as “almost a full day,” not a quick excursion. Traffic can stretch the overall schedule beyond the listed 8 to 9 hours. One traveler experienced delays due to accidents and rush-hour congestion returning to Auckland, pushing the day longer than expected. If you’re trying to make a dinner reservation the night you return, build in a buffer.
Comfort tips that actually help
- Use the snack and water offered on the drive. You’ll feel it later.
- Bring a warm layer for the second cave area.
- Wear shoes you’re happy to stand and walk in for stretches.
Price and value: is $201.69 worth it?
At $201.69 per person, this tour isn’t “cheap,” especially if you’re comparing it to self-drive options. But the value story here is pretty clear when you look at what’s included:
You’re paying for:
- a fully guided experience in the caves (including the 180 minutes guided portion)
- admission to the Spellbound Twin Caves experience
- English-speaking guides
- round-trip pickup and drop-off from Auckland CBD
- air-conditioned transportation
- snacks, bottled water, and coffee/tea
You’re also buying time and stress reduction. Instead of arranging entry, timing, and transportation while driving a long route, you’re handed a structured day with guided interpretation and photo-friendly cave access. If glowworms are a top priority for your Auckland trip, this is the kind of “pay for it once” itinerary that can feel worth every dollar.
That said, if you hate long days and your schedule is tight, the price won’t matter because you won’t enjoy the journey. This is best for people who can relax into a full-day plan.
Who should book this glowworm cave day trip

This is a strong fit if:
- you want a guided, photo-friendly glowworm experience (no camera restrictions)
- you like learning while you’re seeing (cave science and cave geology are part of the package)
- you prefer a small group over big-bus chaos
- you’re okay with a long drive and a full day out of Auckland
It may not be ideal if:
- you need a short, low-effort day and hate the idea of traffic risk
- you’re uncomfortable walking in cool cave environments
- you’re expecting everything to be 100% predictable regardless of weather
Should you book Spellbound from Auckland?
If glowworms are on your must-do list, I’d book this. The combination of a glowworm boat ride, two different cave environments, and photo-friendly access is exactly what makes Waitomo memorable. Add pickup/drop-off, small-group size, and comfort extras like snacks and drinks, and the day feels built for actual enjoyment instead of logistics.
My only hesitation is the honest one: it’s a long day, and timing can slide with real-world traffic. If you’re flexible with your evening plans and you pack for cool cave conditions, this is one of the most worthwhile ways to experience Waitomo without turning your trip into a DIY project.
FAQ
How long is the Waitomo Glowworm Caves small group tour from Auckland?
The tour runs about 8 to 9 hours (approx.), with the drive time to Waitomo listed around 2 hours 45 minutes and the return travel time about 3 hours travel time back to Auckland.
What time does the tour pickup start?
Pickup starts at 7:45 am from Auckland Central.
Is lunch included?
No. Lunch in Otorohanga is not included, though your guide provides suggestions for where to eat.
Are cameras allowed inside the glowworm caves?
Yes. There are no restrictions on cameras, and the experience is set up so you can photograph the glowworms.
How big is the group?
This is a small group tour with a maximum of 11 travelers.
What’s included in the price?
Included are admission to the Spellbound Glowworm Twin Caves guided experience, an English-speaking guide, small-group tour, complimentary pickup and drop-off from Auckland CBD, an air-conditioned vehicle, all fees and taxes, coffee and/or tea, snacks, and bottled water.
What happens if weather affects the caves?
This experience requires good weather. If it’s canceled due to poor weather, you’ll be offered a different date or a full refund.