REVIEW · PORT CHALMERS
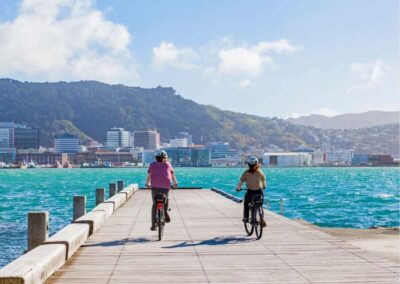
Iconic Shore Excursion: Dunedin City Highlights Tour
Book on Viator →Operated by Iconic Tours NZ Ltd · Bookable on Viator
Steep streets and harbor views in four hours. This Dunedin highlights tour packs the must-sees—Signal Hill, Baldwin Street, the University of Otago, Olveston, and the Octagon—into a small-group ride with cruise-ship pickup. I like the quick-hit itinerary that keeps things moving without feeling empty, and I like that the guide brings real local stories (including mentions of Edinburgh for Signal Hill). One possible drawback: it’s a tight schedule with short stops, so if you want long hangs at each photo spot, you may feel rushed.
For the price ($61.44), you’re buying a guided overview plus transportation from Port Chalmers or Dunedin Railway Station. Many of the stops are free to enter, and you get about an hour of independent time in the city center to shop, grab a coffee, or just sit and watch Dunedin life.
You’ll also want to know the tour is run for good weather. Views from Signal Hill and photo moments by the harbour or beach depend on clear conditions. If your day is rainy or the group needs extra care with timing, expect the itinerary to feel more like a checklist than a slow stroll.
In This Review
- Key highlights that make this tour worth your time
- A half-day plan that actually works from Port Chalmers
- Small-group comfort: the difference between seeing and speeding
- Price value: $61.44 for the guided highlights you’d otherwise miss
- Signal Hill: the view that makes Dunedin look bigger
- Baldwin Street: the world’s steepest street, timed for reality
- University of Otago: a quick hit of student culture
- Olveston Historic Home gardens: vintage details in a short stroll
- Speights Brewery: the oldest working brewery story stop
- The Octagon: your hour of choice in Dunedin’s center
- Dunedin Railways (the station): big architecture, short viewing time
- Toitu Otago Settlers Museum: strong culture stop without taking over your day
- If time permits: St Clair for a quick photo-by-the-sea moment
- Timing reality checks: what can affect your day
- Who should book this tour (and who might not love it)
- Should you book Dunedin City Highlights from Port Chalmers?
- FAQ
- How long is the Dunedin City Highlights Tour?
- Where does the tour pickup for cruise passengers?
- Is pickup and drop-off included?
- What’s the tour maximum group size?
- What are the main stops on the itinerary?
- Is there free time during the tour?
- Are any attraction admissions included?
- Does the price include lunch?
- Is the tour accessible for people who need help getting on and off the vehicle?
- What’s the cancellation policy?
Key highlights that make this tour worth your time

- Small group (max 20): less time waiting, more time at each stop
- Cruise-friendly pickup and drop-off at Port Chalmers wharf
- World-famous Baldwin Street with enough time to walk or run partway
- Signal Hill viewpoints with an Edinburgh connection you can spot while you look
- One hour free time in the Octagon for cafes and gift shops
- Big-name Dunedin anchors: Otago, Olveston, Speights, the Railway Station, and Toitu
A half-day plan that actually works from Port Chalmers
If you’re on a cruise, your day in Dunedin can get swallowed by logistics. This tour is built for that reality. It starts with pickup at Port Chalmers from inside the Visitor Building on the ship’s wharf, and it brings you back after roughly 4 hours. That matters because Dunedin isn’t a “one quick stop” city. It needs some time to hit the real character.
The other smart part is the rhythm. You don’t just drive past landmarks. You stop, you get out, and you get time to look around. The stops are short, but they’re purposeful: viewpoints first, then iconic streets and institutions, then museum time, then a block of free walking in the center.
You can also read our reviews of more city tours in Port Chalmers

Small-group comfort: the difference between seeing and speeding

The tour caps at 20 travelers, which changes the whole vibe. In a large bus, you spend time figuring out where to stand. Here, the guide can park close and keep a closer eye on the group. That helps especially with photo moments on corners and steep streets.
The guides also seem to be a big part of the appeal. Names showing up again and again include Kim (often paired with Greg) and other skilled operators like Allan, Ann, Ken, and Alan. More than just facts, they tend to connect sights to stories, local quirks, and quick humor, which is exactly what you want on a half day when you can’t wander freely the whole time.
Price value: $61.44 for the guided highlights you’d otherwise miss
At $61.44 per person, you’re paying for:
- A professional guide
- Pickup and drop-off from Port Chalmers (or Dunedin Railway Station front steps)
- A set route that hits the signature Dunedin spots without you needing to plan
- Transportation built for a short shore excursion
Lunch is the one major absence. If you think you’ll need a sit-down meal during the tour window, you’ll want to plan on grabbing something during the 1 hour free time in the Octagon or grabbing a quick takeaway before/after.
Also note how many stops are free to enter on the itinerary: Signal Hill, Baldwin Street, University of Otago, Octagon time, Dunedin Railways viewing, and Toitu Otago Settlers Museum. That makes the total experience feel more like a guided day of accessible highlights, not a “pay separately at every door” situation. The one exception to watch is Olveston Historic Home where the gardens are described as free entry, but an admission ticket isn’t included for that stop.
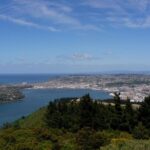
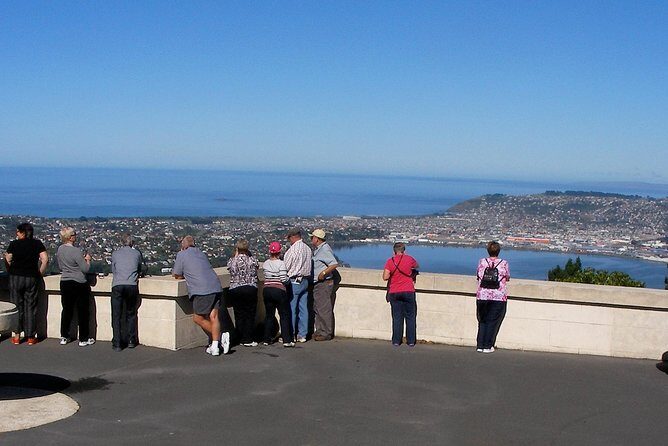
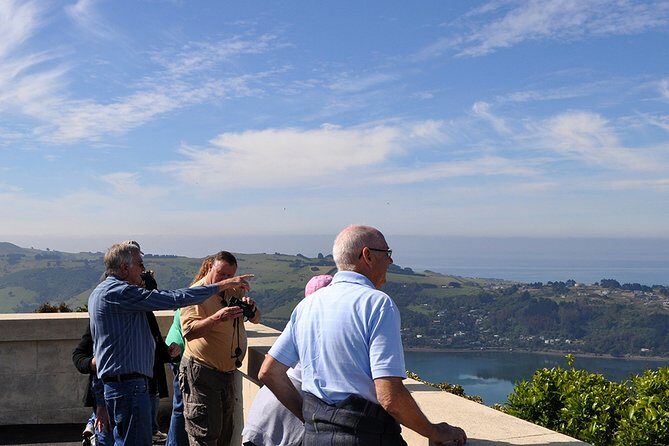
Signal Hill: the view that makes Dunedin look bigger
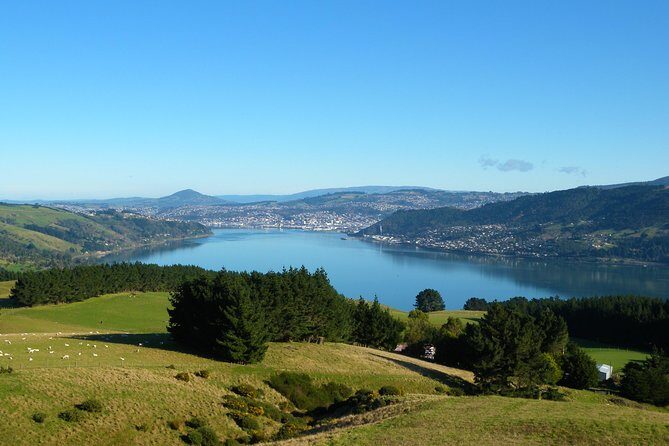
Signal Hill is your “first wow” stop. You get about 15 minutes to take in panorama views over Dunedin and the Otago Harbour.
This stop is also the one with a neat trivia thread: there’s a special connection with Edinburgh, Scotland, if you know where to look. You don’t need to be a history buff. The guide’s commentary is the whole point here. You’ll come away with the feeling that Dunedin didn’t just grow randomly—it has threads to other places, even if you’re standing at the edge of the harbour instead of across the Atlantic.
Practical tip: wear shoes you trust on uneven ground. You’re there for photos and a quick walk, and you’ll likely be stepping around viewpoint edges.
Baldwin Street: the world’s steepest street, timed for reality
Then comes Baldwin Street (the world’s steepest street). You’ll have around 30 minutes to check it out. That’s enough time to do one of two things:
- walk a section and take photos
- go up farther (and if you’re feeling brave, try for the top)
Don’t over-plan this stop. The street is steep enough that even a short climb turns into a workout. But the upside is this: it’s fast to reach the “wow factor,” so you don’t have to lose your whole day to it.
Also, this is where you’ll likely notice the charm of Dunedin’s street life. You’re not just looking at a sign; you’re seeing how the city feels on a street that people actually live with.

University of Otago: a quick hit of student culture
Your stop at the University of Otago is brief, about 5 minutes. The point isn’t a campus tour. It’s a snapshot that helps you understand Dunedin as a university town.
Even with the short time, the experience is worth it because the university is one of the anchors of the city. It’s New Zealand’s first university and has around 20,000 students. That scale shows up in the energy of the streets nearby and helps explain why Dunedin feels different from some other smaller New Zealand cities.
If you’re hoping for long wandering time here, this isn’t the right stop to stretch out. Instead, treat it like a quick orientation moment.
Olveston Historic Home gardens: vintage details in a short stroll
Next is Olveston Historic Home with a focus on the gardens. You get about 15 minutes, and the gardens are described as free entry. The tour also points out highlights like:
- a family vintage touring car
- the original site of an old cottage from the 1860s
- standout botanical features within the grounds
This stop works well because it breaks up the urban intensity. You’re back to moving on foot for a moment, and it’s a nice change from street angles and city views.
Just keep in mind the entry situation: the gardens are set up as free on the itinerary, but an admission ticket isn’t included for this stop. If you’re aiming for deeper time in buildings beyond the gardens, you’ll want to account for that.
Speights Brewery: the oldest working brewery story stop
The route includes a quick stop at Speights Brewery, noted as making beer since 1876, described as the oldest working brewery in New Zealand.
This isn’t a long brewery tour. Think “check out the place and the gift shop,” with enough time to get the story and take a few photos if you like that kind of souvenir.
I like it on a tour like this because it gives you something beyond scenery: a taste of local industry and identity, tied to the city’s long timeline.
The Octagon: your hour of choice in Dunedin’s center
The Octagon is where the tour gives you breathing room. You’ll get about 1 hour of free time in the city center.
This hour is valuable because it lets you do what buses can’t: follow your own curiosity. The Octagon area is where you’ll find cafes, bars, restaurants, banks, and gift shops. It’s also loaded with heritage buildings, so even if you just wander, you’re still surrounded by things worth seeing.
From what I’d use this hour for, you could:
- duck into a cafe for a warm drink
- browse gift shops for local-made items
- or simply sit and people-watch while you reset your legs
If you’re a museum person, this isn’t the moment to force it. Save that energy for Toitu later.
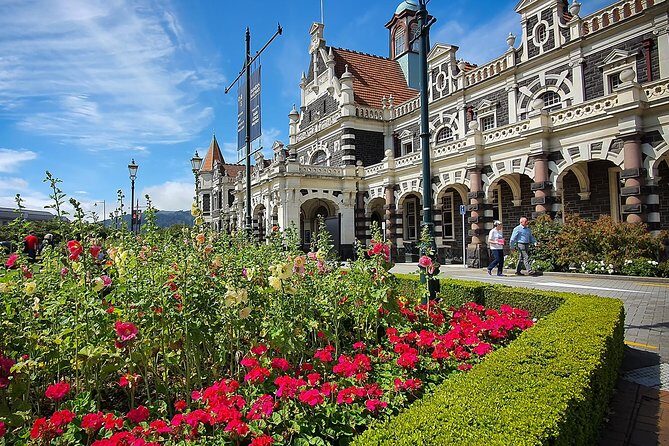
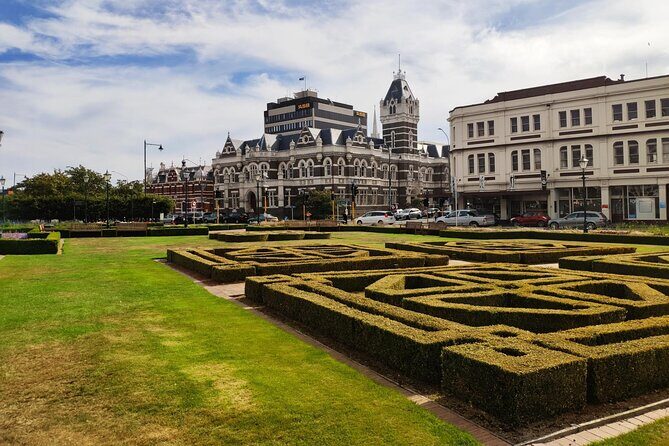
Dunedin Railways (the station): big architecture, short viewing time
At Dunedin Railways, you’re looking at the Grand Railway Station. You’ll have about 20 minutes to view it from the gardens and also check out the interior.
Why I think this stop matters: this station is tied to Dunedin’s early prosperity. It’s described as a symbol of the city’s superior wealth during the early 20th century. That’s not just marketing language. You’ll see it in the scale and the way the building commands space.
You don’t need a long stay to get something here. The exterior impression hits fast, and the interior is usually the payoff.
Toitu Otago Settlers Museum: strong culture stop without taking over your day
Then you get time at Toitu Otago Settlers Museum for about 20 minutes. The museum is described as one of New Zealand’s top museums, with artifacts focused on Dunedin and the people’s achievements over time, including Maori history.
A 20-minute museum visit is never enough for full reading. So I’d treat it like a “choose your favorites” stop. Look for the displays that match your interests, skim the rest, and focus on getting a sense of how Dunedin’s story fits together.
Even short museum time adds depth. It turns your day from scenery-only into a real sense of place.
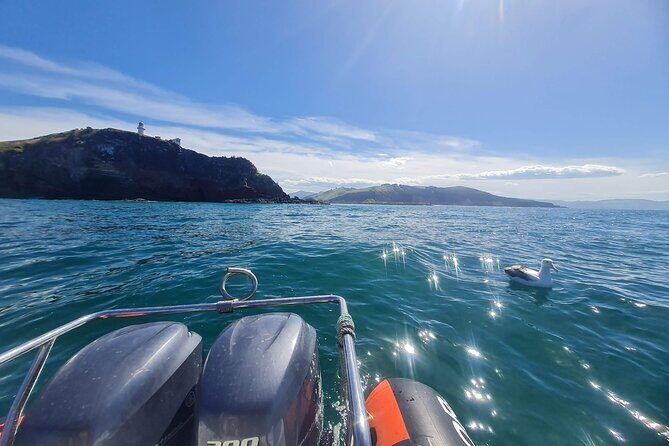
If time permits: St Clair for a quick photo-by-the-sea moment
If the schedule allows, the tour may include a brief look at St Clair, Dunedin’s popular city beach. You’ll drive past the beach front with cafes and bars, spot surfers if conditions allow, and get a short photo stop.
This is a bonus more than a guarantee. Treat it like a gift if it happens, not a must-do checklist item.
Timing reality checks: what can affect your day
This tour is built for comfort and flow, but a half day has limits. A few practical considerations based on what can go wrong on tight itineraries:
- Bathroom stops can be hard to manage when stops are short. If you’re sensitive to timing, consider planning ahead before departing and keep water with you.
- Parking and route constraints can change how smoothly stops line up. On some days, certain viewpoints may be reduced or swapped if the schedule runs behind.
- Expect some stops to feel like “snapshots.” That’s not a flaw—it’s the trade for seeing a lot without eating the whole day.
Weather is another big variable. Views from Signal Hill and photo moments around the harbour and beach depend on visibility. If clouds roll in, the guide may still run the tour, but you’ll get less dramatic scenery.
The best approach: set your expectations for what matters most to you. If Baldwin Street and Signal Hill are your top priorities, focus your energy there. Use the Octagon hour to make up for anything you want more of.
Who should book this tour (and who might not love it)
This fits you well if:
- you’re short on time and want a guided overview
- you’re arriving via cruise and want an easy pickup and return
- you like a route that hits key sights without requiring you to plan transit
You may want to think twice if:
- you want long, slow museum time or extended wandering at every stop
- you have trouble with stairs, since the tour requires passengers to be able to access the steps on and off the vehicle unassisted
- you’re traveling with a tight need for flexible stop lengths (this tour is designed around fixed timing)
Should you book Dunedin City Highlights from Port Chalmers?
Yes, if you want a smart “first look” at Dunedin. The route hits the headline sights—Signal Hill, Baldwin Street, Otago, the Octagon, the Railway Station, and Toitu—and it does it in a way that’s built for a shore excursion.
If you’re choosing between doing things on your own and booking a guide, this is the easier win for getting your bearings fast. And if the guide names Kim or Greg show up for your departure, it’s worth considering them when you book, based on how often their stories and energy come up.
If your priority is slow exploration, you might prefer a walking-based plan instead. But for most cruise visitors and first-time Dunedin stopovers, this is a solid value way to see the city’s core highlights without wasting precious daylight.
FAQ
How long is the Dunedin City Highlights Tour?
It runs for about 4 hours.
Where does the tour pickup for cruise passengers?
If you’re on a cruise ship, meet the team inside the Visitor Building on the ship’s wharf at Port Chalmers.
Is pickup and drop-off included?
Yes. The tour includes pickup and drop-off from Port Chalmers or Dunedin Railway Station (front steps), and also from hotels.
What’s the tour maximum group size?
The maximum is 20 travelers.
What are the main stops on the itinerary?
The tour includes Signal Hill, Baldwin Street, University of Otago, Olveston Historic Home gardens, a Speights Brewery stop, the Octagon, Dunedin Railways, and Toitu Otago Settlers Museum. If time permits, it also may include St Clair.
Is there free time during the tour?
Yes. You get about 1 hour free time in the Octagon.
Are any attraction admissions included?
Many stops are free on the itinerary, including Signal Hill, Baldwin Street, University of Otago, the Octagon time, Dunedin Railways viewing, and Toitu Otago Settlers Museum. Olveston Historic Home is marked as not included for admission, though the gardens are described as free entry.
Does the price include lunch?
No. Lunch is not included.
Is the tour accessible for people who need help getting on and off the vehicle?
No. Passengers must be able to access the vehicle steps unassisted.
What’s the cancellation policy?
You can cancel up to 24 hours in advance for a full refund.