REVIEW · WELLINGTON
Wellington Electric Bike Rental
Book on Viator →Operated by Switched on Bikes · Bookable on Viator
Wellington hills meet electric assist. This self-guided Wellington electric bike rental is an easy way to hit big sights without fighting wind or steep grades. You pick your route, stop for coffee when you want, and still cover serious ground.
I like the setup: helmets, locks, a Wellington city cycle map, and a staff briefing that helps you pick practical routes. I also like the freedom: you can aim for waterfront loops, Miramar views, or keep going toward Mt Victoria and beyond.
One thing to plan for: you’ll be riding in real Wellington weather. Even with pedal-assist, you’ll still pedal, and if you choose ferry or overnight options you need to follow the extra handling and storage rules.
In This Review
- Key Highlights to Know Before You Ride
- Where You Start in Te Aro (and Why It Matters)
- The Bike Setup: Helmet, Lock, and a Real Safety Brief
- What “Self-Guided” Means in Real Life
- A Smart First Day Route: Waterfront Paths to Miramar
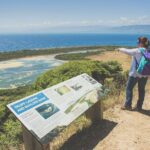
- Stopping for Sights: Te Papa, Weta Workshop, and Zealandia
- Mt Victoria Without the Punishment: Set the Assist and Go
- Going Beyond the City: Pencarrow Lighthouse by Ferry and Dirt Road
- The Rimutaka Rail Trail: Forest Cycling Far From Traffic
- How Long You Can Ride (and When to Bring It Back)
- Using the E-Bike Like a Pro: Pedal Still Counts
- Practical Considerations: Weather, Wind, and Clothes
- Bike Weight, Height, and Who This Works For
- Price and Value: Is $52.75 Worth It?
- Quick Notes on What’s Included (and What You’ll Need)
- Who Should Book This Wellington Electric Bike Rental?
- FAQ
- FAQ
- Where do I pick up the electric bikes?
- How close is the pickup location to Te Papa and I-Site?
- What time can I start riding?
- How long are the rental options?
- When do I need to return the bike for a one-day rental?
- What’s included with the rental price?
- Is this tour guided or self-guided?
- Do I need to know how to ride a regular bike?
- Are there height and weight limits?
- What happens if the weather is bad?
- Should You Book Switched on Bikes in Wellington?
Key Highlights to Know Before You Ride
- Central Te Aro pickup near Te Papa means less time searching and more time rolling
- Self-guided routes help you build your own day, from waterfront paths to hill lookouts
- Pedal-assist that flattens hills and headwinds without turning it into a free ride
- Bike locks, maps, and helmet included so you can move fast and stop confidently
- Coast and rail options let you go from city sights to places like Pencarrow and the Rimutaka Rail Trail
Where You Start in Te Aro (and Why It Matters)

Pickup is at Switched on Bikes, Unit 15/22 Herd Street, Te Aro. It’s a central spot, about a 5-minute walk from Wellington’s I-Site and Te Papa Museum, so you can pair your bike time with museum time without losing half a day to transit.
You can pick up your eBike starting from 9:00AM. If you’re doing the half-day option, you can ride up to 4 hours, and for a full day you’ll want to aim to be back by 5:30pm.
The shop process is designed to get you moving quickly. You get a full instruction and safety briefing, plus time to practice in a large car-free space before you head out onto the roads and shared paths.
You can also read our reviews of more cycling tours in Wellington

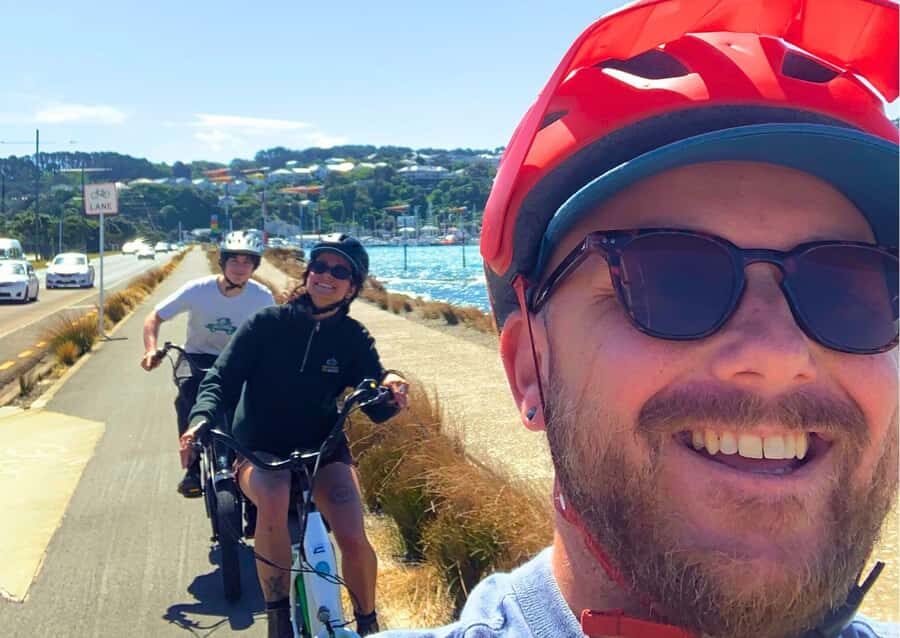
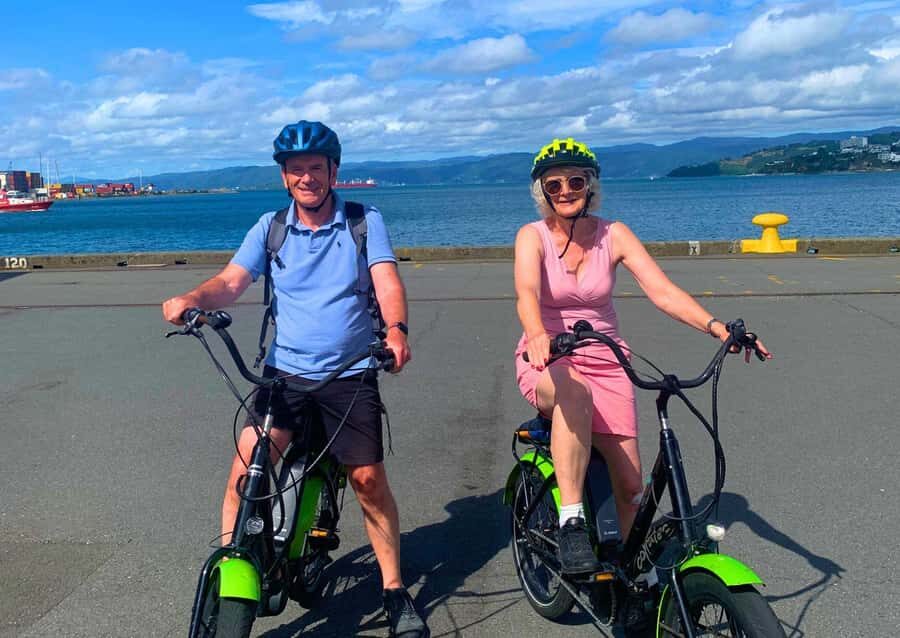
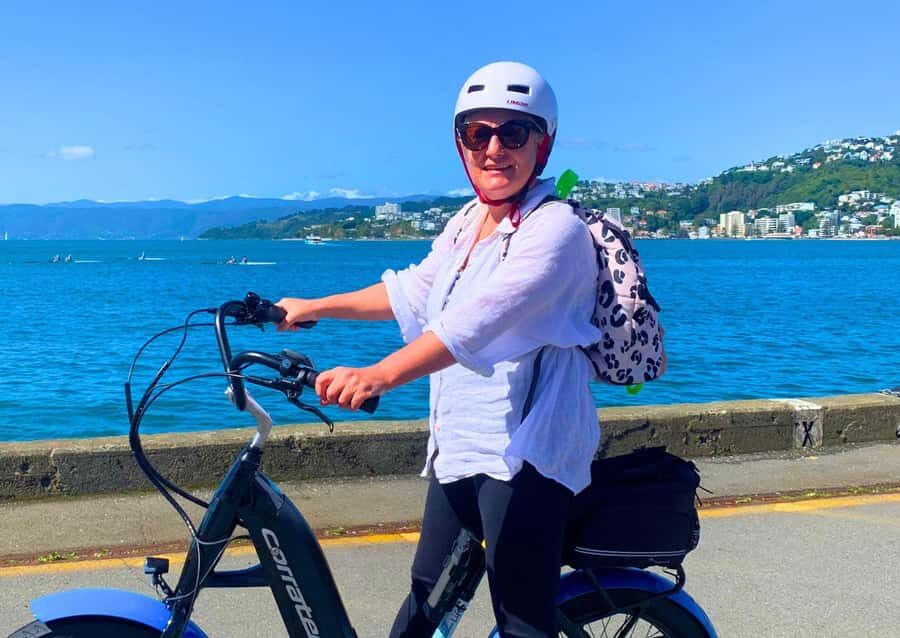
The Bike Setup: Helmet, Lock, and a Real Safety Brief

This isn’t just hand-over-the-keys. You’ll get a safety briefing and full instructions on how the pedal-assist works and how to use the bike properly.
You’ll be provided a helmet and a lock, and hi-vis gear is available if you want it. This is a small thing that pays off: Wellington roads and cycle lanes can feel busy, and it helps to be visible and secured when you stop for lunch or photos.
One useful “don’t skip it” tip: make sure you understand the bike’s start-up routine and assist controls before you ride off. A first-time eBike rider noted that paying attention during the quick intro makes everything smoother once you’re rolling.
What “Self-Guided” Means in Real Life
Self-guided doesn’t mean you’re on your own. The staff will mark the best routes on your Wellington cycle map, including suggested photo spots and places to stop for coffee, lunch, or an ice-cream.
This matters because Wellington’s best cycling routes are not always the most obvious ones. The shop’s job is to help you connect the dots—where the easier paths are, where the cycle ways run cleanly, and where it’s smarter to avoid friction.
You can also ask for small route tweaks. If you want a swim, you can let them know and they’ll mark beaches on your map. That’s a very Wellington kind of flex, especially if you’re trying to turn the ride into a full day.
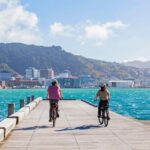
A Smart First Day Route: Waterfront Paths to Miramar
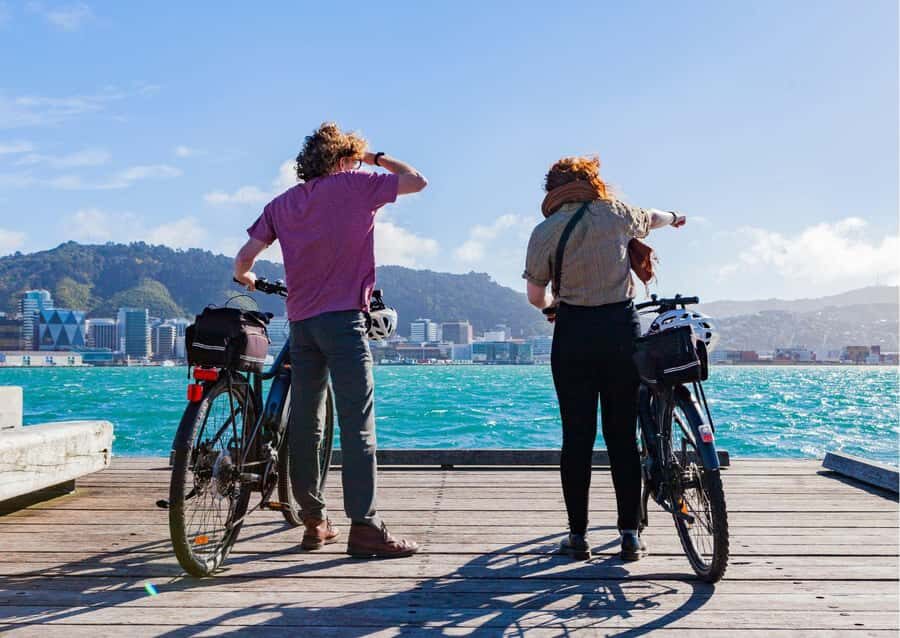
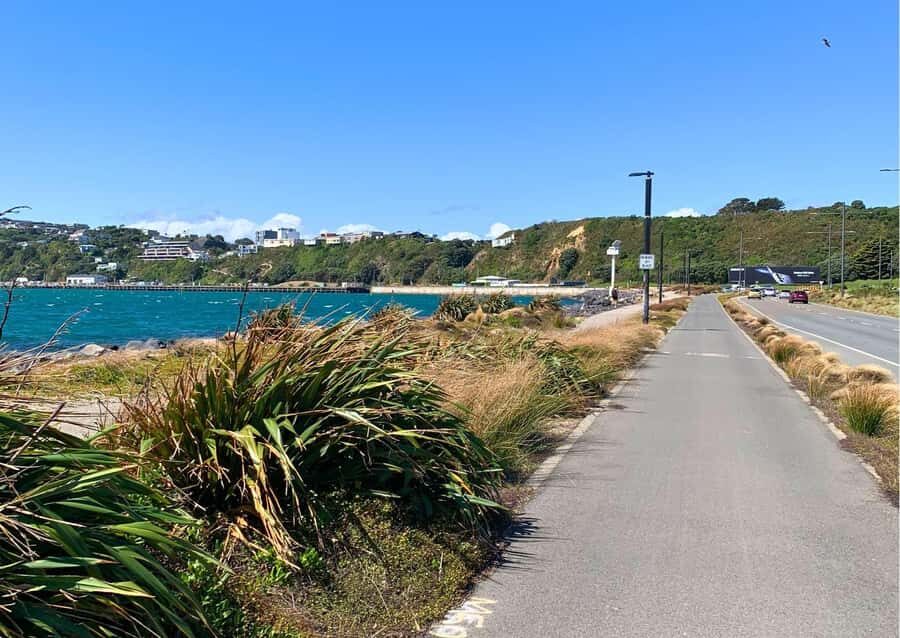
The most popular ride starts close to the city center along the shared paths on the Wellington Waterfront. You get the best of both worlds here: easy cruising near the action, plus quick access to cycle routes that lead outward.
From there, you head toward Miramar Peninsula using on-road cycle ways. Miramar is where the ride starts to feel more “Wellington” and less “just getting from A to B,” with long water views and a sense that you’re actually going somewhere.
You don’t need to be an endurance cyclist to enjoy it. The eBikes are pedal-assist, which means you pedal like a normal bike, while the electric assist takes the strain out of hills and headwinds.
Stopping for Sights: Te Papa, Weta Workshop, and Zealandia
This rental is built for hopping between major attractions at your own pace. It’s set up so you can cycle to the kinds of places most visitors want fast access to, including Te Papa Museum, the Weta Workshop, and Zealandia Sanctuary.
I like this approach because it avoids the common “tour schedule squeeze.” Instead of racing between stops, you can linger where you care most—maybe more time at Te Papa, or more time outside taking photos, then rolling onward.
If your day plan includes multiple attractions, the bike turns them into a flexible loop. You can map your own order based on timing, food stops, and weather, rather than forcing everything into a fixed itinerary.


Mt Victoria Without the Punishment: Set the Assist and Go
Wellington’s hills are famous, and Mt Victoria is one of the big rewards. If you want panoramic lookouts, you can ride toward Mt Victoria and set the bike to full-power to cruise up.
The key here is to use the assist as a tool, not as a gimmick. One rider specifically called out that using the stronger modes helps a lot when wind picks up, and they still had plenty of battery after hours of riding.
This is also where the eBike makes the day feel fair. Instead of arriving at viewpoints completely cooked, you arrive ready to take photos, look around, and then continue your ride without feeling like you’ve survived a workout.
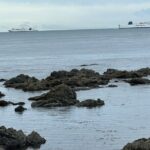
Going Beyond the City: Pencarrow Lighthouse by Ferry and Dirt Road
If you want a ride that feels like an excursion, Pencarrow Lighthouse is a standout option. The route is accessed via the East by West Ferry that goes to Days Bay, then you follow the coast.
After you reach Days Bay, you’ll take a dirt road toward the lighthouse. The lighthouse is climbable, and from up top you can look back across the harbour toward Wellington City.
Wildlife is a real possibility on this kind of coastal route, including seals. Just keep in mind you’re cycling an active, outdoorsy outing, so pack for wind and variable conditions.
One practical consideration: if you choose the ferry option, you need to lift the bikes up and down steps. The ride itself is doable, but the handling details matter—plan for it and don’t treat the ferry like a simple drop-off.
The Rimutaka Rail Trail: Forest Cycling Far From Traffic
For a change of pace, the Rimutaka Rail Trail is explored by taking the bikes on a train, then cycling from Maymorn to Featherston. It’s described as a world-class track away from the city, which is exactly what you want when Wellington’s wind feels relentless.
The trail includes forest and rail-history context, and it’s the kind of ride where you can settle in and enjoy the rhythm. Pack your lunch, take your camera, and use the extra time waiting for the return train to check out local stores and museums in Featherston.
If you like the idea of turning this into a full multi-day adventure, the option is there. You could even stay overnight to explore wineries the next day, but you’ll want to confirm your own bike storage needs and plans since overnight storage is on you.
How Long You Can Ride (and When to Bring It Back)
Half-day options run up to 4 hours. Full-day options run through to closing time, or up to 24 hours, depending on how you pick the rental period.
If you’re doing the one-day rental, return bikes by 5:30pm. If you’re taking a bike overnight (for up to 24 hours), you must have secure bike storage, and any risk is on you.
This timing structure is useful if you’re building a schedule around other plans—like museum hours, dinner reservations, or a show. You’ll get more value from a rental if you plan a route that matches your available riding window.
Using the E-Bike Like a Pro: Pedal Still Counts
Electric assist helps, but it doesn’t remove effort. You still pedal just like a regular bike, and the assist handles hills and headwinds so the ride feels manageable.
A first-time rider can still have an excellent day. More than one rider mentioned that once they got the hang of the controls and pedaling feel, climbing hills like Mt Victoria became much easier than expected.
You’ll also want to be ready for Wellington wind. One rider described using a stronger assist mode (referred to as Turbo) when gusts hit, and it helped maintain comfort without turning the ride into a grind.
Also, make sure you’re comfortable with gear shifting. One practical note was to pay attention to shifting while riding, since it helps you keep an easy cadence as the terrain changes.
Practical Considerations: Weather, Wind, and Clothes
Wellington weather is not a suggestion. This experience requires good weather, and if it’s canceled due to poor weather, you’ll be offered a different date or a full refund.
Even when you do get to ride, the wind can change your whole day. Several people highlighted how much the eBike helps in windier conditions, but it’s still smart to dress warm and be ready for it to feel colder near the water.
The coastline is gorgeous, but you’re also exposed. Bring layers you can adjust quickly, and consider a wind layer even if the morning looks calm.
Bike Weight, Height, and Who This Works For
This rental is for people who can ride a regular bike. You’re not required to be a racer, but you should feel comfortable balancing, pedaling, and using gears.
There are also limits you should check before you book:
- Bike weight limit is 330 lbs (150 kg)
- Heights must be advised if you’re less than 5 foot (152 cm)
- Children ages 13–17 must ride with an adult
Service animals are allowed, and there’s a limit of up to 6 travelers for the activity. Since this is self-guided, that low cap is mainly about how they manage rentals and bike availability rather than group dynamics.
Price and Value: Is $52.75 Worth It?
At $52.75 per person, this rental can be a strong value if you plan to ride enough to justify the time savings. You’re paying for the bike, helmet, lock, map, and the staff help that makes routes easier to navigate.
It’s especially good value when you want to cover multiple areas—city museums, waterfront, Miramar, and viewpoints—without paying for repeated taxis or expensive guided transport.
If your day is mostly focused on one tight neighborhood and you’re not comfortable cycling, you might feel like you’re paying for unused potential. But if you want to see Wellington at your own pace and you’re open to moving between stops, the eBike shifts the math in your favor.
Quick Notes on What’s Included (and What You’ll Need)
Included in the rental:
- Self-guided bike tour structure
- Bicycle use, helmet, and lock
- Hi-vis gear available
- Wellington City Cycle Map
- Local taxes
Not included:
- Food and drinks
You’ll also need a credit card as a bond. If you’re planning a day out, budget for snacks, lunch, and coffee along your route.
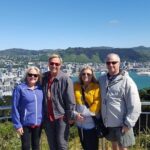
Who Should Book This Wellington Electric Bike Rental?
I think this is ideal for you if you want:
- A flexible way to see Wellington’s top sights without a rigid schedule
- Hill-friendly cycling that still feels like a real day outdoors
- A straightforward rental that includes maps and route help
It’s also a good fit for couples and families with teens, as long as everyone meets the basic riding requirement. Even older first-time eBike riders can do well, especially if you’re using the assist and planning a route that matches your energy.
Skip it if you’re expecting to ride no matter the weather. The requirement for good weather is real, and Wellington can be unpredictable.
FAQ
FAQ
Where do I pick up the electric bikes?
You pick up the eBike at Switched on Bikes, Unit 15/22 Herd Street, Te Aro, Wellington 6011.
How close is the pickup location to Te Papa and I-Site?
It’s about a 5-minute walk from Wellington’s I-Site Information Center and Te Papa Museum.
What time can I start riding?
You can pick up your bike anytime from 9:00AM.
How long are the rental options?
You can choose a half-day option (up to 4 hours) or a full-day option (to closing time or up to 24 hours).
When do I need to return the bike for a one-day rental?
Return bikes by 5:30pm if you’re riding for one day.
What’s included with the rental price?
You get the bike, helmet, and lock, plus a Wellington City Cycle Map. Hi-vis gear is also available.
Is this tour guided or self-guided?
It’s self-guided. Staff will provide instructions and mark routes on your map so you can ride at your own pace.
Do I need to know how to ride a regular bike?
Yes. You must be able to ride a regular bike.
Are there height and weight limits?
The bike weight limit is 330 lbs (150 kg). Heights must be advised if you’re less than 5 foot (152 cm).
What happens if the weather is bad?
The experience requires good weather. If it’s canceled due to poor weather, you’ll be offered a different date or a full refund.
Should You Book Switched on Bikes in Wellington?
If you want maximum Wellington per hour, this is a strong yes. The central Te Aro pickup, the map-based route help, and the pedal-assist make it easy to see waterfront sights, museums, and viewpoints without turning your day into a hill battle.
Book it if you’re comfortable riding a bike and you’re ready to dress for Wellington’s wind and changing conditions. If weather looks rough, take the weather requirement seriously—this rental is built for you to get out and ride, not to hope it works out.