REVIEW · AUCKLAND
6 Hours Sightseeing Tour in Auckland
Book on Viator →Operated by Voltours Limited · Bookable on Viator
Black sand beaches and a volcano day. This small-group west Auckland tour packs Mount Eden crater views, rugged Piha coastline, and a waterfall hike into one smooth morning, with wine tasting at the end. You’ll ride in a comfortable air-conditioned private vehicle with personalized guide time, then get dropped back where you started in Auckland Central.
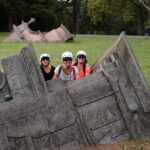
I really like two things here. First, the max 9 travelers setup means you’re not stuck in a huge group shuffle, and it’s easier to ask questions and adjust your pace. Second, the day blends geology and local stories with hands-on stops that actually let you see why Auckland’s volcanic and coastal edges are so famous—especially when your guide is someone like Tracy, Harriet, or Jerome.
One possible drawback: it’s an active outdoor route, plus a fair amount of driving time in between, so you’ll want a moderate fitness level and solid expectations for hills and stairs. Also, lunch at the winery is not included, so plan your budget for food on the day.
In This Review
- Key highlights that make this tour worth your morning
- How the 6-hour west Auckland route fits your day
- Mount Eden crater: the fast way to see Auckland from above
- Piha Beach walk and the lookouts: black sand and big attitude
- Karekare Falls: a short hike that changes the mood
- Soljans Estate Winery tasting: what’s included, what costs extra
- Small-group comfort and the real value of the price
- Who this tour fits best (and who should think twice)
- Tips to get the most from the day
- Should you book this Auckland west coast tour?
Key highlights that make this tour worth your morning
- Up to 9 people in a private vehicle: easier photos, fewer waiting around, more guide attention
- Mount Eden crater stop with great Auckland viewpoints and volcanic history talk
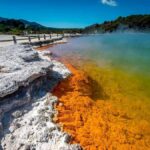
- Piha Beach walk along black sand coast, with lookouts for The Keyhole and The Gap (tide permitting)
- Karekare Falls short hike: a greener shift from beach to forest waterfall scenery
- Soljans Estate Winery wine tasting included (lunch is extra) to round out the day
- Air-conditioned comfort + bottled water, so you spend energy on the sights, not logistics
How the 6-hour west Auckland route fits your day
This is a tight, efficient half-day trip built around three big nature anchors west of the city: a volcano, a black-sand beach, and a waterfall. The total time is about 6 hours, and the schedule includes transit, not just time standing around looking at scenery.
The timing starts at 8:00 am from 148 Quay Street in Auckland Central, and it ends back at that same meeting point. That matters if you’re trying to avoid late-day rush. If you’re coming from a cruise ship or a hotel, pickup is offered, which keeps the start from feeling like a scavenger hunt.
Because this is a nature-heavy route, weather plays a role. The tour runs best with good conditions since you’ll be walking and hiking outdoors. On a rainy, windy day, you can still have a great time, but your experience will depend on what your guide adjusts to keep the day safe and fun.
You can also read our reviews of more tours and experiences in Auckland.


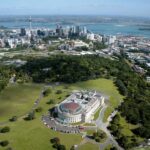
Mount Eden crater: the fast way to see Auckland from above

You’ll begin at Maungawhau / Mount Eden, and the heart of the stop is the crater itself. The tour gives you about 45 minutes here, and it’s listed as admission-ticket-free, which is a nice bonus—more time for views, less time for admin.
Mount Eden is one of those places where you get an immediate sense of how Auckland sits on volcanic ground. Your guide will explain what you’re looking at and how the volcanoes shaped the region, including context for the first inhabitants. Even if you’re not a “rocks person,” it lands quickly because the views are right there in front of you.
Practical tip: the top involves a climb, so if you don’t want to push your legs, you’ll still enjoy the main viewpoints. You may also find it helpful to ask your guide about alternative ways up when the footing is slick. People doing this route tend to think in terms of comfort and photo angles, not a “race to the summit.”
This is also a smart opening stop because it frames the whole day: once you see the city from above, Piha and Karekare hit harder. You’re not just driving west; you’re watching Auckland’s edges change.
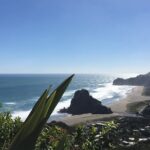
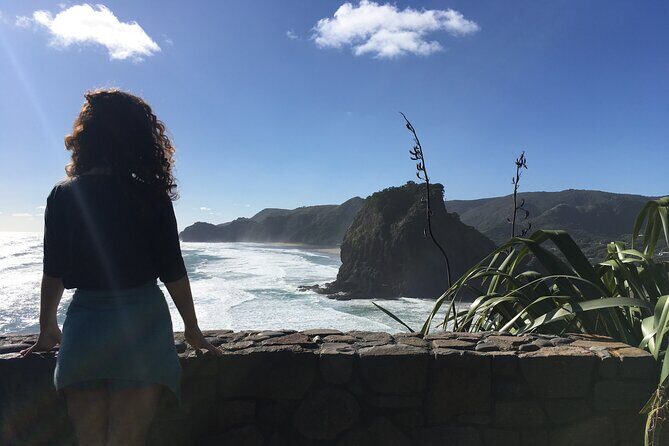
Piha Beach walk and the lookouts: black sand and big attitude
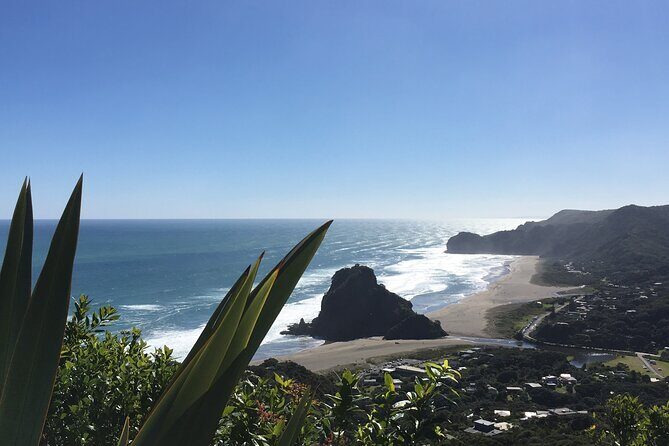
Next is Piha Beach, scheduled for about 1 hour. The tour starts with an overlook, then you head down for a beach walk. If you love dramatic coastlines, Piha is why.
This stretch is known for its black sand and rugged rock formations. The tour specifically aims for the area around The Keyhole and The Gap, but timing depends on the tide—so you’re thinking “season and sea conditions,” not a guaranteed moment.
On the beach, plan on some uneven footing. Black sand can be a little gritty, and the coast can be breezy. Comfortable walking shoes help a lot more than you’d think. You may also want to bring sandals or slip-ons for breaks, since you’ll likely be going in and out of the sand/rocks and the wind can make you want an easy footwear change.
One more thing: Piha isn’t a quick photo-stop and leave. It’s a real walking experience. The payoff is that you get to see why the area attracts serious photographers and surfers—up close, not just from behind glass.
If you’re traveling with anyone who gets tired easily on uneven terrain, this is the stop where I’d encourage you to set expectations early. You’ll still get the lookout and the vibe even if you choose a gentler pace on the sand walk.
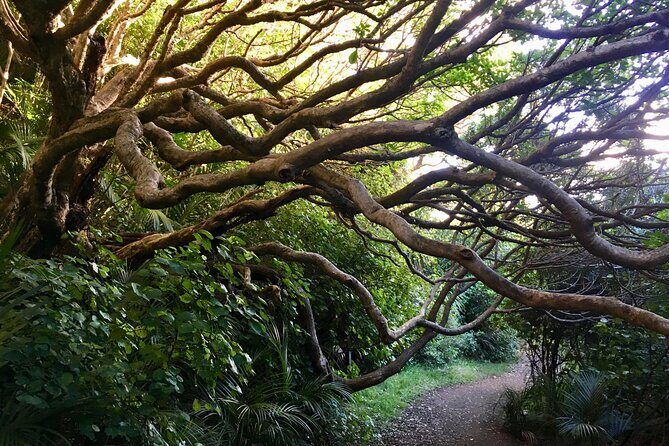
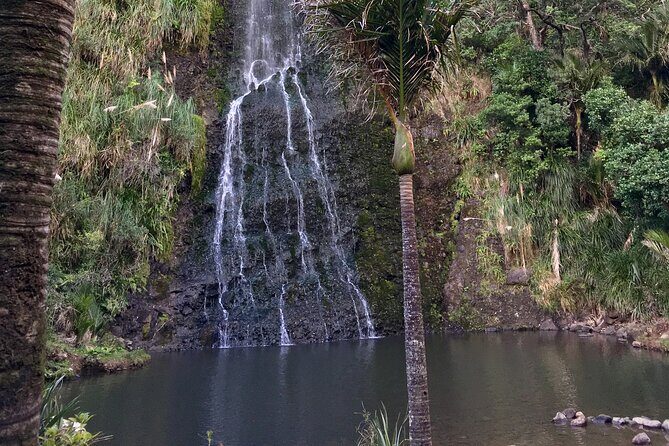
Karekare Falls: a short hike that changes the mood
From Piha you move to Karekare Falls, with about 30 minutes scheduled for the hike. This is where the day pivots: the coast gives way to a greener, quieter feel as you walk toward the waterfall.
Even in a short window, Karekare is usually worth it because it feels like a mini-world compared with the beach. The route is designed as a manageable outing—good for people with moderate physical fitness—without turning the day into a full-on trek.
Here’s a practical expectation check: because it’s an outdoor hike, you’ll want to bring what you need for damp patches and potentially slippery spots (especially after rain). If the weather is windy or wet, your guide may adjust how aggressively you go toward certain views.
If you’re someone who likes variety—city-from-above to wild coast to forest waterfall—this stop is the connector that keeps the day from feeling like one long drive.
Soljans Estate Winery tasting: what’s included, what costs extra
The last major stop is Soljans Estate Winery, scheduled for about 1 hour. The tour includes a wine tasting (and alcoholic beverages are included), but lunch is at your own expense.
That setup is common on tours like this: they include the tasting so you get a local experience without driving the price up for everyone. It also gives you flexibility. Maybe you don’t want a full meal at the winery that day—you can still enjoy the tasting and pick something later if your schedule allows.
The tour info also notes that lunch is available at Soljans Estate Winery or Hallertau Brewery, with wine or beer options. In other words, you’re not locked into one type of dining, but the day still treats food as an add-on, not a base inclusion.
Practical advice: eat a solid breakfast before you go. Once you’re out on the west coast, there aren’t guaranteed long breaks for food until the end. People who show up hungry often feel rushed at lunch because the time block is limited.
Also consider this: if you’re a big wine fan, you might want to view the tasting as sampling, not a deep seminar. You’ll get the chance to try and then decide what you like. If you’re not a wine person, you may still enjoy the brewery option with beer as the included tasting style.


Small-group comfort and the real value of the price
At $179.97 per person for about 6 hours, you’re paying for more than driving. You’re paying for an organized route, a guide, and a small-group format in an air-conditioned private vehicle.
Here’s where the value becomes clearer:
- You’re not renting a car or planning a day of transport links.
- You’re not stuck with a huge group that eats up photo time.
- You get bottled water and a local guide throughout.
- You get wine tasting included with alcoholic beverages.
- The major stops are timed so you see several big hits without trying to DIY everything.
Group size matters. With a maximum of 9 travelers, you tend to get quicker check-ins, easier pacing, and fewer “waiting for stragglers” moments. That’s the kind of comfort that sounds minor until you’re actually doing day trips around Auckland.
One more value factor: you’re covering a chunk of west Auckland in one morning. If you’ve ever tried to map out Mount Eden plus Piha plus Karekare on your own, you’ll know how quickly the logistics start to dominate your brain. This tour turns that mental load into a simple plan.
Who this tour fits best (and who should think twice)

This is a strong match if you want:
- A west Auckland highlights route without car rental stress
- Short walks and viewpoints instead of a long, slow day
- A guide who can explain why the region looks the way it does
- A small-group format where you can actually talk to your guide
It may be less ideal if:
- You hate walking on uneven ground or steep bits
- You need lots of long breaks for sitting and eating
- You’re expecting lunch to be fully included
- You’re traveling only for wine and beer and don’t care about nature stops
The route requires moderate physical fitness, and the ascent at Mount Eden plus the beach/coast walking make comfortable footwear a real factor, not a nice-to-have.
If you’re going with family members or anyone who’s less steady on their feet, it’s still possible to enjoy the scenery, but you’ll want to match expectations to a moderate walking day and use the guide’s pacing suggestions.
Tips to get the most from the day
I’d do three simple things to keep your morning smooth.
First: plan your footwear. Bring good walking shoes for beach and trail bits. If you want to swap for comfort, pack sandals too.
Second: eat before you go. Lunch is not included, and the schedule doesn’t feel like it has a lot of “food detours.” A big breakfast saves you from decision fatigue later.
Third: be flexible about tides and conditions. If you’re aiming for views like The Keyhole and The Gap, know that tide conditions can affect what you’ll see. Weather can also influence how the guide manages outdoor time.
Should you book this Auckland west coast tour?
I think you should book it if you’re trying to see the best of western Auckland in one efficient shot: volcano crater views, black-sand Piha, a waterfall hike, and an included wine tasting to close the loop. The small group size and private-vehicle comfort make a noticeable difference, especially on a day where you’ll be moving between very different environments.
I wouldn’t book it if you’re the type who wants a super relaxed, mostly seated tour. This day has walking, hills, and outdoor timing. And if you’re strict about included meals, you should know lunch at the winery or brewery is extra.
If you want a practical rule: book it when you want a “high sights per hour” day and you’re good with a moderate, outdoors-focused morning.