REVIEW · AUCKLAND
Auckland to Rotorua via Waitomo Caves Small Group Tour (One Way)
Book on Viator →Operated by Cheeky Kiwi Travel · Bookable on Viator
Glow-worm caves start the day right. This one-way small-group tour links Waitomo Glowworm Caves with central Rotorua, with live guide talk the whole way. It’s a smart way to make the most of a long North Island travel day without hiring a car.
What I like most is the combination of guided cave time and guided bus time. You get a real Waitomo introduction (with entrances handled) and you also learn what you’re driving past in the Waikato and around Rotorua. One thing to consider: it’s an early start at 6:00 am, and you’ll still do a decent amount of sitting in the mini-bus between stops.
In This Review
- Key highlights
- The big idea: Auckland to Rotorua in one smooth push
- Price and time: what $191.76 buys you
- Leaving Auckland: Waikato countryside with real commentary
- Stop in Pirongia: coffee break plus Land Wars context
- Otorohanga: the Kiwiana capital stop-by
- Waitomo Glowworm Caves: the main event
- Inside the caves, set expectations
- Guide touches you might get
- Drive to Rotorua: arriving with fewer headaches
- The Te Puia option
- How the group size changes the whole feel
- Comfort and practical planning: luggage, snacks, and weather
- Safety note: driving style can be a personal deal
- Who this tour suits best
- What you’ll actually come away with
- Should you book the Auckland to Rotorua one-way via Waitomo tour?
- FAQ
- What time does the tour start?
- Is hotel pickup included?
- What’s included in the tour price?
- How long do you spend at Waitomo Glowworm Caves?
- Can I take photos inside the caves?
- Is there a luggage limit?
Key highlights
- Small group up to 15 people so the day stays friendly and not chaotic.
- Guided Waitomo Glowworm Caves tour (about 2 hours) with caves formations explained.
- Hotel pickup from select hotels plus a central Rotorua drop-off.
- Snacks and water provided, so you’re not hunting for food mid-journey.
- Photography not permitted inside the caves, so plan for memory over phone shots.
- Luggage allowance of 1 large and 1 small bag per person keeps things practical.
The big idea: Auckland to Rotorua in one smooth push
If you’re moving from Auckland toward Rotorua, the usual options are either rent a car and drive solo, or take long-distance transport with no real plan. This tour does something different: it uses the travel time to teach you the story behind the scenery, then drops you into Rotorua with less hassle.
This is a true one-way day trip. You start in Auckland, stop along the way for brief breaks and local sights, then end with a Rotorua drop at central accommodation areas or a main central location.
You’ll also feel the “small-group” difference. With a maximum of 15 travelers, you can actually hear the guide commentary over the engine noise, and it’s easier to get your questions answered.
You can also read our reviews of more tours and experiences in Auckland.

Price and time: what $191.76 buys you
At $191.76 per person, the price isn’t just for transport. You’re paying for the full package of guided time, included entrance to the caves, and a couple of “buffer” stops that would be harder to schedule on your own.
The tour runs about 7 hours total. Real talk: that includes driving and the cave experience, so it’s not a slow, meandering day. The upside is you can connect Auckland to Rotorua without spending your entire next day on logistics.
You’ll also get practical support: luggage allowance (1 large + 1 small), water and snacks, and a mobile ticket. Those details matter when you’re juggling early departures and switching accommodation areas.
Leaving Auckland: Waikato countryside with real commentary
The day starts in Auckland, then your guide takes you out of the city and into the Waikato countryside. The route is part scenery, part lesson. You’ll pass through farmland country and you’ll get the context to make it more than just “fields from the bus window.”
One of the best parts of this kind of tour is that you’re not left staring at a map. The guide points out what you’re seeing and connects it to local history and culture as you travel south.
At Pirongia, there’s a quick 15-minute coffee break. It’s short, but it’s timed to reset you before the longer stretch toward Waitomo.
Stop in Pirongia: coffee break plus Land Wars context
Pirongia is one of those small places that works well as a quick reset stop. You’ll get a breather and you’re not forced into a long “tourist activity” that steals time from the main goal.
The guide also covers local history, including the New Zealand Land Wars, which helps you understand why certain towns and landscapes matter. If you like history that’s tied to what you can actually see (rather than a lecture with no visuals), this moment is worth the stop.
Otorohanga: the Kiwiana capital stop-by
Next you pass through Otorohanga, often described as the Kiwiana capital. In practice, this is more “see the town vibe” than a long visit. You’ll get the story as you drive through, which keeps the day moving.
This stop works best if you enjoy small local moments and you don’t need hours to wander shops. If you want lots of free time to browse, you may feel the day is structured.


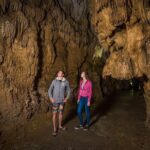
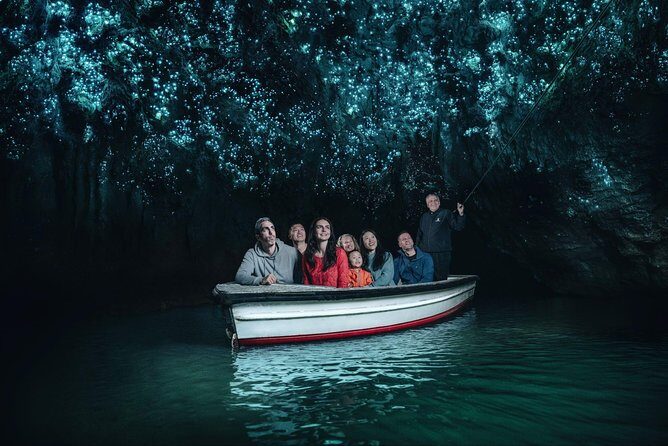
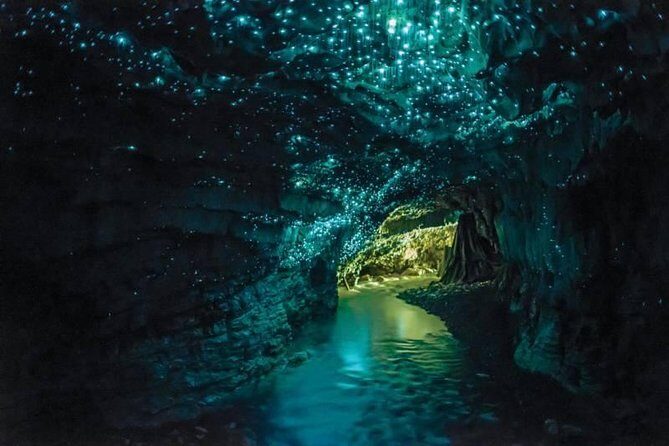
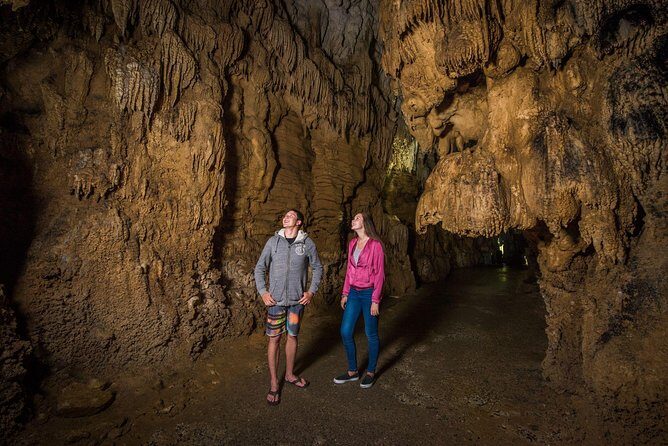
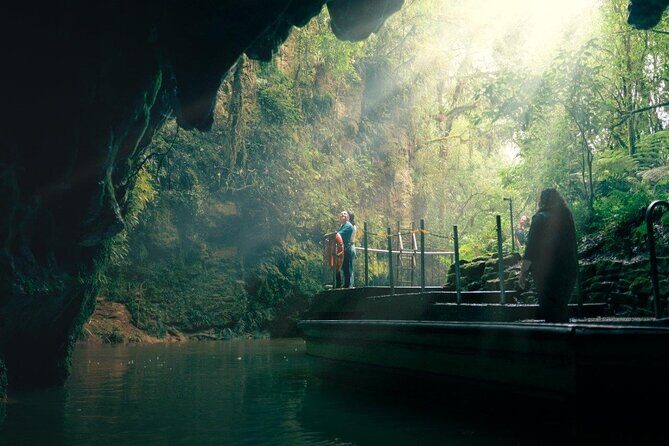
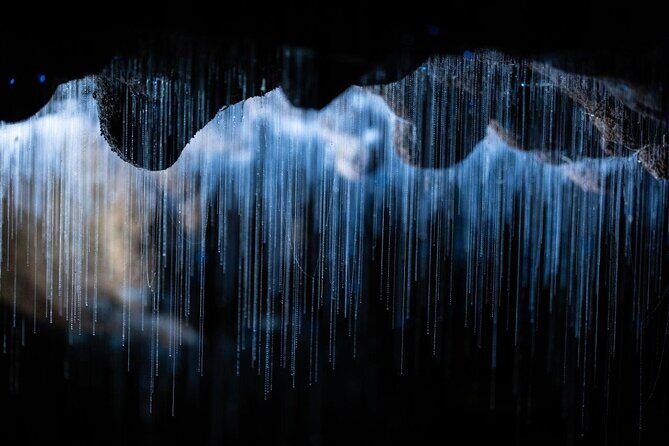
Waitomo Glowworm Caves: the main event
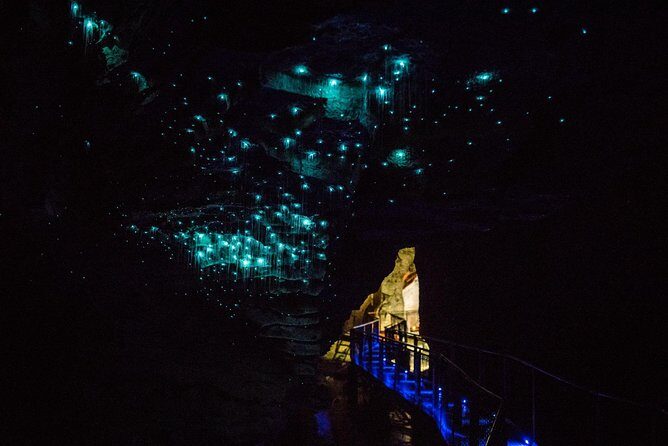
The tour’s centerpiece is the Waitomo Glowworm Caves visit, with about 2 hours on-site. You’ll go on a guided walk through the caves and see formations like stalactites, stalagmites, and lime columns.
The glowworms themselves are the hook, but the value here is the explanation. You’re not just walking through darkness; you’re learning what shaped the caves and why the glowworms live where they do.
Inside the caves, set expectations
There’s an important rule: photography isn’t permitted inside the caves. So don’t plan your experience around getting the perfect shot.
Instead, plan on quiet attention and good memory-making. If you’re the type who likes to watch lights, ceiling shapes, and shifting cave details, you’ll likely enjoy the experience more because you’re not constantly filming.
Guide touches you might get
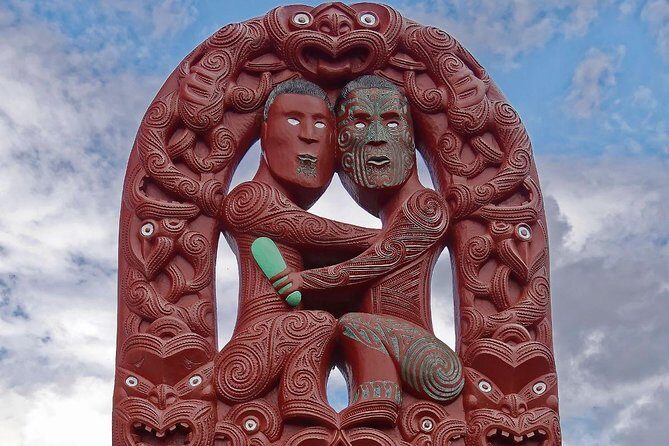
Some guides add extra personality and storytelling style. I’ve seen comments praising guides for going beyond the basic talk—things like adding Māori language and cultural context, and even memorable moments during the cave intro from the guide.
That matters because Waitomo can feel similar if you get a dry presentation. A guide who can make the history feel human turns the cave from a stop into a story you carry with you.
Drive to Rotorua: arriving with fewer headaches
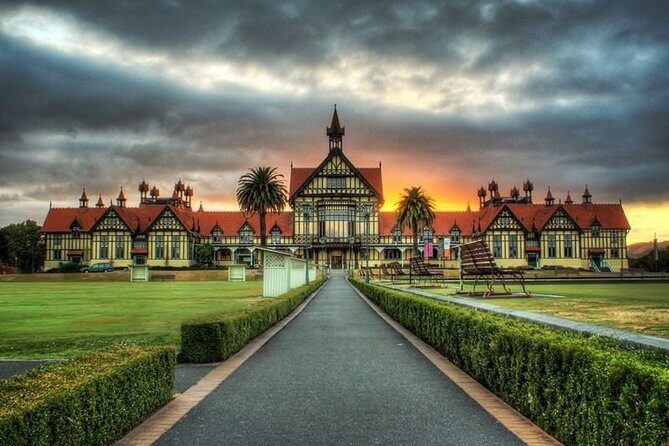
After Waitomo, the day heads to Rotorua. Your guide drops you at your accommodation in Rotorua (central hotels only) or a main central location.
This is where the one-way nature becomes useful. If you were doing this independently, you’d still have to line up the drive, then sort out where to drop bags and how to reach your hotel. Here, the schedule is built around getting you into Rotorua without extra steps.
The Te Puia option
You may also have the chance to visit Te Puia before the tour ends. The big thing is that this isn’t mandatory. If you’re interested in geothermal culture and activities in Rotorua, it can be a good add-on—just make sure you understand what you’re opting into.
Some travelers have felt confused when they expected the day to include more than the basic plan. If Te Puia is on your must-do list, confirm how it fits your specific booking choice.
How the group size changes the whole feel
With a maximum of 15 travelers, this tour stays in the “small group” zone instead of the “big coach” world. That affects more than comfort.
It means:
- More time for your guide to answer questions without rushing.
- Less bumping over each other when you’re boarding and exiting.
- A smoother flow to and from Waitomo, where the schedule can’t really stretch.
You’ll also notice that this is designed for a moderate physical fitness level. There’s walking involved, and it’s not ideal for severe mobility difficulties. If you have a tight mobility situation, this is the part to weigh carefully.
Comfort and practical planning: luggage, snacks, and weather
The tour runs in all weather conditions, so dress for rain and wind even if your morning looks fine. New Zealand weather can flip fast.
You’ll get snacks and water, which helps on a day that starts early. If you’re sensitive to long drives with big gaps between meals, this small inclusion is actually a big deal.
Bring your luggage planning in mind too. The tour includes luggage allowance (1 large and 1 small per person). That’s helpful if you’re moving between cities and don’t want to pay extra for storage elsewhere.
Safety note: driving style can be a personal deal
Most of the feedback praises the drivers for comfort and local insight. There was at least one less positive comment about driving style being too fast or aggressive.
I can’t tell you how any specific driver will handle the road on your departure. What I can say is simple: if you’re someone who gets anxious in traffic, consider that this is a long highway day. If you need extra reassurance, ask the operator about driver habits on the day you book, or communicate any concerns before you start.
Who this tour suits best
This is a good fit if you:
- Want an easy one-way transfer from Auckland to Rotorua.
- Prefer a guided day where you learn what you’re seeing rather than just getting from A to B.
- Enjoy the idea of pairing a big nature experience (Waitomo) with a cultural hub (Rotorua).
- Like small-group travel with limited numbers.
It’s less ideal if you:
- Want lots of free time for independent exploring.
- Expect many long stops or multiple major attractions in Rotorua on this same day.
- Need a fully accessible route with minimal walking.
What you’ll actually come away with
At the end of the day, you should feel like you’ve done two North Island highlights without wasting daylight on logistics.
From Waitomo, you’re likely to remember the cave darkness, the glowworm glow, and the rock formations you learned to spot. From the drive, you’ll have a sense of the Waikato region’s farmland scale and a few local history threads that make Rotorua’s setting make more sense.
And when you arrive in Rotorua, you’re not starting from scratch. You’ve been dropped into the central area, ready to continue your geothermal and cultural plans.
Should you book the Auckland to Rotorua one-way via Waitomo tour?
I’d book it if you want a guided, efficient one-way that turns a driving day into real experience time. The included cave tour, live commentary, and snacks make it feel more complete than a simple transfer.
I’d think twice if you hate early starts or you’re counting on extra Rotorua activities being included automatically. The day is built around the Waitomo highlight, with Rotorua as your arrival and a possible add-on like Te Puia depending on your chosen option.
If your priority is glowworms plus a smooth arrival in Rotorua, this tour is built for that. If you want a slower pace with lots of wandering, you may prefer a multi-day Rotorua plan instead and do the Auckland route separately.
FAQ
What time does the tour start?
The start time is 6:00 am.
Is hotel pickup included?
Pickup is offered from select hotels, and you’ll be dropped at central Rotorua accommodation or a main central location.
What’s included in the tour price?
Entrance fees and the fully guided Waitomo Caves tour are included, along with water and snacks provided.
How long do you spend at Waitomo Glowworm Caves?
You have about 2 hours at the Waitomo Glowworm Caves.
Can I take photos inside the caves?
No. Photography isn’t permitted inside the Waitomo Glowworm Caves due to the delicate ecosystem.
Is there a luggage limit?
Yes. The tour includes a luggage allowance of 1 large and 1 small bag per person.