REVIEW · AUCKLAND
Auckland: Vintage Double-Decker Bus Sightseeing Tour
Book on GetYourGuide →Operated by Vintage Views · Bookable on GetYourGuide
That’s a lot of Auckland in one classic bus. You get a 1964 London Routemaster ride with a no-stop panoramic route, so you can orient fast without bouncing around the city. I especially like the chance to see Mission Bay, Parnell, Ponsonby, and K Road from the top deck, then take in the city wideviews on the way over the Auckland Harbour Bridge. One thing to consider: since the tour doesn’t stop, it can be tricky to grab photos at exactly the right moment.
The payoff here is how much you cover for the money, and how the guide keeps the ride moving with strong commentary. If you want extra long photo pauses or lots of time off the bus, this isn’t that kind of tour.
In This Review
- Key Things You’ll Notice on This Auckland Routemaster Ride
- A 1964 London Routemaster Turns Auckland Into a Movie Set
- The 3-Hour Plan: 1.5 Hours on the Bus, Done Your Way
- Where You Start at 2 Customs Street East (And How to Avoid a Miss)
- Mission Bay: Beaches You Can Read Instantly From Above
- Parnell Village and Heritage Vibes Without the Planning Headache
- Ponsonby Road: The Cool-But-Not-Formal Neighborhood Read
- K Road: Auckland Nightlife Energy in a Quick Visual Snapshot
- Auckland Harbour Bridge Crossing: The View That Changes the Whole Trip
- The Guide Experience: Strong Commentary, With a Slight Technical Turn
- Value for $29: Why This Is a Good Use of a Short Auckland Visit
- Photo Reality Check: The One Catch With a No-Stop Route
- Who This Auckland Double-Decker Tour Suits Best
- Should You Book This Auckland Vintage Bus Tour?
- FAQ
- How long is the Auckland Routemaster sightseeing tour?
- How much does the tour cost?
- Where do I meet for the tour?
- What kind of bus is used?
- Are there stops during the tour?
- Which areas does the route pass?
- Is there free cancellation and flexible payment?
Key Things You’ll Notice on This Auckland Routemaster Ride
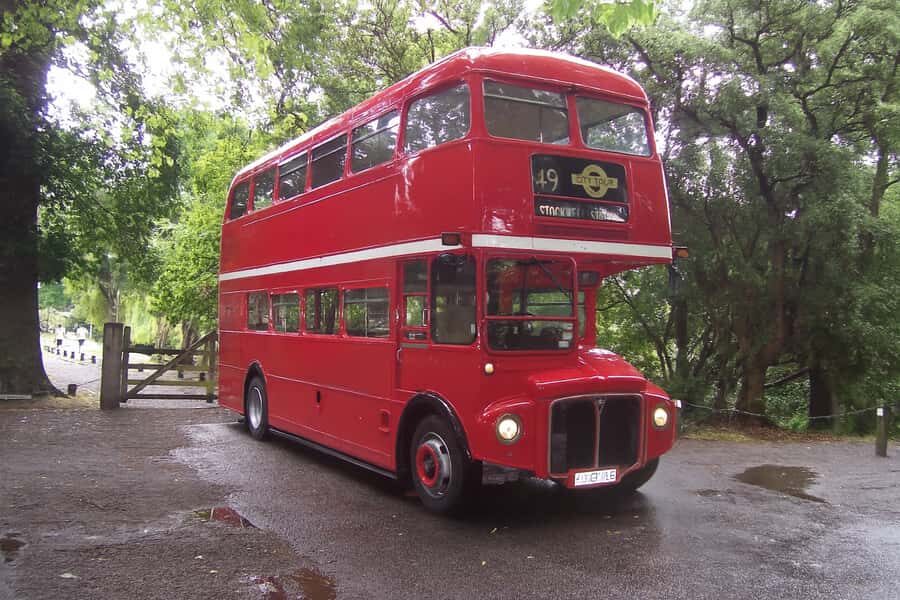
- A vintage 1964 London Routemaster double-decker for that classic, film-set feeling
- A no-stop route built for first-time orientation in a short window
- Harbour Bridge crossing for sweeping views you’ll remember
- Neighborhood snapshot from the top deck: Mission Bay, Parnell, Ponsonby, K Road
- Guide commentary with good banter, though it can lean technical at times
A 1964 London Routemaster Turns Auckland Into a Movie Set
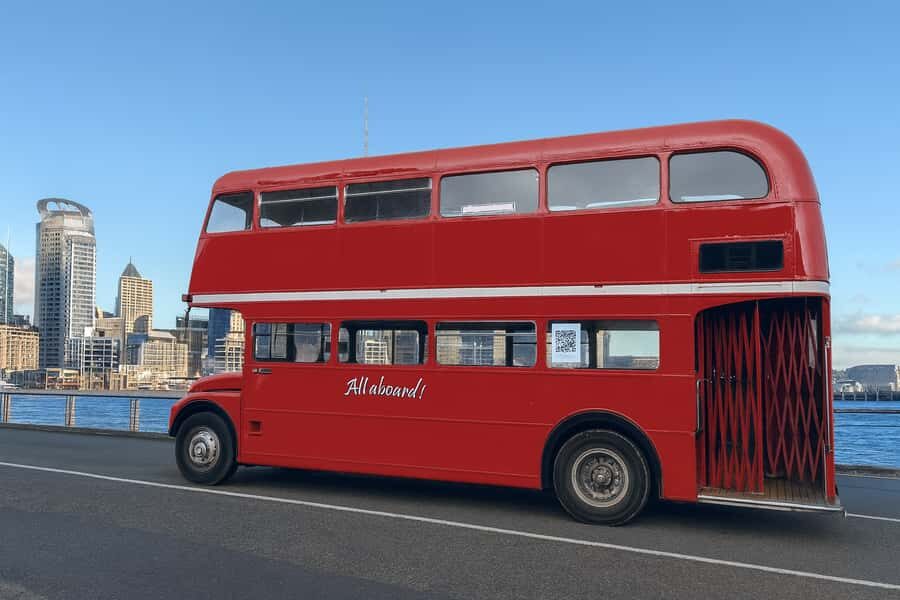
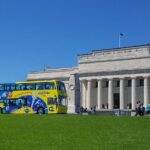
There’s a special kind of comfort that comes from riding an old double-decker. This tour uses a vintage 1964 London Routemaster, so you’re not just sightseeing. You’re stepping into the look and feel of another era while Auckland rolls past the windows.
What I like about this setup is that it changes the pace of “seeing sights.” Instead of rushing from place to place, you get a slow, steady rhythm from the upper deck. The bus is the attraction as much as the route. And because it’s a full sightseeing ride, you’ll likely spend less time thinking about where to go next and more time looking out at what Auckland offers.
The double-decker angle matters too. From above, neighborhoods read differently. You can track coastline edges around Mission Bay, then watch the city start clustering toward the bridge area. If you’re the type who enjoys visual clues, this style of touring helps you build a mental map quickly.
You can also read our reviews of more tours and experiences in Auckland.


The 3-Hour Plan: 1.5 Hours on the Bus, Done Your Way
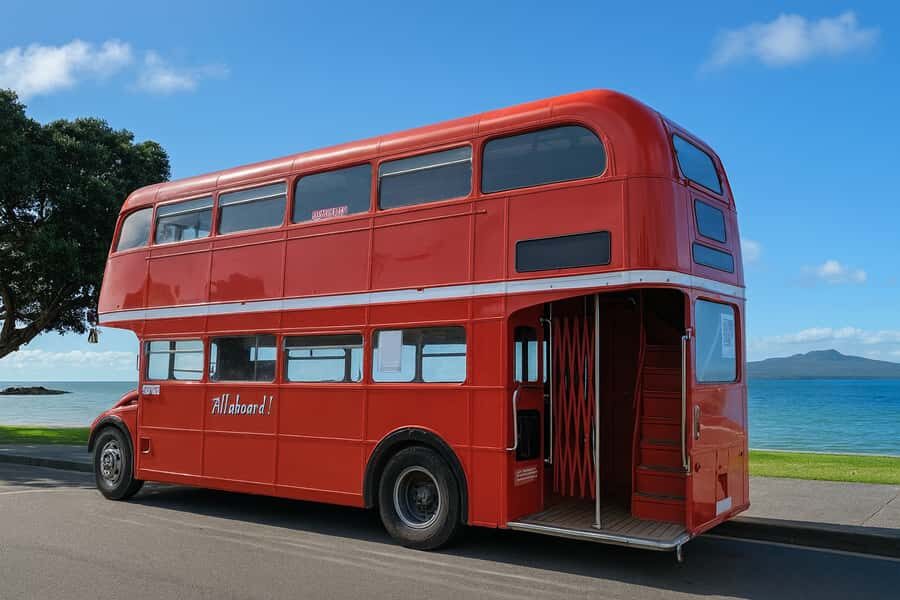
The total time is listed as 3 hours, with 1.5 hours of guided sightseeing. That’s a big difference, because you can plan a half-day without losing your whole afternoon.
Here’s the practical way to think about it:
- You’ll spend the majority of the tour time on the road, riding and listening.
- The rest of the time is used to get you in position at the start and then back to the same spot at the end.
This is the kind of tour that works best when you want results fast. You’re not trying to cover every corner of Auckland. You’re getting the main shapes of the city: beaches, heritage-adjacent streets, a nightlife corridor, and the Harbour Bridge view that ties it together.
Where You Start at 2 Customs Street East (And How to Avoid a Miss)
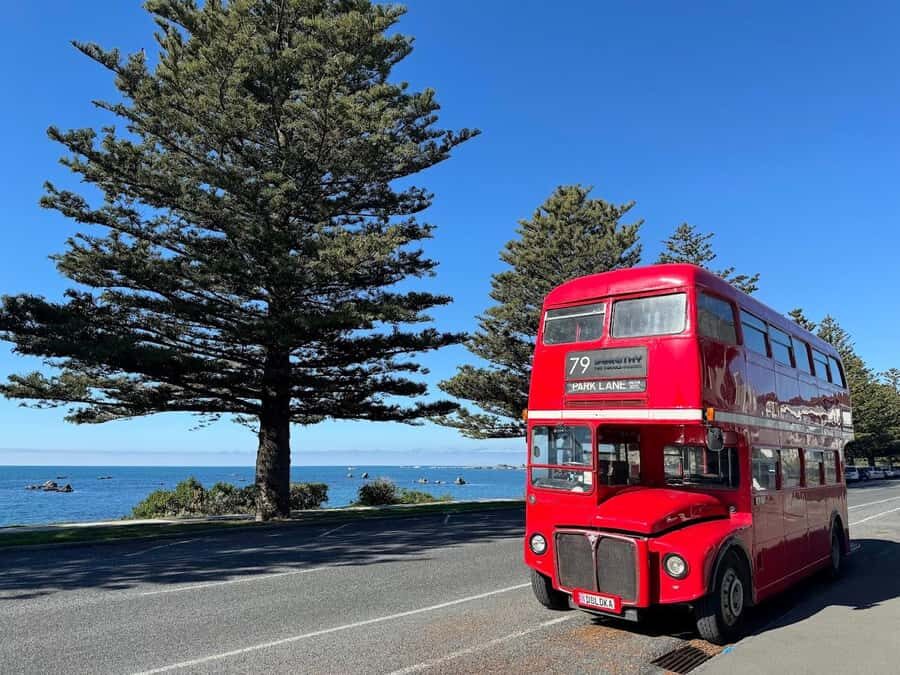
The tour starts and ends at 2 Customs Street East. One useful real-world detail: the pickup is described as being outside the Adidas shop, and in some cases there’s no obvious sign showing the meeting point.
So I’d treat this as a simple photo scouting mission before boarding. Arrive a few minutes early, stand where you can see the street approach, and look for staff or the group gathering near the shop entrance. If you walk past it once, you’re not alone. This part matters because the rest of the tour is built around staying on schedule and keeping that no-stop flow intact.
If you’re traveling with kids or you’re meeting a partner, this is also the easiest point to double-check, because you’re returning to the same spot at the end.
Mission Bay: Beaches You Can Read Instantly From Above
Mission Bay is one of those places that looks simple until you see it from the right angle. From the top deck, you get a clear view of the waterfront feel and the way that area sits within the wider Auckland geography.
Even if you don’t get out and stroll, the sightseeing format gives you what you need: an overview of the coastline, the beach direction, and the overall vibe. This is helpful when you’re deciding where to spend time later. You’ll come away with an idea of whether Mission Bay feels like a quick-walk stop, a longer beach afternoon, or just a scenic pass on your way elsewhere.
Because the tour has no stops, you’re basically getting a drive-by highlight. That sounds limiting, but it’s also the reason the tour can stay short and cover a lot of ground.
Parnell Village and Heritage Vibes Without the Planning Headache
After Mission Bay, the route moves toward Parnell Village, which brings a more historic neighborhood mood into the mix. Parnell is a great contrast to the coastal energy, and watching it slide past from the bus helps you understand how Auckland layers different identities next to each other.
This matters for first-timers. A lot of visitors over-plan and then feel stuck. Here, you’re seeing where the character shifts:
- water and open space
- then older, established streets and village-style atmosphere
If you later decide to explore Parnell on your own, the bus gives you a head start. You’ll already know the general feel and where to aim your feet.



Ponsonby Road: The Cool-But-Not-Formal Neighborhood Read
Next comes Ponsonby Road, another major piece of Auckland’s identity. Ponsonby is often associated with a trendy neighborhood reputation, and from the bus you’ll get the practical version of that. You can spot how it feels more street-oriented, with activity and storefront energy, without needing to navigate parking or lines.
From the top deck, I like how you can see Ponsonby as a corridor rather than a single stop. That helps you understand the neighborhood as a connected stretch, not a single highlight dot on a map.
And again, because there are no stops, the tour keeps momentum. You’re not waiting for a group to gather, not walking back to the bus, and not worrying about timing. You get a continuous view.
K Road: Auckland Nightlife Energy in a Quick Visual Snapshot
Then you reach K Rd (Auckland nightlife centre), which is where the city shows a more nightlife-forward side. The bus doesn’t turn this into a walking tour. Instead, it offers a fast visual read of what the area is known for.
For people who only have a day or two in Auckland, this is a smart approach. You’re not guessing later what K Road feels like. You see the energy as you pass through, then you can decide whether it’s a place you want to revisit in the evening.
If nightlife isn’t your scene, you’ll still appreciate it as a cultural cue. Auckland doesn’t just have beaches and harbor views. It has a streetscape that swings more social in the evening.
Auckland Harbour Bridge Crossing: The View That Changes the Whole Trip
The standout moment is crossing the Auckland Harbour Bridge. Even if you’ve seen bridge photos online, nothing replaces seeing it in context with the city layout around it.
This is one of those rides where the bridge becomes a moving viewpoint. You’ll get a city-wide perspective that ties the route together: coastline segments behind you, the urban grid around you, and the harbor framing everything.
Two practical notes, both important:
- Since the tour doesn’t stop, the best photo windows are short.
- If you want photos, you’ll need to be ready when the bridge angle hits rather than waiting for the bus to pull over.
If you’re bringing a camera, consider taking a quick test shot at the beginning so you know your settings. Then when the bridge crossing starts, you’re not fumbling with your gear.
The Guide Experience: Strong Commentary, With a Slight Technical Turn
The guide quality is a big part of why this tour works. The commentary is described as excellent, and the guides bring a friendly tone, including banter with passengers. That matters because a no-stop ride can otherwise feel like a long lecture. Here, the guide helps keep the trip lively.
There’s a caveat. At times, the guide may spend extra time on technical details about the vintage bus. One example mentioned is talking about engine and vehicle specs like engine size and weight-related details. That kind of info can be fun if you love transport history. If you’re hoping for mostly city narration, you might find it a bit much.
So I’d match the tour to your style:
- If you like stories, street viewpoints, and light conversation, you’ll likely enjoy the vibe.
- If you want only city facts and minimal bus talk, keep that in mind.
Value for $29: Why This Is a Good Use of a Short Auckland Visit
At $29 per person, the value is strong if your goal is orientation. You’re paying for a guided 1.5-hour panoramic ride on a real vintage double-decker, plus a route that includes key sights like Parnell Village, Ponsonby Road, and K Rd, and a drive over the Harbour Bridge.
What you’re not paying for is stop-and-explore time. There are no stops during the tour, which means you won’t get extended walking time at any single location. That trade-off is the whole deal. The tour is built to compress Auckland’s “best of” into a short window.
If you’re thinking, I want one activity that makes the rest of my trip easier, this is that activity. The sightseeing route gives you the city’s main segments, and it helps you decide what to return to later on your own terms.
Photo Reality Check: The One Catch With a No-Stop Route
The biggest practical drawback is simple: it can be hard to get photos because the bus doesn’t stop. That’s not a reason to skip the tour, but it is something to plan for.
Here’s how to make it work:
- Stand on the side where the view looks best for the moment you’re approaching (the bridge crossing is the big one).
- Keep your camera accessible before you reach the best angles.
- Accept that you might miss one shot and get a better one right after. This tour is about motion, not still-life photography.
If your trip is heavily photo-driven and you need frequent stops for perfect angles, you may feel constrained. But if you’re okay with the “moving postcard” style of sightseeing, you’ll probably be happy with what you capture.
Who This Auckland Double-Decker Tour Suits Best
This tour fits best if you:
- are seeing Auckland for the first time and want quick orientation
- don’t have much time and prefer a scheduled route over map hunting
- like classic vehicles and don’t mind that the bus itself is part of the show
- enjoy guided city narration with a friendly tone
It also works well for families and couples because it’s a single, steady experience. You’re not switching modes, not dealing with multiple locations, and you’re back at the starting point when it ends.
If you’re the kind of traveler who wants to jump out and explore for an hour at each stop, you’ll probably want a different format. This is for getting the big picture fast, then choosing later.
Should You Book This Auckland Vintage Bus Tour?
Book it if you want the highest value use of a short window: 1.5 hours of guided sightseeing, a 1964 London Routemaster ride, and a Harbour Bridge crossing that anchors the whole route. The route also covers several of Auckland’s most recognizable areas without forcing you into planning complexity.
Skip it or pair it with something else if:
- you need frequent photo stops or you’re picky about getting every shot
- you strongly prefer city commentary over bus-history or technical vehicle talk
- you want more time off the bus in specific neighborhoods
For many visitors, this is an easy win: you get the feeling of the city, you understand where the neighborhoods sit, and you leave with clearer ideas about what to do next.
FAQ
How long is the Auckland Routemaster sightseeing tour?
The tour is 3 hours total, with 1.5 hours of guided sightseeing.
How much does the tour cost?
The price is $29 per person.
Where do I meet for the tour?
Pickup and drop-off are at 2 Customs Street East.
What kind of bus is used?
It’s a vintage 1964 London Routemaster double-decker bus.
Are there stops during the tour?
No. It’s a panoramic ride with no stops.
Which areas does the route pass?
You’ll pass Mission Bay, Parnell, Ponsonby, and K Road, and you’ll drive over the Auckland Harbour Bridge.
Is there free cancellation and flexible payment?
Yes. Free cancellation is available up to 24 hours in advance for a full refund, and there is also a reserve now & pay later option.