REVIEW · AUCKLAND
Auckland’s Wild West Coast & Black Sand Beaches Tour inc Lunch
Book on Viator →Operated by Cheeky Kiwi Travel · Bookable on Viator
Black sand and gannets beat a gloomy day. This small-group Wild West Coast & Black Sand Beaches Tour from Auckland pairs Muriwai’s gannet colony with a guided run along the rugged west, so the whole day feels purposeful instead of rushed. I especially like the pace and storytelling that comes with fully guided small-group touring, not a big coach shuffle.
One thing to note: the included Hallertau lunch is a set menu, and while it’s generally enjoyable, it’s not always the highlight for everyone. If you’re picky about meals, I’d mentally file lunch as good energy for outdoors, not a gourmet destination.
The other big win is the guide-led flow. You’ll start at Sky Tower, roll over to the North Shore, then out to the coast, with guides sharing local context (and names like Grant and Dean show up in the best kind of way). The ride happens in modern, comfortable minibuses, max 15 people, so you can actually hear the explanations when the wind is howling.
In This Review
- Key things I’d plan around
- Getting Oriented at Sky Tower and Heading Over the Harbour
- Hallertau Brewery Lunch: Included Set Menu and the Optional Beer Add-On
- Muriwai Beach and Black Sand: Where the Coast Looks Like It Means Business
- Muriwai Gannet Colony Walk: Big Birds, Close Views, Real Scale
- North Head Historic Reserve in Devonport: Volcanic Cone Views Over the Hauraki Gulf
- Return to Auckland: City Time and the Ferry Option
- Price and Value for $108.60: What You’re Really Paying For
- Weather Reality: When Rain and Wind Threaten the Schedule
- Who Should Book This Wild West Coast Tour
- Should You Book This Tour?
- FAQ
- What time does the tour start, and where do I meet?
- How long is the Auckland Wild West Coast & Black Sand Beaches Tour?
- How many people are on the tour?
- Is lunch included?
- Is craft beer tasting included?
- What are the main stops on the tour?
- How does the return to Auckland work?
- Do I need to walk much during the tour?
- What should I know about tickets?
- Is cancellation free if plans change?
Key things I’d plan around
- Small group (15 max) for a less chaotic day so you can ask questions and actually see what the guide points out
- Muriwai gannets on the largest mainland colony in the North Island with a walk up from the beach for views
- Hallertau Brewery lunch included plus an optional craft beer tasting if you want the extra flavor of the day
- North Head Historic Reserve in Devonport for big vantage points over the Hauraki Gulf and Auckland
- Modern minibus comfort plus little extras like complementary refreshments during the drive
Getting Oriented at Sky Tower and Heading Over the Harbour
Your day starts back in the city at Sky Tower on Victoria Street West, with a 12:00 pm departure. It’s a handy meeting point if you’re staying central, and it also keeps the first leg simple: you’re straight into the “how Auckland sits between sea and hills” story.
From there, the route swings you over to the North Shore. You’ll travel via the Harbour Bridge, then continue north before turning toward the west coast. For me, that early Harbour Bridge moment matters because it sets the tone. You’re not just sightseeing; you’re getting your bearings fast for the rest of the coast.
The tour runs around 5 hours, so this isn’t one of those slow, all-day marathons. Expect steady driving time, then short focused stops where you can look, walk a bit, and reset.
A few more Auckland tours and experiences worth a look
Hallertau Brewery Lunch: Included Set Menu and the Optional Beer Add-On
A key part of the value is that lunch is included at Hallertau Brewery. You’ll have about an hour at the brewery, which gives you enough time to eat without feeling trapped in a long sit-down.
The lunch is from a set menu, so you’re choosing within that structure rather than picking from a giant all-day card. That’s part of how the tour keeps the day on schedule, especially with coastal stops later. If you have strong dietary restrictions, you should check details before booking because the data here confirms a set menu, not custom options.
After lunch, you have the chance to taste Hallertau’s winning craft beers for an extra cost. I like this as a choose-your-own-adventure moment. If you’re driving later, don’t want alcohol, or simply prefer saving calories for the coast, you can skip it without losing the day.
Muriwai Beach and Black Sand: Where the Coast Looks Like It Means Business
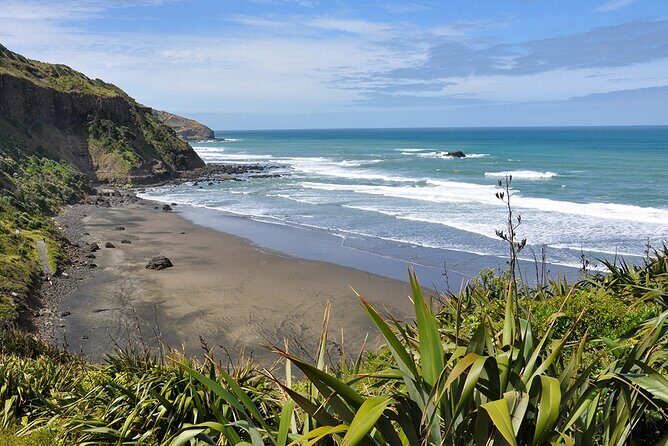
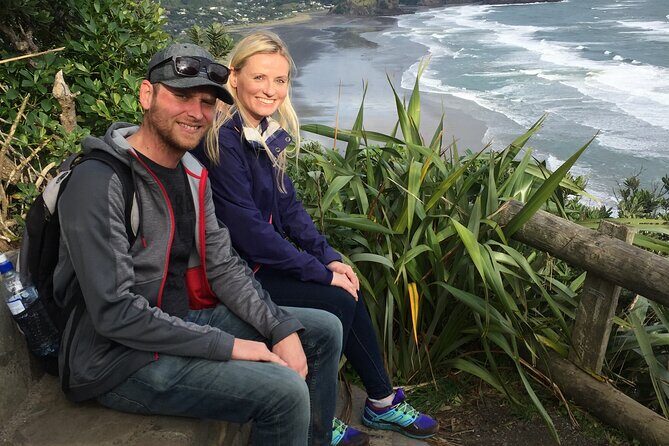
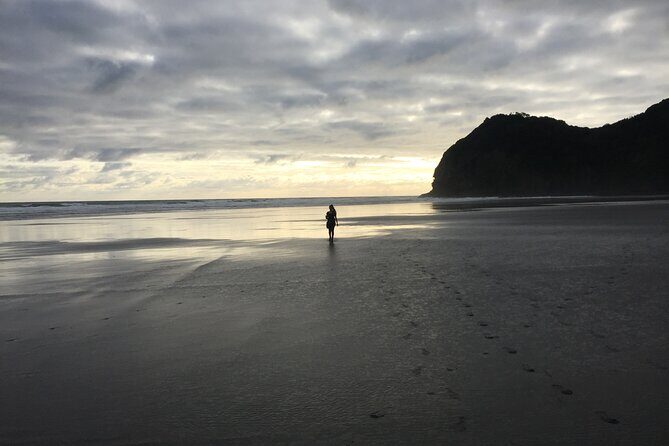
Then you hit one of the main reasons to book: the black sand coastline at Muriwai. This stop lasts about 30 minutes, which sounds short until you realize how quickly weather and lighting change along exposed coasts.
What you’re seeing here is the classic contrast of New Zealand west coast power: rugged shoreline, dramatic cliffs, and that signature dark sand. If the day is windy, you’ll feel it instantly. That’s not a problem with the tour; it’s the coast being the coast.
Practical tip: wear shoes you don’t mind getting a bit dusty or damp. Black sand can cling, and you may be walking on uneven ground near the beach viewing areas. Bring a wind layer even if the morning looks friendly.
This stop is best for quick photos, a slow look at the ocean’s scale, and a reset before the gannets. If you want long beach time, this is not that kind of tour. But if you want the coast highlights efficiently, it hits the mark.
Muriwai Gannet Colony Walk: Big Birds, Close Views, Real Scale
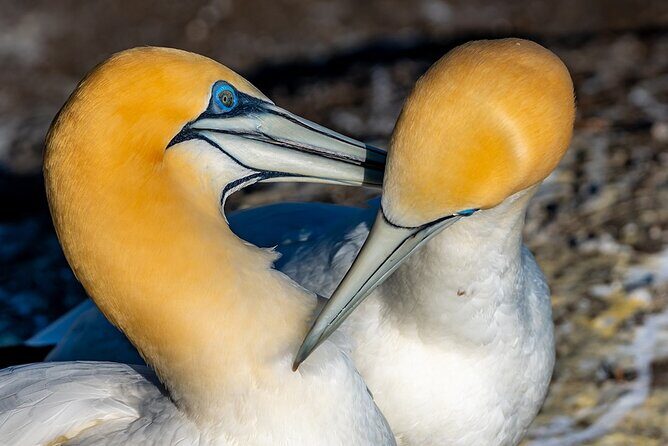
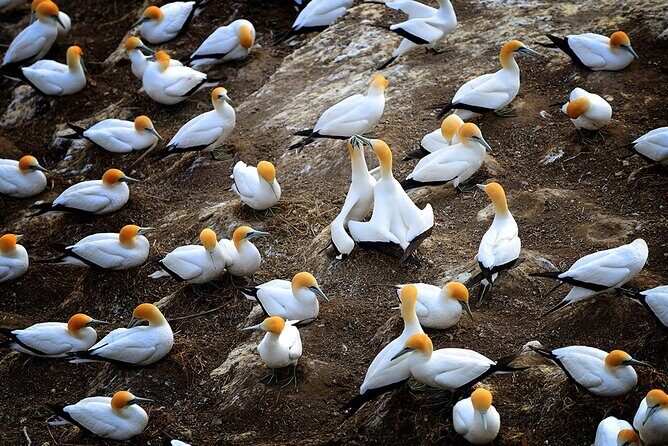
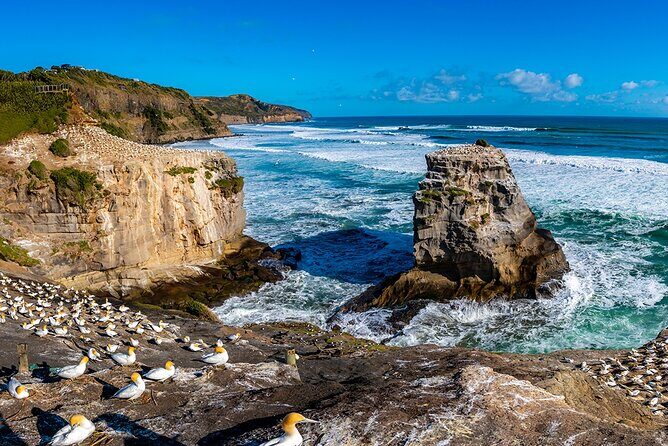
Next comes Muriwai Gannet Colony, with about an hour for the walk and viewpoints. You climb from the beach area up toward the best viewing spots, and the payoff is the reason many people plan Auckland trips around this coast.
The colony here is described as the largest mainland gannet colony in the North Island. That’s a big claim, but what matters for you is the on-the-ground result: you’re not looking at a single bird on a sign. You’re looking at a massive natural community from a practical walking path where your guide can help you understand what you’re seeing.
Binoculars aren’t required in the details you provided, so I’d assume you can enjoy the experience with your eyes and the guide’s pointing. Still, if you already own binoculars, you’ll likely find them handy when birds are farther out.
Why the walk is worth it: the views expand as you climb, and the guide’s commentary helps you connect the dots between seabirds, nesting behavior, and why Muriwai’s coastline draws them in. Even on less-than-perfect weather days, the gannet colony stays visually rewarding.
North Head Historic Reserve in Devonport: Volcanic Cone Views Over the Hauraki Gulf

After the coast, you cross back over the harbour and head to Devonport. From there, the tour takes you to North Head Historic Reserve, a historic volcanic cone with sweeping views over the Hauraki Gulf and Auckland.
You get around 45 minutes here, which works well for a quick scenic circuit and a couple of viewpoint stops. The timing also helps: you’re using the morning energy and early afternoon light to see a different side of the region than the black sand.
What I like about North Head is that it gives you a sense of Auckland’s geography without needing a full separate day trip. You’ll see water, city edges, and coastal shape in one go, which is exactly what you want when your time is limited.
Consideration: this stop is best for travelers who are comfortable with some walking on uneven ground. The tour overall calls for moderate physical fitness, so if you want zero walking, you might feel limited.

Return to Auckland: City Time and the Ferry Option
By the end of the afternoon, you’re back toward central Auckland. You have a choice at the return stage: take a scenic ferry ride from Devonport back across the harbour to the city, or go straight back (the details note options).
The ferry can be a nice “wrap the loop” moment. You get to ride across the water after spending the day looking at coastlines and viewpoints. It also makes the day feel less like a long drive and more like a full Auckland circuit.
This is where the 5-hour structure matters. It keeps the day from becoming a late-night slog. You’ll come back to the meeting point area, so you’re not dealing with complicated end-of-tour logistics.
Price and Value for $108.60: What You’re Really Paying For
At $108.60 per person, you’re paying for three things that matter on a short trip: guided direction, transport, and included entry/major meal timing.
Here’s what the tour includes based on the info provided:
- Small group and fully guided tour
- Lunch (set menu) at Hallertau Brewery
- Park entry fees
- Park entry fees are included as part of the day’s costs
Craft beer tasting is listed as additional cost, so if you want it, expect that extra spend. Everything else is built into the schedule.
So how does that price compare in real terms? You’re not just buying a seat. You’re buying a planned route that connects the main west coast stops with tight timing, plus a guide who helps you see what you’re looking at. If you try to do this by public transport and self-drive, you’ll spend energy on coordination and you’ll likely lose the “stop value” at each location.
This tour also caps at 15 travelers. That matters more than it sounds. In a larger group, coastal viewpoints get crowded and commentary gets drowned out.
Weather Reality: When Rain and Wind Threaten the Schedule
The west coast can be wild, and this tour clearly works when weather turns. The important part is how you prepare.
If it’s rainy or windy, you’ll still get the key experiences: black sand coastline, gannet colony viewpoints, and North Head panoramas. That’s possible because the tour focuses on short, high-impact stops rather than long hikes or long beach layovers.
Bring a windproof layer and keep your phone protected if you plan lots of photos. The tour’s vehicle comfort helps, too, since you’ll get time to warm up between coastal stops.
And if it’s a rough-weather day, the guide’s job becomes even more valuable. Good guiding turns weather from a problem into a “see it anyway” story, and you’ll understand the coast better while you’re there.
Who Should Book This Wild West Coast Tour
This tour fits best if you want:
- a compact Auckland day trip with the west coast highlights
- a small-group pace (max 15) and a guide-led experience
- included lunch and park entry fees, so the day runs smoother
It’s also a good pick if you’re visiting for the first time and want to understand Auckland’s layout quickly: harbour, North Shore, rugged west, then volcanic viewpoints back toward the city.
You might want to think twice if you want lots of beach time or minimal walking. The itinerary includes a beach stop, a colony walk, and a viewpoint-focused historic reserve. The tour lists moderate physical fitness, so plan accordingly.
Kids are allowed, but children aged 7 and below require a child safety car seat. The info states you can hire seats for $20 NZD per seat or bring your own.
Should You Book This Tour?
If your priority is seeing Muriwai’s black sand and the gannet colony without wrestling transport, this is a strong yes. The schedule is tight in a good way: key stops, enough time to enjoy each one, and guidance that helps you make sense of what you’re seeing.
Book it especially if you like guided history and nature moments that stay practical, not just scenic for the sake of it. The value is strongest when you want the main highlights in one half-day outing and you’d rather spend your energy enjoying the coast than planning routes.
If you’re a foodie who expects a standout restaurant experience from a set-menu lunch, temper your expectations and treat lunch as included fuel. For everything else on the itinerary, this tour does what it promises: it brings you to the places that define Auckland’s wild west.
FAQ
What time does the tour start, and where do I meet?
The tour starts at 12:00 pm and you meet at Sky Tower, Victoria Street West, Auckland Central.
How long is the Auckland Wild West Coast & Black Sand Beaches Tour?
It runs about 5 hours (approximately).
How many people are on the tour?
The maximum group size is 15 travelers.
Is lunch included?
Yes. Lunch is included as a set menu at Hallertau Brewery.
Is craft beer tasting included?
Craft beer tasting is available, but it’s an additional cost.
What are the main stops on the tour?
You’ll visit Sky Tower area to start, Hallertau Brewery for lunch, Muriwai Beach, the Muriwai Gannet Colony, North Head Historic Reserve in Devonport, and then return to the meeting point area.
How does the return to Auckland work?
The tour returns back to the meeting point. At Devonport, you can choose the scenic ferry ride back across the harbour or another option back to the city as outlined in the tour description.
Do I need to walk much during the tour?
The tour calls for moderate physical fitness. You’ll walk from the beach up toward the gannet colony viewpoints and also visit North Head Historic Reserve.
What should I know about tickets?
You’ll receive a mobile ticket, and park entry fees are included.
Is cancellation free if plans change?
Yes. You can cancel up to 24 hours in advance for a full refund.