REVIEW · AUCKLAND
Coromandel Day Tour From Auckland
Book on Viator →Operated by Auckland & Beyond Tours · Bookable on Viator
A long morning, a mountain train, and a sea cave. This Coromandel day tour links three classic stops into one efficient 12-hour run from Auckland. You’re moving through the Waikato Region and Bay of Plenty, then getting big “wow” moments fast—before you’ve even settled into jet lag.
What I like most is the Driving Creek Railway ride: spirals, tunnels, reversing points, and Eyefull Tower views over the Hauraki Gulf. I also love how Hot Water Beach gives you hands-on fun, with a spade included so you can dig your own mineral pool spot.
One thing to keep in mind: the timing can shift a bit because Hot Water Beach depends on the tides, and that can affect the start time.
In This Review
- Key things to know before you go
- Early Start from Auckland City Center: What 6:00 am Really Means
- Waikato to Bay of Plenty Drive: Comfort Stops and Ready-to-Photo Timing
- Driving Creek Railway and Eyefull Tower: A Mountain Train Ride for People Who Like Details
- Hot Water Beach Mineral Pools: The Fun Part (and What to Bring)
- Cathedral Cove Coastal Walk: Getting to the Iconic Spot the Easy Way
- Food and Drinks: Snacks Included, Lunch Missing
- Guides in the Driver’s Seat: The Storytelling Angle That Makes It Click
- Price and Value for $284.84: Why This Costs What It Costs
- Weather and Tide Reality Check: The Two Reasons Plans Shift
- Who Should Book This Coromandel Day Tour?
- Should You Book This Tour?
- FAQ
- How long is the Coromandel day tour from Auckland?
- What’s included in the price?
- Is lunch included?
- What time does the tour start?
- How big is the group?
- Where does the tour end?
Key things to know before you go

- Small-group feel (max 19) with pickup and drop-off in Auckland City Center
- Eyefull Tower panoramas from the Driving Creek Railway climb
- Hot Water Beach digging with a spade provided (plus the usual bring-swimwear reminder)
- Cathedral Cove coastal walk as the main payoff on the Coromandel Peninsula
- Wi‑Fi and snacks included for the long day (but lunch isn’t)
Early Start from Auckland City Center: What 6:00 am Really Means
This tour is built for a full day, starting at 6:00 am from central Auckland with hotel pickup and a return drop-off back in the city. Plan for an early wake-up. Plan for a late-ish finish. And yes, you’ll be glad you packed water and snacks before you head out.
One more timing twist: the tour’s start time may vary based on tide times at Hot Water Beach. That means your day still runs on the same overall route, but the first pickup could move slightly to match what the beach is doing that day.
If you hate rushing, this might feel early. If you like beating crowds and getting your best light for views, it’s a smart schedule.
You can also read our reviews of more tours and experiences in Auckland.


Waikato to Bay of Plenty Drive: Comfort Stops and Ready-to-Photo Timing
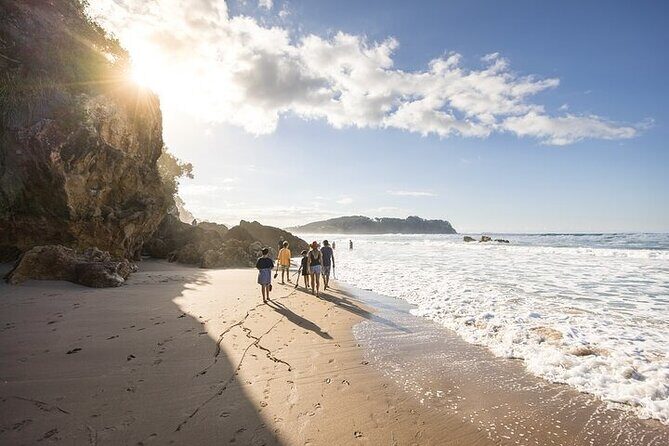
After pickup, you get a scenic drive through the Waikato Region and into the Bay of Plenty. It’s a three-hour stretch to get you out to the Coromandel without you having to rent a car or worry about parking.
Along the route, there are photo stops and extra breaks as needed. The vehicle has air-conditioning, plus Wi‑Fi on board, which helps if you want to upload a few early shots or just keep your phone battery alive for the day.
This is also where I’d set expectations: you’re not just transferring—you’re also spending part of the day sightseeing from the road. If you’re the type who likes scenery but doesn’t want the hassle of driving yourself, this format is a win.
Driving Creek Railway and Eyefull Tower: A Mountain Train Ride for People Who Like Details

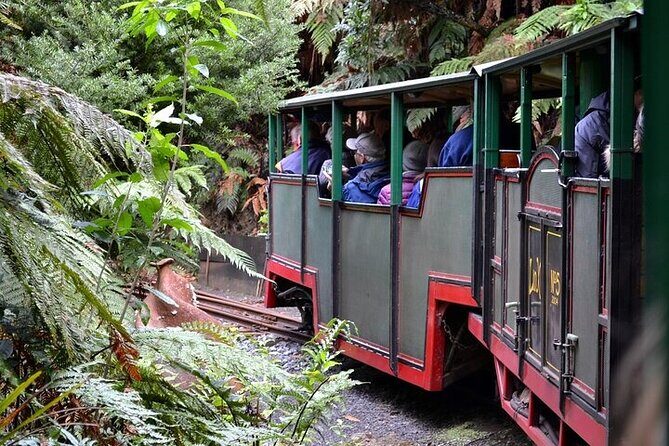
The day’s first big experience is the Driving Creek Railway (Eyefull Tour). Expect about an hour on the train, and expect it to feel more like a miniature adventure than a simple ride.
You’ll go through spirals, tunnels, viaducts, and reversing points as the train climbs toward Eyefull Tower. That mix matters because it keeps your attention. You’re not looking at one straight line of scenery—you’re constantly changing perspective, and the ride itself becomes the entertainment.
Once you reach Eyefull Tower, you’re rewarded with panoramic views over the Hauraki Gulf. This is the kind of lookout that makes you slow down and actually look—water, islands, and coastline rolling out in every direction.
A small caution: a train ride with stairs, uneven spots, or viewing areas can be harder for anyone with mobility limits. The tour says most travelers can participate, but if you know you’ll need extra space or time, consider arriving with that in mind.
Hot Water Beach Mineral Pools: The Fun Part (and What to Bring)
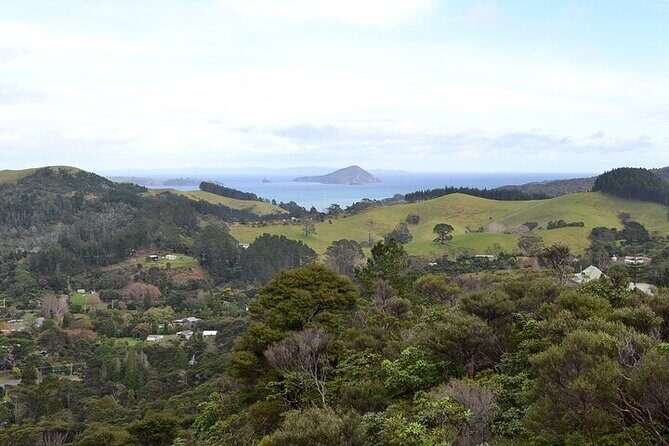
Next up is Hot Water Beach, famous for its thermal mineral pools that you can access right near the shore. The tour gives you time to relax, swim, or stroll along the coastline—at the exact moment when digging makes sense.
Here’s the best part: you get a spade provided to dig your own hole for the mineral water. That turns the trip from sightseeing into a hands-on activity. It’s casual. It’s playful. And it’s way more memorable than just looking at a sign.
What I recommend you bring:
- Swimwear and a towel (the tour specifically calls this out)
- Slip-on shoes or something you can handle easily; one review tip was to not forget them for Hot Water Beach
Also, come prepared for sand and water. Even if you don’t dig, you’ll still likely walk along the shore. Keep your valuables in a dry bag or sealed pocket if you can.
The tour also notes the start time may vary based on tide times. Translation: you’re not showing up whenever. You’re showing up when conditions are right for the experience you came for.
Cathedral Cove Coastal Walk: Getting to the Iconic Spot the Easy Way

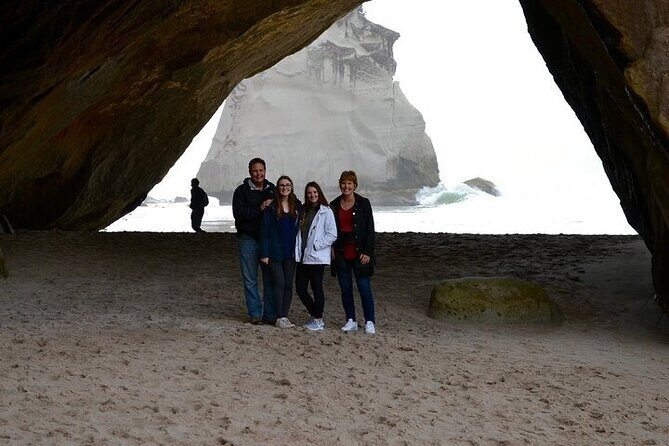
After the thermal beach, the tour heads to the Coromandel Peninsula’s Cathedral Cove area. You’ll explore via the coastal walkway, which is one of those classic New Zealand-style shore walks: dramatic rock, sea views, and a steady sense of arrival as the coastline shapes itself around you.
This is the part of the day that rewards good shoes and a calm pace. You don’t want to rush it, but you also don’t want to linger so long that you miss the rest of the schedule back to Auckland.
One practical note: the tour depends on good weather. If it’s rough or unsafe outside, your day might be changed. That’s not “maybe,” that’s a reality check. Coastal walks are weather-dependent.
When conditions are good, Cathedral Cove is exactly the kind of place that makes the early start feel worth it.



Food and Drinks: Snacks Included, Lunch Missing

The tour includes snacks and bottled water, plus Wi‑Fi and an air-conditioned vehicle. That covers the long drive and keeps you from turning into a cranky gremlin before lunch time.
But lunch isn’t included. So if you don’t want to hunt for food later or pay surprise prices, plan your strategy. Either eat something before pickup, or keep a little cash/credit handy for lunch stops you’ll encounter during the day’s breaks.
One review also flagged that the cafe options at rest stops can be a highlight—so in practice, you’re not stuck with bland convenience food.
Guides in the Driver’s Seat: The Storytelling Angle That Makes It Click
This is a tour run by a professional driver/guide, and that’s important because the day has multiple “move-and-look” moments. Without context, you might see scenery. With context, you get meaning.
I especially liked the way guides bring in place stories. One guide named Steve was described as entertaining and full of fun facts and history, which is exactly what you want on a day like this when you’re already packed with sights. Another guide, Warren, was praised for tying the New Zealand story into what you’re seeing.
Even if you’re not a history nut, these little connections help you remember the day as more than just photos. They also make the drive time feel shorter.
Group size also helps here. With a maximum of 19 travelers, the guide can actually manage the flow—questions, timing, and getting everyone back on schedule.
Price and Value for $284.84: Why This Costs What It Costs
At $284.84 per person, this isn’t a “grab a cheap bus ticket and hope” kind of tour. The value comes from what’s bundled.
Included, you get:
- Hotel pickup and drop-off in Auckland City Center
- Air-conditioned vehicle and Wi‑Fi on board
- Snacks and bottled water
- All entry tickets & guided tours
- A spade provided for Hot Water Beach
- A professional driver/guide
And that’s before we even talk about the big expenses you avoid yourself: driving, parking stress, and paying separately for each attraction.
Where you’ll feel the cost most is in the fact that lunch is not included. But overall, if you want an efficient one-day hit of Coromandel highlights—without rental logistics—this price can make sense.
If you’re the kind of traveler who enjoys DIY road trips and likes controlling every timing detail, then you might compare it to renting a car. But if you value being transported, guided, and on a clear schedule, this tour is built for that.
Weather and Tide Reality Check: The Two Reasons Plans Shift
Two factors can affect how your day feels in real life.
First: tides at Hot Water Beach. Since the start time may change based on tide times, your departure from Auckland can be adjusted so you arrive when digging works best.
Second: weather. The experience requires good weather, and if conditions are poor, you’ll be offered a different date or a full refund. That’s the tour being honest: you’re booking coastal and beach time, not museum time under a roof.
So yes—pack for flexible conditions. Bring layers you can handle if the wind kicks up. And expect a schedule that’s responsive, not rigid.
Who Should Book This Coromandel Day Tour?
This tour is a great fit if you want:
- A one-day Coromandel sampler from Auckland without renting a car
- A mix of big sights: train ride + hot springs digging + Cathedral Cove walkway
- A guide-led day with included tickets and a manageable group size
It might be less ideal if you:
- Hate early mornings and hate tide-dependent schedules
- Want full control over stops and timing (because this is designed as a set day)
- Need a very flexible pace for walking and coastal terrain
Kids are welcome, with the tour noting that children must be accompanied by an adult. Just remember you’ll be doing an active day with beach time and a coastal walk.
Should You Book This Tour?
I’d book it if you’re in Auckland and you want the Coromandel highlights in one smooth go. The combination is hard to beat: the quirky mountain train experience up to Eyefull Tower, the hands-on fun of Hot Water Beach digging, and the iconic Cathedral Cove walk—all run by a professional guide with tickets handled for you.
Before you commit, check your tolerance for early pickup and tide-based timing. If those are fine, this tour offers strong value for the money and a day that feels like it has actual variety, not just one long drive.
If you want, tell me your travel month and whether you’re a morning person—I can suggest what to prioritize so the tide and weather factors work in your favor.
FAQ
How long is the Coromandel day tour from Auckland?
It runs for about 12 hours.
What’s included in the price?
You get snacks, bottled water, an air-conditioned vehicle, Wi‑Fi on board, hotel pickup and drop-off in Auckland City Center, and all entry tickets & guided tours. A spade is also provided for Hot Water Beach.
Is lunch included?
No. Lunch isn’t included.
What time does the tour start?
The start time is listed as 6:00 am, but it can vary based on tide times at Hot Water Beach.
How big is the group?
The tour has a minimum of 4 people to operate and a maximum of 19 travelers.
Where does the tour end?
The tour ends back at the meeting point, with drop-off in Auckland City Center.