REVIEW · AUCKLAND
Auckland City Tour & Kumeu Wine Country Includes Wine Tastings & Lunch
Book on Viator →Operated by Bush and Beach · Bookable on Viator
A day that mixes harbor views and wine. That is the appeal here: you get a guided loop through Auckland’s classic neighborhoods in the morning, then head west to Kumeu for three tastings plus a vineyard lunch. The pace feels built for first-timers who want variety without juggling buses or rental car stress.
I like how this tour handles two very different moods in one day. You’ll start with scenic stops around Queen Street, Ponsonby, and the Harbour Bridge area, then switch to slower, more sensory time among vines and tasting rooms in Kumeu. I also love the small-group setup (max 14), which usually means more room to ask questions and fewer “wait while someone takes forever” moments.
One consideration: the day is long (about 8 hours) and packed with stops, so it helps to be comfortable sitting in a minivan for stretches and doing a short walk at Muriwai. Also, gannet viewing is listed for Aug–Apr, so if you’re traveling outside that window, you should expect the bird timing to be different.
In This Review
- Key things to know before you go
- Auckland to Kumeu: a smart day plan without the driving
- Morning Auckland sights: Queen Street, Ponsonby, and the Harbour Bridge view
- Devonport and Mt Victoria: where the harbor finally feels real
- Westhaven Promenade and the Auckland Fish Market area
- The drive to Kumeu: West Auckland wine country on a schedule
- Soljans Estate Winery lunch: the midday reset you need
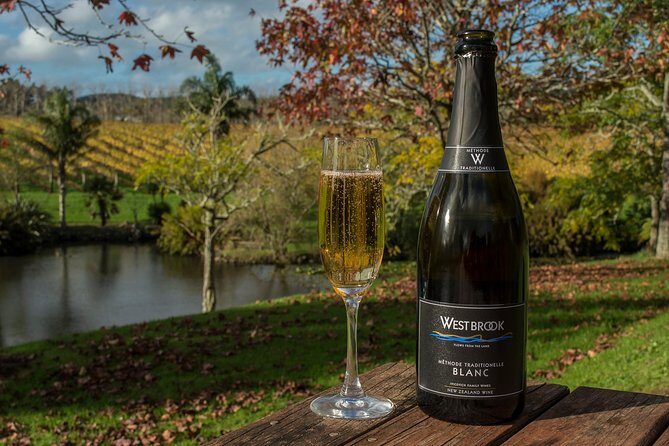
- Westbrook Winery tasting: variety number two
- Coopers Creek Vineyard tasting: the sweet finish to the wine block
- Muriwai Beach and the gannets: a unique New Zealand wildlife stop
- Returning to Auckland: how the day ends cleanly
- Price and value: what you’re really paying for at $248.23
- Who this tour suits best (and who might want something else)
- Should you book Auckland City Tour and Kumeu Wine Country?
Key things to know before you go
- Small group, max 14: easier conversation and a better chance to keep moving at a human pace
- City + wine in one loop: no car needed, and you skip the “how do we get there” problem
- Three Kumeu tastings plus lunch: you’re not just sampling wine, you’re eating too
- Mt Victoria lookout + Devonport: you get the harbor view payoff without extra planning
- Muriwai gannet colony viewing (Aug–Apr): a rare mainland nesting site, timed to the season
- Central Auckland pickup/drop-off: it starts and ends near major transport and easy meeting points
Auckland to Kumeu: a smart day plan without the driving
If you want one day that gives you a feel for Auckland plus the nearby wine scene, this is a very direct way to do it. The morning centers on the city’s “how it’s laid out and why it matters” story: downtown streets, older neighborhoods, and big viewpoint moments over the harbor. Then you trade the urban pace for West Auckland’s Kumeu wine country and its simpler, countryside rhythm.
The price is $248.23 per person for an about 8-hour day, and the value comes from what’s actually included: central transfers, a full city sightseeing block, three winery tastings, plus a lunch at a winery with a glass of wine. When a tour bundles that much, you’re paying less for logistics and more for guided access and time in the places you’d likely struggle to reach without a rental car.
I also like the practical details: air-conditioned luxury vehicle, pickup offered, and a group size capped at 14. That’s the difference between a fun day that runs smoothly and one that feels like you’re herding people.
You can also read our reviews of more city tours in Auckland
Morning Auckland sights: Queen Street, Ponsonby, and the Harbour Bridge view
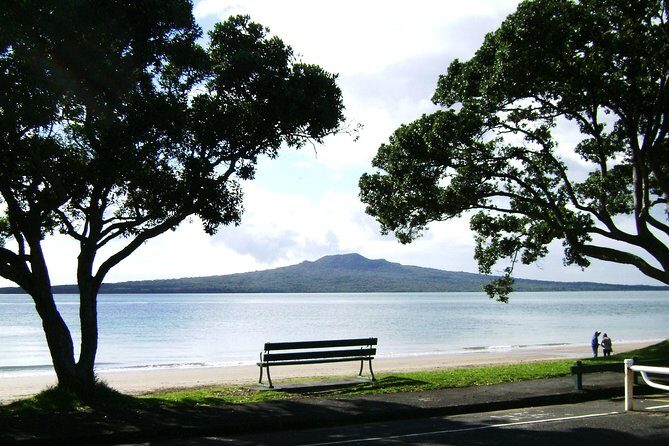
Your day starts at SkyCity Auckland at the corner of Victoria and Federal Street, with a 9:00 am departure. From there, the route is designed to help you get your bearings fast—you see key central streets, then you widen the lens toward neighborhoods and viewpoints.
Downtown coverage includes the heritage architecture around Queen Street and stops that highlight the central business district. Even if you only spend a short time in Auckland, this part helps you understand the city’s center—what feels historic, what’s modern, and where the energy lives.
One of my favorite pieces here is the shift to Ponsonby. It’s the kind of neighborhood you can walk later on your own, but getting a guided introduction in the morning helps you spot what you’d otherwise miss. The route also passes Auckland University and the Auckland Domain, described as the city’s oldest park. That matters because Auckland’s “green space with civic importance” vibe is a big part of why people like living here.
Devonport and Mt Victoria: where the harbor finally feels real
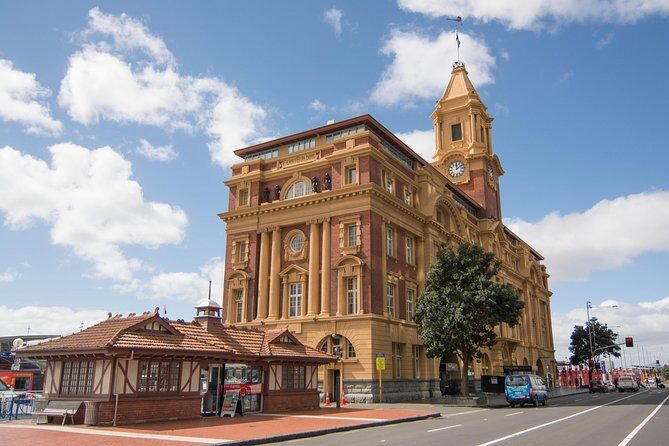
Crossing the Auckland Harbour Bridge brings you to the North Shore side, and the tour slows down in the most useful way: a quick stop with time to look, not just drive past. Devonport is the first North Shore stop, with a meander at Narrow Neck Beach and nearby context tied to the area’s naval history.
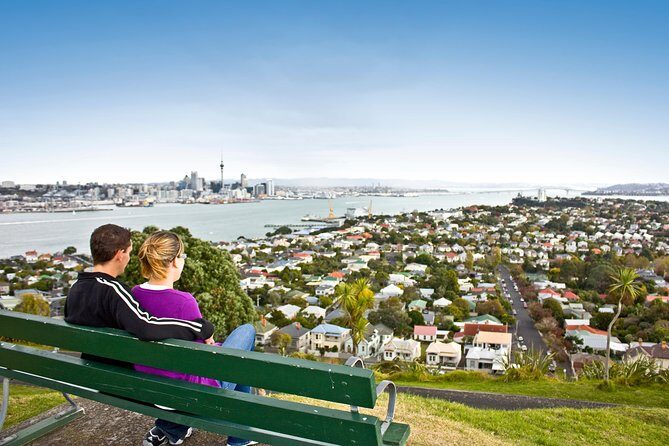
Then comes Mt Victoria lookout, which is the “okay, now I get Auckland” moment for a lot of people. You’re set up for panoramic views over the city and harbor, and it’s the kind of viewpoint that pays off even if it’s not a full sunrise or sunset. If you hate standing around, you’ll still get enough time to take pictures and soak in the scale.
A small caution: if the weather is windy or cold, a lookout can feel colder than you expect. The tour operates in all weather conditions, so dress for the outdoors even if you start the day feeling comfortable.
Westhaven Promenade and the Auckland Fish Market area
After you return across the bridge, you’ll go by Westhaven Promenade, with a chance for marina views. It’s not a long stop, but it gives you a clean slice of Auckland’s waterfront personality. The marina side of town is often where visitors notice Auckland is different from a “one-harbor postcard” place—it’s more layered.
The route also includes a glimpse of the Auckland Fish Market area. You’re not promised a seafood meal here, but the pass-by is useful if you want context for what the working waterfront looks like. Even better: it ties into the larger theme of the day—Auckland’s relationship with water, from viewpoints to the harbor economy.
The drive to Kumeu: West Auckland wine country on a schedule
Once the city portion wraps, the trip heads about 30 minutes to the Kumeu wine region. This is a big advantage: Kumeu is close enough to do in a day from Auckland, but far enough that rental-car timing can get annoying. With a minivan, you just relax and let the driving be handled.
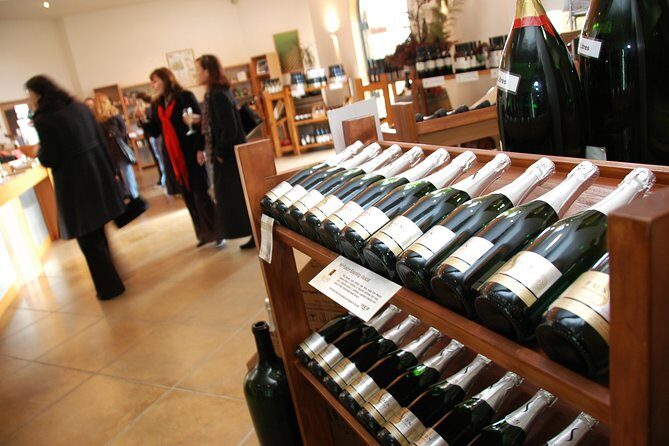
Kumeu is known for fine New Zealand varietals, and the plan is built around three tastings. That format matters: you’re not trying to make decisions at three random stops. You’re sampling with breaks and structure, plus you’ll have lunch in the middle to reset your palate.
If you care about wine specifics, this is also the kind of day where you’ll get more value out of paying attention to the variety styles and which winery is focusing on what.
You can also read our reviews of more wine tours in Auckland



Soljans Estate Winery lunch: the midday reset you need
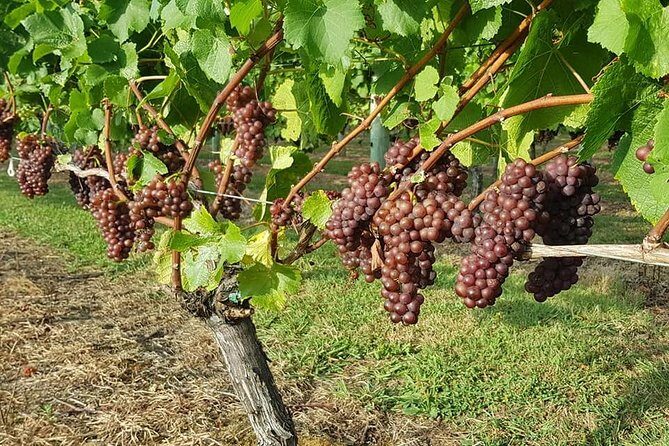
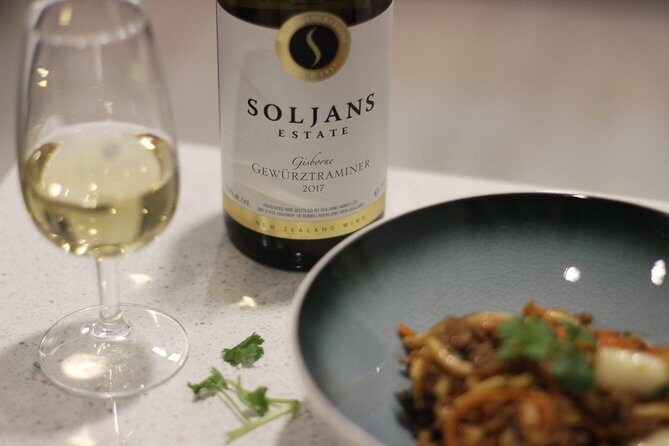
The first winery stop is Soljans Estate Winery, and it’s your lunch anchor. The schedule includes an hour here, with lunch plus a glass of wine and time to relax.
This stop is valuable for two reasons. First, it gives you food that’s actually part of the experience—not just a sandwich eaten while moving on. Second, it creates a palate rhythm: you taste earlier, eat, then taste again later with less fatigue.
From the notes you provided, there’s also a hint of what to watch for on the menu. One person called out a Croatian dish when it’s available, described as a standout. I can’t promise it’ll be on your exact day, but it’s a good idea to ask what’s special when you arrive, since winery lunches often rotate based on what’s being served.
If wine isn’t your only interest, you’ll still enjoy this hour because it’s the most “sit back and enjoy” portion of the day. And after the city morning, that pause feels earned.
Westbrook Winery tasting: variety number two
After lunch, the tour continues with another tasting at Westbrook Winery. This stop is shorter—about 25 minutes—so expect a structured sample rather than a long sit-down.
The strength of a stop like this is focus. You’ll get time to taste and talk without feeling like you’re stuck waiting for a group that’s half ready to leave. If you’re the type who wants to remember what you liked, you’ll have enough time to identify which glass you prefer and carry that preference into the next stop.
A practical tip: with back-to-back tastings, pace yourself. Pour size is small, but three wineries plus lunch can add up faster than you’d think. Plan to sip slowly and keep water in mind, since you’ll still be walking later at Muriwai.
Coopers Creek Vineyard tasting: the sweet finish to the wine block

The day’s last tasting stop is at Coopers Creek Vineyard, scheduled for about 30 minutes. This is your final “wine sampling with explanation” stop before the bird-colony walk and the drive back.
One detail that stands out from the notes you shared is praise for the dessert wine labeled Coopers Creek Gold. That’s useful information even if you don’t order it: it signals the winery’s style includes notable sweet options. If you tend to prefer whites and reds but like trying one dessert-style pour, this could be the moment to do it.
Also, by the third winery, the tour should feel like it’s helping you connect dots. You can compare what each place emphasizes—dry structure, aromatic style, sweetness, and how they think about pairing. That makes the tasting portion feel like education, not just sipping.
Muriwai Beach and the gannets: a unique New Zealand wildlife stop
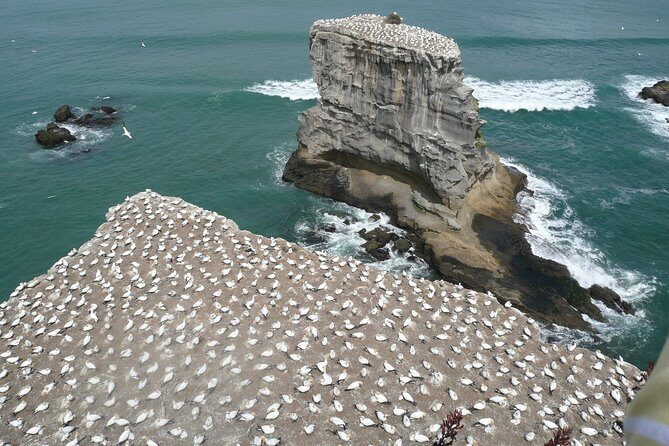
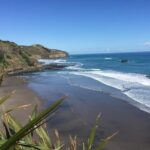
After the wine, it’s time for one of Auckland’s most memorable nature outings: Muriwai Beach. The stop includes time at the beach and viewing of gannets flying in the distance, plus the note that the black sand and surf waves are stunning.
There’s also a timing detail worth understanding: viewing of the gannet bird colony is listed for Aug–Apr. That matters because bird behavior and access can change with the season. If you’re traveling in that window, your odds of seeing gannets are much better.
The tour includes walking time, and there’s a mention that the colony will be visited again once the path reopens. Translation for you: don’t assume you’ll be able to access every path segment on every day. But even if access is limited, the viewing angle from the beach still tends to be spectacular.
If you’re a photographer, bring a lens that works at distance. Gannets can be far out, and you’ll be happier if you’re prepared for viewing rather than expecting close-up.
Returning to Auckland: how the day ends cleanly
Once Muriwai wraps, you’ll relax on the picturesque drive back to Auckland. The structure of the schedule is what makes the ending feel easy: you’re not hopping between neighborhoods all afternoon, you’re traveling back after your main stops.
Because the tour ends back at the meeting point near SkyCity Auckland, it’s also easy to plan your evening. You’ll likely want dinner afterward, but you won’t have to solve transport before you do.
Price and value: what you’re really paying for at $248.23
At $248.23 per person for about 8 hours, this tour can look pricey until you total what’s included. You get central Auckland transfers, guided city sightseeing, three wine tastings, a winery lunch with a glass of wine, and access to the Muriwai gannet viewing portion (season-dependent).
If you were to reproduce it yourself, you’d likely spend money on a rental car or paid transport and still struggle to get coordinated winery time without planning multiple bookings. Here, the pacing does some of the work for you: the minivan schedule, guided stops, and wine-tasting order keep the day from feeling chaotic.
Small-group size also changes the value. Max 14 is enough for energy but small enough that you’re not lost in the shuffle. That’s the sweet spot for a day that mixes city narration, tasting, and a nature walk.
Who this tour suits best (and who might want something else)
This fits best if you’re:
- In Auckland for a short stay and want a guided sampler of city plus Kumeu
- Interested in wine but don’t want to drive or piece together separate bookings
- The type who likes viewpoints and brief neighborhood context more than long museum-style stops
- Comfortable doing short walks, including at Muriwai
It might be less ideal if you:
- Prefer slow, long winery visits and lots of time sitting with just one producer
- Want more free time in each neighborhood rather than a tight schedule
- Travel with someone who gets carsick easily, since the day involves multiple road segments
For most people, it’s a well-balanced format: city energy in the morning, countryside and tasting in the afternoon, wildlife at the end.
Should you book Auckland City Tour and Kumeu Wine Country?
I’d book this if you want a single, guided day that covers a lot of “first-timer Auckland” territory and still gives you a legit wine-country experience. The biggest wins are the small-group format, the practical central pickup, and the fact that the day includes both lunch and multiple tastings instead of cutting you off early.
If you’re traveling during Aug–Apr, the gannet stop adds extra weight to the plan because it’s a special seasonal wildlife moment. If you’re outside that window, you’ll still get the beach scenery, but you should adjust expectations about bird-colony viewing.
In short: if you want convenience plus variety—and you’re happy to spend a full workday on the move—this is a strong pick.