REVIEW · QUEENSTOWN
Queenstown: Lord of the Rings Locations Half-Day Tour
Book on GetYourGuide →Operated by Trails of Middle Earth · Bookable on GetYourGuide
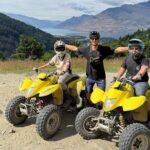
Four and a half hours of Middle-earth scenery. This half-day Queenstown tour strings together famous trilogy spots, real local history, and hands-on movie props. I love the mix of iconic filming stops and practical photo moments, and I also love the production materials (original scripts and call sheets) that make the scenes feel less like a screenshot and more like a process. The one thing to consider: you’ll be on your feet and walking a bit, so it’s not the best fit if you have mobility limitations.
You get a tight route with enough time to look, shoot, and ask questions without feeling rushed. I especially like the weapon time, where you can handle and photograph replicas like Gimli’s axe, Anduril, and Sting. One possible drawback for casual fans is that the tour goes hard on details, so if you only care about a quick scenic hit, the intensity of fandom talk might be more than you expected.
In This Review
- Key Middle-earth moments that make this tour different
- Queenstown to Middle-earth in 270 minutes: what you’re actually buying
- Meeting at Camp Street and settling into the van ride
- Skippers Canyon: the first big wow shot
- Arrowtown: gold-rush vibes plus real time to wander
- Ford of Bruinen and Gladden Fields: action scenes meet real riverside geography
- Kawarau River and the Argonath: The Pillars of the King in your frame
- Lake Hayes and Queenstown Hill: the pause before the final Middle-earth pointers
- The weapon-handling part: Gimli’s axe, Anduril, and Sting photos
- What the guides bring: more than script talk
- Logistics that matter: time, walking, and who this tour suits
- Price and value: how this stacks up against cheaper tours
- How to prepare so you get better photos and a better day
- Extra feel-good: supporting local conservation
- Should you book this Queenstown Lord of the Rings half-day tour?
- FAQ
- What time does the tour start?
- Where do I meet the group?
- How long is the tour?
- What Lord of the Rings locations are included?
- Can I handle and photograph replica weapons?
- Is this tour suitable for children or wheelchair users?
Key Middle-earth moments that make this tour different
- Skippers Canyon viewpoints with guided stops you’d skip on your own
- Arrowtown time for photos, walking, and local snacks
- Bruinen and Gladden Fields locations paired with story-focused context
- Kawarau River Argonath views where The Pillars of the King land on your camera
- Licensed replica weapons you can hold and photograph, not just point at
- Original scripts and production call sheets for behind-the-scenes texture
Queenstown to Middle-earth in 270 minutes: what you’re actually buying
This tour is built for people who want more than a drive-by. You’re not just ticking off film locations. You’re getting short stops, guided context, and time to take photos at places that clearly mattered to the filmmakers.
At $118 per person for about 270 minutes, the value comes from what’s included, not just the sightseeing. You get transportation, a live English-speaking guide, a hot drink, photos with licensed replica props, and access to real production paperwork like original scripts and production call sheets. That combination is rare for a half-day tour.
You’ll start either 8:00AM or 1:30PM from the Station Information Centre on Camp Street, then ride in a van between stops. This is also set up for small groups or private options, which matters because you’re going to want your questions answered, especially if you’re a true fan.
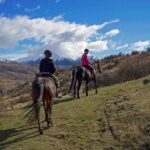
A few more Queenstown tours and experiences worth a look
Meeting at Camp Street and settling into the van ride
The tour meets outside the Station Information Centre on Camp Street. Plan to show up a few minutes early so you’re not holding up the group when they’re ready to leave.
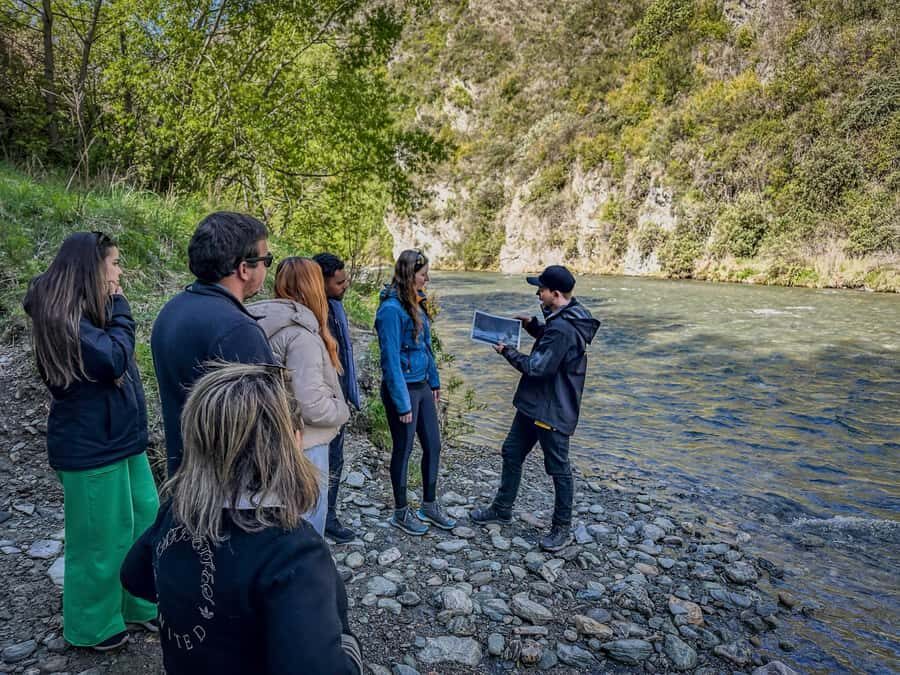
The van ride segments are part of the experience. You’ll travel to each location in short hops, with guided commentary along the way. A few guides have a reputation for being energetic and for steering you toward good photo angles, which can save you time if you’re not sure where to stand.
Bring the basics: comfortable shoes, sunscreen, sunglasses, and water. Queenstown weather can switch fast, so dress for it. You’re on the outside a lot more than you might think from a half-day tag.
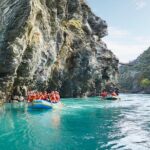
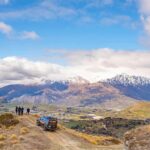
Skippers Canyon: the first big wow shot
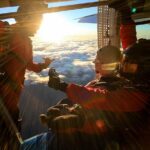
Your first major stop is Skippers Canyon, with a photo stop plus a guided look and scenic views along the route. The canyon gives you that immediate Queenstown drama, the kind that makes people understand why this area fits a fantasy epic.
Why it works: you get your eyes oriented early. Once you’ve got the canyon on your camera, the later film-location stops hit harder, because you’ve already seen the local geography that the production leaned on.
Practical note: photo stops here can be brief, so be ready to move quickly. If you’re the type who likes to scout angles for ten minutes before you shoot, take a breath and aim for a few solid frames, then get to the next spot.
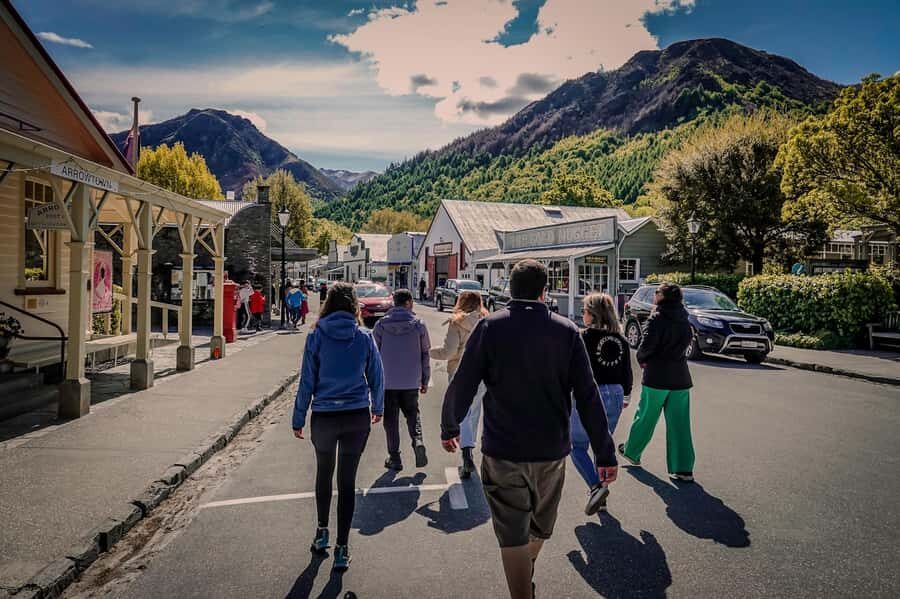
Arrowtown: gold-rush vibes plus real time to wander

Next you head to Arrowtown, once a rich gold mining area. You get a guided portion, then free time plus the chance to walk and grab local snacks.
This is where the tour becomes more than Lord of the Rings cosplay. You’re learning about the town itself, not only using it as a film backdrop. Arrowtown also gives you a break in pace after canyon driving, and it’s a chance to stretch your legs without feeling like you’re racing the clock.
A good strategy for Arrowtown: do the quick guided info first, then use your free time for the stuff you can’t replicate later—photos where you control the framing and a snack stop you actually enjoy.
Ford of Bruinen and Gladden Fields: action scenes meet real riverside geography
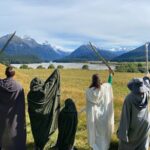
After Arrowtown, you’ll visit The Ford of Bruinen, tied to the moment involving the Black Riders and Arwen. From there, you’ll head toward the Gladden Fields, a key location connected with Isildur’s story and the loss of the One Ring.
These are the stops that tend to turn a casual fan into a closer-watcher. Instead of just saying where a scene happens, the guide helps you connect the film moment to the actual terrain: where the camera likely faced, how the scene’s layout makes sense on the ground, and why the area works visually.
A consideration: because this is tied to action scenes, the atmosphere can feel dramatic in your head before you see the exact spot. Manage expectations by thinking of these as story-and-location pairings, not as theme-park sets.


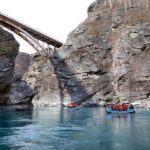
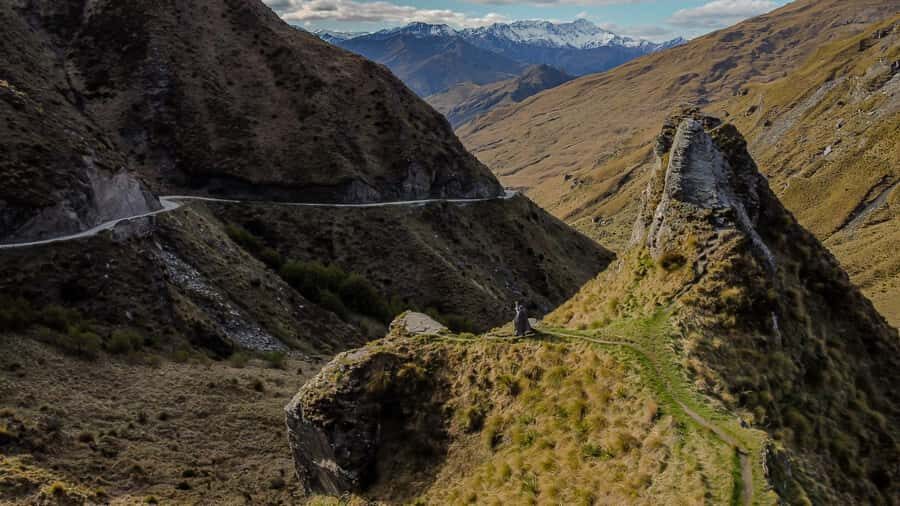
Kawarau River and the Argonath: The Pillars of the King in your frame
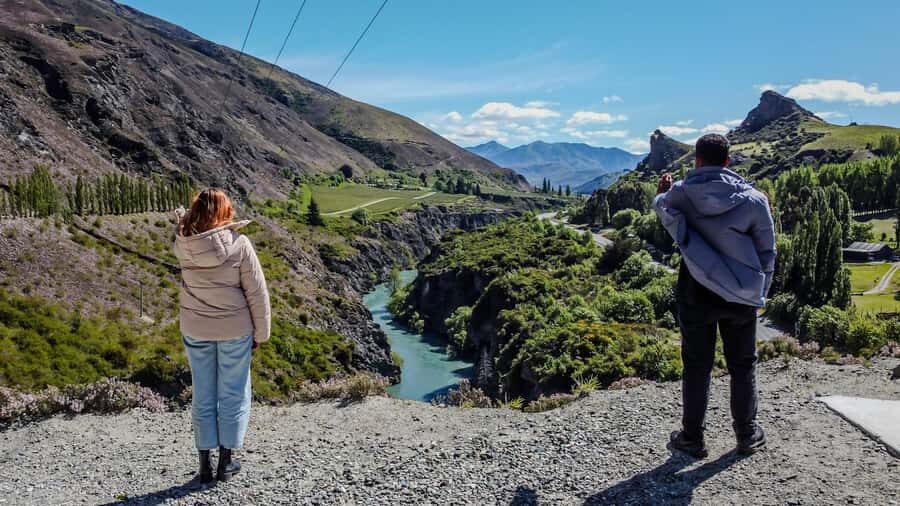
Then comes the Kawarau River and a photo stop for The Argonath (The Pillars of the King). This is one of those locations where the guide’s job is as much about timing and framing as it is about lore.
You’ll get a short guided component plus scenic views while driving between points. That matters because the river region has specific sightlines. If you’re hoping for a clean “stand here and it’s perfect” shot, listen for the guide’s instructions before you start walking around. It saves time and helps you avoid ending up in the wrong spot.
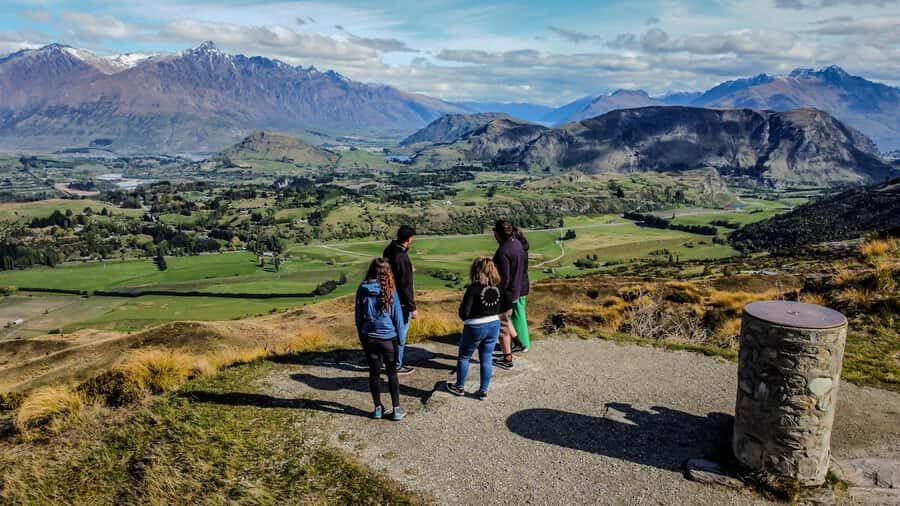
Lake Hayes and Queenstown Hill: the pause before the final Middle-earth pointers
You’ll make additional stops that widen the tour beyond pure film references. One is Lake Hayes, where you’ll have a photo stop and guided look plus free time.
Another is Queenstown Hill, Otagp (as listed), again with a photo stop, guided tour, and scenic views. These parts of the route are valuable because they reset your attention. After weapons, action scenes, and heavy detail, a calm viewpoint helps your brain process what you saw and what you still want to photograph.
The final lookout stop is also story-focused, with the guide pointing out more locations tied to Rohan and Gondor before you head back.
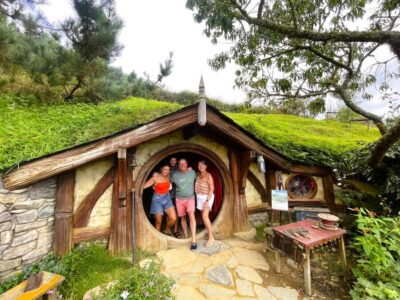
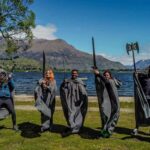
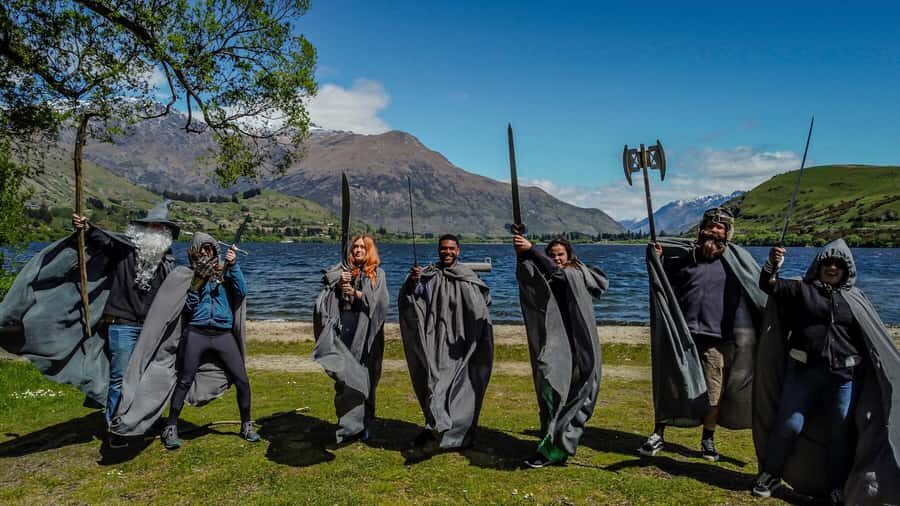
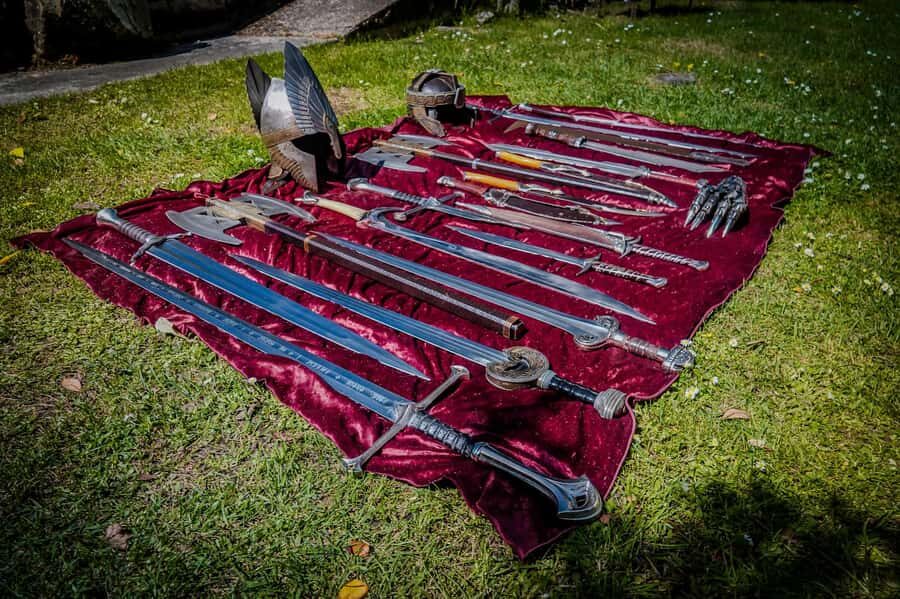
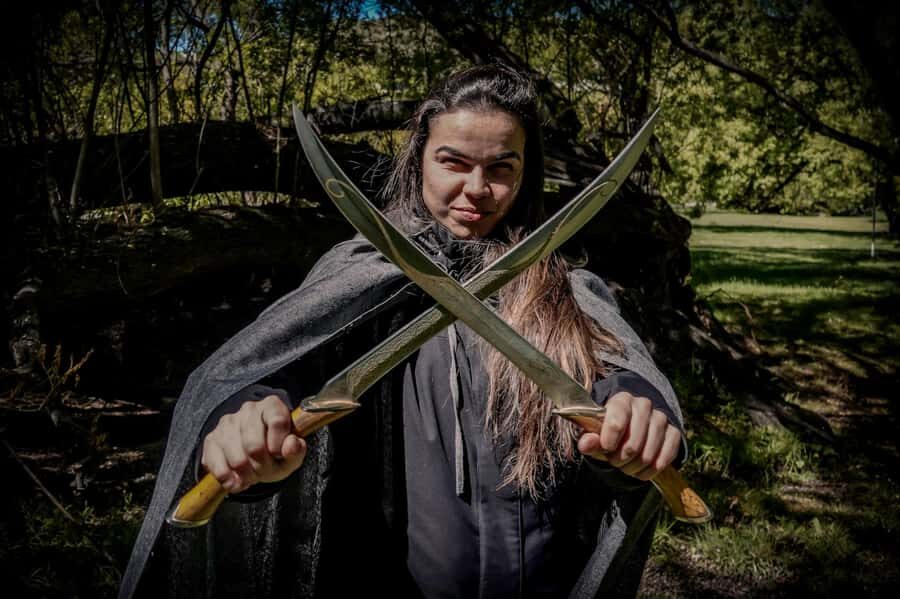
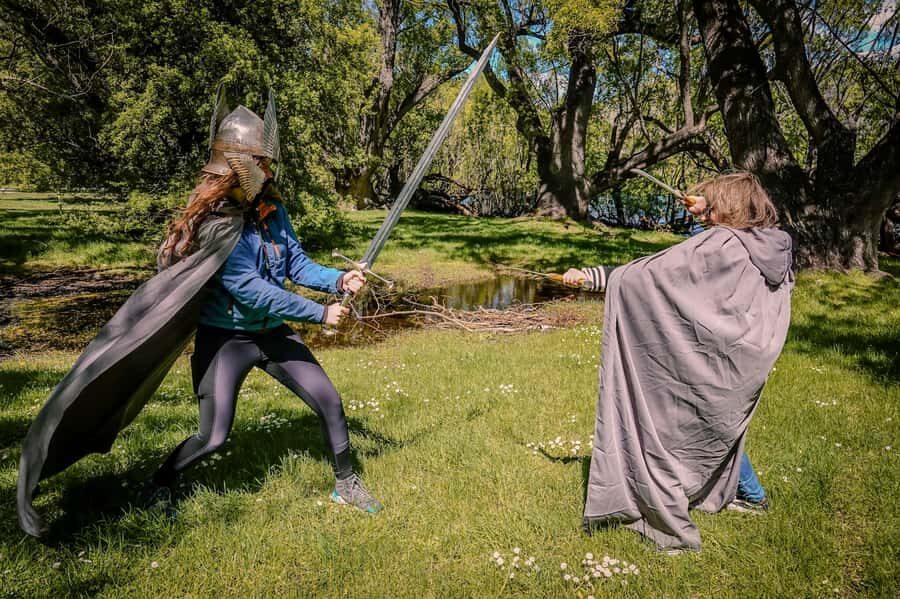
The weapon-handling part: Gimli’s axe, Anduril, and Sting photos
The most fun block on the schedule is the prop time. You’ll spend time handling and photographing licensed replica weapons, including Gimli’s axe, Anduril, and Sting.
Why this is worth your money: it’s not just a photo opportunity. It’s interactive, and the guide helps set up the moments so you’re not fumbling with props in awkward poses. The best guides also frame what you’re holding in terms of how the movie presented the items on screen, which makes the photos feel like more than a souvenir.
If you enjoy dressing up for photos, you’ll probably have fun with the vibe. One person even mentioned picking Gandalf for their own cosplay moment, which captures the playful energy this segment can bring.
One practical tip: wear shoes you’re comfortable moving in. Prop time can lead to short bursts of stepping around for better angles.
What the guides bring: more than script talk
The biggest strength across the guides I’ve seen highlighted is how they combine film knowledge with local storytelling. You’ll hear names like Eby/Ebbi, Shane, Benji, Eby, Annie, JC, Ian, and Francesco in the tour experience, and the pattern is consistent: the guide guides the group, explains what you’re seeing, and keeps the energy up.
A standout detail you can take advantage of: you can look at original scripts and production call sheets. That turns the tour from a recap into something more tangible. You’re seeing the kind of documentation that helps the production stay consistent across scenes.
You’ll also get behind-the-scenes visuals and commentary, including hints about how scenes were put together. The practical effect for you: you’ll start noticing small choices in the filmmaking instead of just spotting familiar moments.
Logistics that matter: time, walking, and who this tour suits
This is a half-day tour, so you won’t linger long at each stop. Plan to move with the group. If you’re the type who loves long photo sessions, you may feel slightly under-tempo at some points.
The tour includes walking, short walks, and outdoor photo stops. You’ll want comfortable shoes and a willingness to stand in wind or sun depending on the day.
It also isn’t suitable for children under 5, and it’s not set up for mobility impairments or wheelchair users. If any part of that affects you, it’s worth thinking carefully before booking.
Group comfort is another hidden factor. The transport is rated very highly, and the vibe described is friendly and well run. For a group experience that includes interactive prop handling, smooth timing makes a real difference.
Price and value: how this stacks up against cheaper tours
A lot of tours in Queenstown sell transportation and viewpoints. This one adds three things that usually cost extra elsewhere:
- Licensed replica prop photos
- Access to original scripts and production call sheets
- A guide who ties local history and geography into the film locations
So yes, $118 isn’t a “bargain bus” price. But the inclusion list makes it feel closer to a guided experience with extras, not just a ride. If you’re even moderately into the films, the combination of Middle-earth stops and prop time gives you more return per hour than a simple sightseeing loop.
Where you might question value: if you’re strongly not into Lord of the Rings details, you might find the weapon segment fun but the rest a bit heavy. That said, even people who aren’t die-hard fans can appreciate the scenery and the local history layer.
How to prepare so you get better photos and a better day
If you want your camera to look sharp, don’t wait until you arrive to think about your shot.
Bring:
- Sunscreen and sunglasses (the sun can be sneaky)
- Water
- Comfortable sneakers/trainers
For photos:
- Listen at each stop for the best position before you move around.
- Take a wide shot first, then work on closer details after the guide points out what to look for.
- If weather turns, prioritize the angles the guide highlights, because those often depend on specific sightlines.
And since the route includes multiple stops, keep your phone/camera ready so you’re not digging for it while everyone else is taking frames.
Extra feel-good: supporting local conservation
This tour is run by Trails of Middle Earth, and it donates 1% of proceeds to the Love Queenstown Community Fund. If you like spending money on experiences that also support local grass-roots efforts to protect the area, that’s a nice bonus.
Should you book this Queenstown Lord of the Rings half-day tour?
Book it if you want a focused, film-accurate day with real story context, not just a scenic drive. The weapons handling and licensed prop photography are the kind of inclusion that turns it into a memory you’ll actually share with others.
Skip it if you dislike walking, if you need wheelchair-friendly access, or if you want a low-energy, minimal-lore tour. This is guided and detail-forward, even if the guide keeps it fun.
If you’re on the fence, here’s the simplest decision rule: if you want to see Middle-earth locations and also take photos holding famous props, this tour fits. If you only want views and don’t care about the film layer, you’ll likely find better value in a shorter scenic option.
FAQ
What time does the tour start?
There are two start times: 8:00AM or 1:30PM, depending on the option you book.
Where do I meet the group?
Meet outside the Station Information Centre on Camp Street.
How long is the tour?
The tour runs for 270 minutes (about 4.5 hours).
What Lord of the Rings locations are included?
The route includes stops such as Skippers Canyon, Arrowtown, The Ford of Bruinen, Gladden Fields, The Argonath (The Pillars of the King) at the Kawarau River, Lake Hayes, and Queenstown Hill.
Can I handle and photograph replica weapons?
Yes. You’ll have photos with licensed replica props, and you can handle and photograph items such as Gimli’s axe, Anduril, and Sting.
Is this tour suitable for children or wheelchair users?
It’s not suitable for children under 5, and it’s also not suitable for people with mobility impairments or wheelchair users.