REVIEW · WELLINGTON
Wellington Shore Excursion City Sightseeing Tour
Book on Viator →Operated by Leisure Tours · Bookable on Viator
Wellington can feel like a lot for one morning. This tour is built for short time onshore, with coach transfers and big-name stops like the Beehive and Old St Paul’s Cathedral. I especially like the Mt Victoria panorama stop and the way the route links politics, gardens, and harbor views without you having to plan a thing.
One thing to consider: timing can be tight. The tour is listed around 3 hours, but real-world days can run longer, and there can be limited toilet or drink breaks depending on the schedule and weather.
In This Review
- Key Highlights Worth Your Focus
- Port Transfers First: Getting from Your Ship to the Coach
- The Wellington Loop: Thorndon, the Beehive, and the Parliament Pass-By
- Mt Victoria: The Short Stop That Gives You the Big Harbor View
- Lady Norwood Rose Garden and Premier House Area: Pretty Break Time
- Wellington Cable Car at Kelburn: Classic, Optional, and Line-Sensitive
- Passing the Coast: Lyall Bay Views and the South Island Check
- The Real Time Question: When 3 Hours Turns into More
- Guide Energy Matters: Dennis, Dean, Bryan, Robert, Graeme, and Chappie
- Price and Value: Is $96.19 a Smart Use of Shore Time?
- What This Tour Skips (and How to Plan Around It)
- Small Logistics That Can Save Your Day
- Who This Tour Fits Best
- Should You Book This Wellington Shore Excursion?
- FAQ
- How long is the Wellington Shore Excursion City Sightseeing Tour?
- What’s included in the price?
- Where does the tour start?
- Is the cable car ride included?
- Is there time to eat or buy snacks during the tour?
- What’s the cancellation policy?
Key Highlights Worth Your Focus
- Port pickup and drop-off keep you from juggling buses before your ship leaves
- Mt Victoria gives you a free-viewpoint style harbor and city payoff (brief stop, big views)
- The Beehive and Parliament pass-by makes Wellington’s political identity easy to spot
- Lady Norwood Rose Garden adds a pretty, walk-around moment with lots of color in season
- Cable Car option gives you a classic Wellington angle over the Botanic Garden hill area
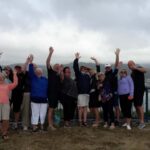
- Small group size (max 30) helps the coach time feel more controlled
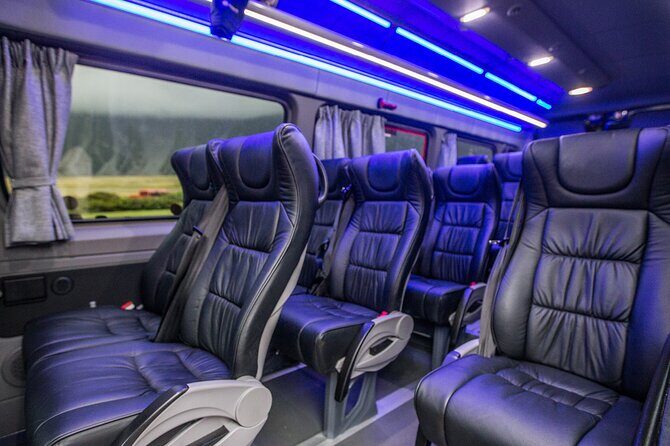
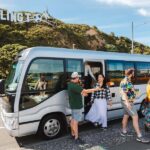
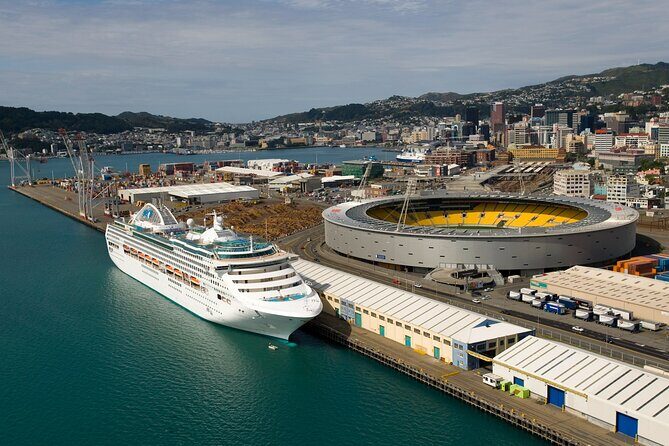
Port Transfers First: Getting from Your Ship to the Coach

This excursion is set up for cruise days. You start at CentrePort Wellington, Shed 39/2 Fryatt Quay (Pipitea) and you’re taken back there at the end. That matters because Wellington’s streets are steep, and getting lost with a clock ticking is the last way to enjoy a short visit.
The pickup uses a comfortable coach with air-conditioning, and you’ll have a local guide on board. You also get a mobile ticket, which is handy when you’re moving fast between ship gangways and meeting points. The day is designed so you don’t need to rent a car, hunt for parking, or figure out which bus goes where.
Accessibility is also called out as a plus. The tour is accessible to most wheelchair users, and service animals are allowed. If you’re traveling with mobility needs, it still helps to plan for coach entrances/exits and sidewalks around viewpoints and gardens.
You can also read our reviews of more city tours in Wellington

The Wellington Loop: Thorndon, the Beehive, and the Parliament Pass-By
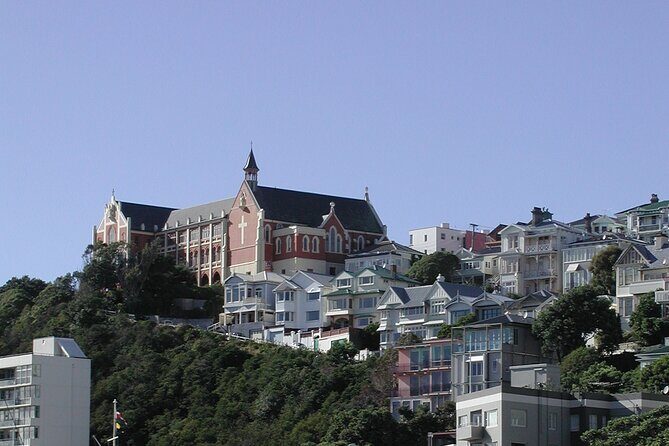
A big part of the appeal is how much Wellington you can see in one morning loop. The route starts in the Thorndon area, which is where Wellington’s political core shows up. You’ll pass the New Zealand Parliament Buildings and the cone-shaped Executive Wing, locally known as the Beehive.
Even if you’re not a politics person, this is a fun “spot it from the road” moment. The Beehive’s shape is so distinctive that it becomes a visual anchor for the rest of the day. And passing Parliament buildings early gives you context for why Wellington feels different from other New Zealand cities—small enough to navigate, but important enough to host national leadership.
You’ll also stop at or visit Old St Paul’s Cathedral, noted for its Gothic Revival architecture. It’s the kind of stop that adds culture without requiring museum tickets or long walking.
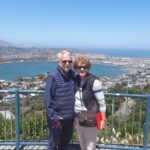
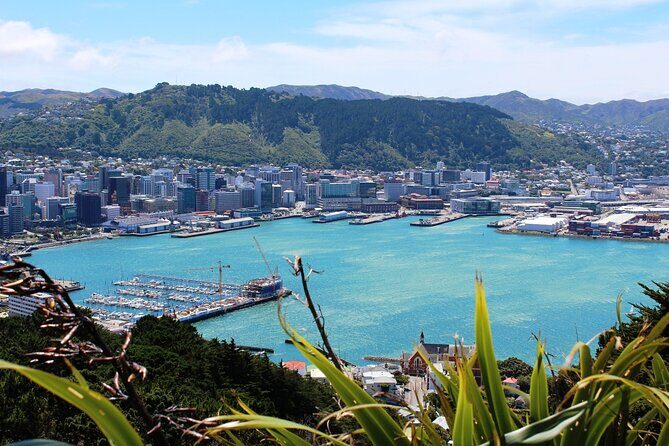
Mt Victoria: The Short Stop That Gives You the Big Harbor View
If you only have a few hours, Mt Victoria is where you spend the time for the return on effort. The tour heads up to the summit area with a stop at a viewing platform. The stop is listed as about 10 minutes, and admission there is free.
Here’s the practical way to think about it: you’re not there to hike or linger. You’re there to get oriented. From Mt Victoria, you can see Wellington Harbour and the harbor setting that makes the city feel like it’s built around water and hills.
Weather matters. Wellington conditions can change fast, and you’ll see in the setup that the tour requires good weather. If skies are clear, this becomes a photo-rich stop. If clouds roll in, you may still enjoy the viewpoint, but expect less drama in the distance.
One more tip: plan for the reality that restroom access on a hill viewpoint can be tricky. One review mentioned guidance about using the area behind bushes on Mt Victoria, and another noted limited toilet/drink breaks during travel. So bring what you can (water if you like) and don’t assume frequent stops.
Lady Norwood Rose Garden and Premier House Area: Pretty Break Time
After the political and cathedral moments, the tour shifts into gentler territory. You’ll head through the Lady Norwood Rose Garden area, described as perfumed with thousands of colorful blooms. Even if you visit outside peak rose season, the garden still tends to function as a calm pause: a place to stretch your legs, reset your eyes, and take photos without sprinting.
The route also includes the Premier House area, described as the historic home of New Zealand’s Prime Minister. This is another “you’re seeing the real city, not just the main street” stop. You get the sense of how government life sits close to everyday neighborhoods.
In one review, the rose stop also came with mention of a peace garden feeling, which suggests the gardens may include quieter sections depending on how the guide times the walk. Either way, it’s a welcome change from the nonstop talk-and-go style some tours use.
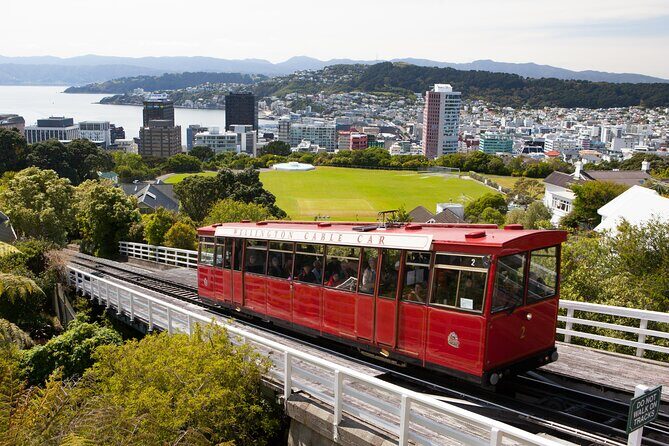
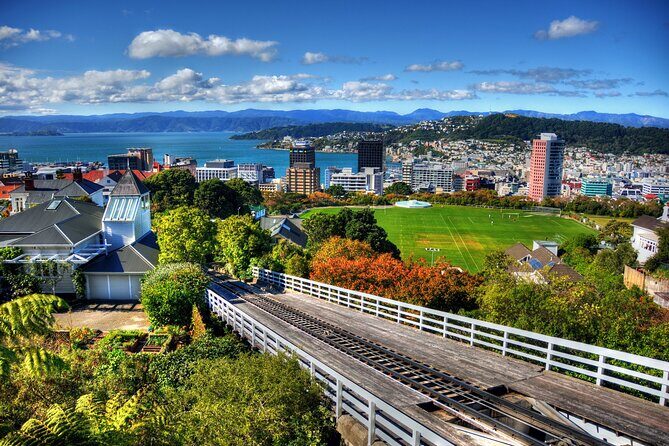
Wellington Cable Car at Kelburn: Classic, Optional, and Line-Sensitive
Wellington’s cable car is one of those things that feels like it belongs in any first-time Wellington visit. On this tour, you’ll reach the cable car stop and head toward the hilltop Kelburn area near the Botanic Garden side.
There’s also mention that you can visit a quaint museum at the top area. So even if you skip the ride (if it’s offered as optional), there’s still often a small “character” moment built into the cable-car portion.
One detail to verify before you go: the information includes both an optional cable car ride for own expense and also notes about cable car admission being included in the stop section. Since these can conflict, your best move is to check what’s covered on your actual ticket confirmation.
Also, lines can make your experience. One review specifically called out that they were disappointed by missing out on an important viewpoint because of how the cable car line affected timing. So if you think you’ll want the full cable-car experience, treat it as time-critical, not as a casual detour.
A few more Wellington tours and experiences worth a look

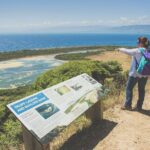
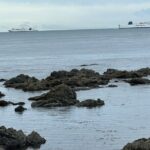
Passing the Coast: Lyall Bay Views and the South Island Check
The tour also includes a coastal drive segment. You’ll pass Lyall Bay beach, go by Wellington airport, and see rugged coastline. On a clear day, you may be able to glimpse the South Island.
This is one of those “if the day cooperates” pieces. When Wellington is clear, coastline drives can add a big sense of place. When it’s gray, you still get a good idea of how the city hugs the water, but the distant payoff may be limited.
It’s also a nice change of pace from urban stops. You get to see how quickly scenery changes once you leave the central viewpoint loop.
The Real Time Question: When 3 Hours Turns into More
The tour duration is listed at about 3 hours, but the lived schedule can stretch. Some reviews noted a shorter target like 3.5 hours, while others described the day running longer (even around 5 hours) because guides wanted to hit highlights and keep everyone comfortable.
What does that mean for you? If you’re a cruise passenger, you’re working against strict re-boarding times. The tour asks cruise passengers for ship docking, disembarkation, and re-boarding info at booking. That helps, but you should still build in a buffer mindset.
Another real-world factor: road access and coach size. One review mentioned a huge bus couldn’t take the proper route and caused extra time on the road. So consider the day a moving puzzle, not a perfectly timed train schedule.
Guide Energy Matters: Dennis, Dean, Bryan, Robert, Graeme, and Chappie
The biggest predictor of a great shore excursion often isn’t the itinerary. It’s the person behind the wheel and the microphone.
In reviews for this tour, I saw praise for guides by name: Dennis stood out for passion and extra attention to highlights, Dean for pointing out interesting facts, Bryan for strong commentary, Robert for clear explanations and managing stop timing, Graeme for leading and informing, and Chappie for strong city-and-culture context.
You can also see a range of guide styles in the feedback. One guest even said they personally dislike hosts who talk nonstop, and still felt this guide hit a good balance. That’s a useful clue: the best versions of this tour seem to mix stories with time for photos, not just a lecture-style coach ride.
Price and Value: Is $96.19 a Smart Use of Shore Time?
At $96.19 per person, this isn’t the cheapest option for a Wellington morning. But for cruise travelers, it often competes well because it includes port pickup and drop-off plus a guide and transportation in one package.
The value equation I’d use is simple:
- If you would otherwise spend time figuring out transit or paying for multiple individual tickets, the bundled tour cost starts looking reasonable.
- If you only want one or two stops and you’re comfortable navigating on your own, you might find cheaper ways.
One review contrast was clear: cruise-run versions were described as more expensive and giving less time. That’s not always the case everywhere, but it aligns with why independent shore excursions tend to win on value when your priority is seeing multiple neighborhoods fast.
If your main goal is the “first look” at Wellington—politics, cathedral, lookout, gardens, and a classic cable car angle—this price can feel like a fair trade for stress-free logistics.
What This Tour Skips (and How to Plan Around It)
This tour is efficient, which means it can’t also include everything. One review specifically wished for Te Papa Museum time and suggested that if the tour ended elsewhere, they could have gone there on their own.
So here’s the practical planning advice: if Te Papa is your must-see, consider a separate visit slot. Use this tour for orientation and outdoor highlights. Then reserve museum time for the part of Wellington that needs slower pacing.
Also, cable car direction and timing can affect what you get to do. One review mentioned a preference for going down the cable car rather than up due to lines. That’s a real-life lesson: if you’re trying to protect your schedule, decide your cable car direction plan early and don’t assume you’ll have flexible time.
Small Logistics That Can Save Your Day
A few things I’d treat as prep basics for Wellington shore tours like this one:
- Bring a light layer. Mt Victoria and coastal drives can feel cooler even when the city is mild.
- Watch the stop timing. The viewing platform is short by design, so get your photos quickly and move when the guide signals.
- Plan for limited breaks. There are stops to get out and look, but not every stop is restroom-friendly.
- Double-check your ticket coverage for the cable car ride if the confirmation says it’s optional or included.
- Keep your re-boarding time sacred. Schedules can run long on road conditions or with extra highlight time.
If you like a tour that moves and keeps you seeing without fuss, this one tends to match that style.
Who This Tour Fits Best
This excursion is a great match if:
- you want a fast overview of Wellington’s key landmarks without researching routes
- you’re on a cruise and need port reliability
- you like viewpoint moments (Mt Victoria) plus city-center architecture (Parliament, Beehive, cathedral)
- you’re okay with a guided pace and short, purposeful stops
It may feel less perfect if:
- you want lots of museum time
- you prefer long garden walks or slow café wandering
- you strongly want a cable car ride and are sensitive to lines affecting timing
Should You Book This Wellington Shore Excursion?
I’d book it if your goal is to get oriented fast and see multiple Wellington highlights in one coordinated morning. The mix of Parliament/Beehive context, a cathedral stop, Mt Victoria orientation views, and a rose-garden break hits the sweet spot for a shore day.
I’d think twice if Te Papa is your top priority or if you’re expecting a long, relaxed tour with lots of restroom and drink breaks. In that case, you might choose a custom plan that gives you more time at fewer stops.
If you want the simplest answer: for first-time Wellington and cruise-day logistics, this tour is usually a solid use of time—especially with a strong guide behind the wheel.
FAQ
How long is the Wellington Shore Excursion City Sightseeing Tour?
The tour is listed at about 3 hours, though real timing can vary depending on the day’s schedule and road conditions.
What’s included in the price?
The included items are port pickup and drop-off, a local guide, and an air-conditioned vehicle. Food and drinks are not included.
Where does the tour start?
It starts at CentrePort Wellington Shed 39/2 Fryatt Quay, Pipitea, Wellington 6011. The tour ends back at the same meeting point.
Is the cable car ride included?
The tour notes an optional cable car ride at your own expense, but the stop details also mention cable car admission included. Check your booking confirmation to see what applies to your departure.
Is there time to eat or buy snacks during the tour?
Food and drinks are not included. Some stops may give you a chance to grab a coffee or pastries, but you should plan to cover meals on your own.
What’s the cancellation policy?
You can cancel up to 6 days in advance for a full refund. If the tour is canceled due to poor weather, you’ll be offered a different date or a full refund.