REVIEW · WELLINGTON
Wellington Self-Guided Electric Bike Tour
Book on Viator →Operated by Switched on Bikes · Bookable on Viator
E-bikes make Wellington feel effortlessly close. For $52.75, I like that you get high-quality e-bikes plus a self-guided cycle map so you can ride at your own pace along the waterfront and into hillier neighborhoods without the day turning into a slog. It’s freedom with guardrails: clear instructions, a helmet, a lock, and routes you can follow or remix.
One consideration: this isn’t for push-walking. You should have moderate physical fitness and you must be able to ride a regular bike, since an e-bike still needs you to pedal and steer.
In This Review
- Key things to know before you ride
- E-bikes in Wellington: easy hills and big views
- Switched on Bikes handoff: helmets, locks, and a map you’ll actually use
- How the self-guided format works (and how to build a winning route)
- Stop-by-stop ride: Parliament, the waterfront, and the coastal bay run
- Stop 1: New Zealand Parliament grounds (easy start, great people-spotting)
- Stop 2: Switched on Bikes pickup at the Wellington Waterfront (your basecamp)
- Stop 3: Oriental Bay waterfront (the postcard moment)
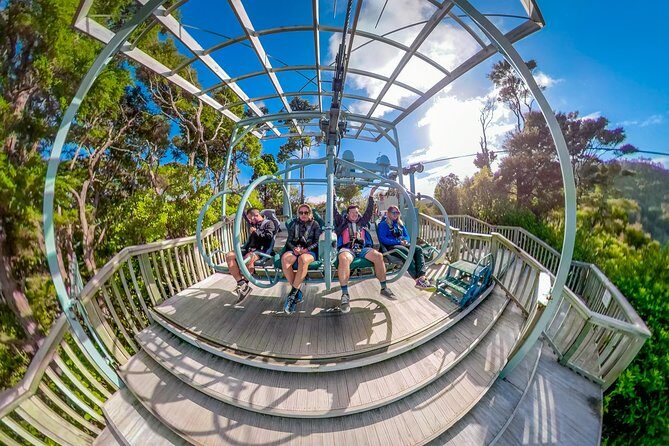
- Stop 4: Mount Victoria lookout (where TURBO earns its keep)
- Stop 5: Shelly Bay + Chocolate Fish Cafe stop (snack like a local)
- Stop 6: Lyall Bay (beach energy, planes and surfers as background)
- Stop 7: Scorching Bay (sheltered swimming vibes and picnic room)
- Stop 8: Weta Cave at Weta Workshop (movie-world stop, optional extra time)
- Comfort, safety, and what to bring (so the ride stays fun)
- Price and value: why $52.75 can actually feel like a bargain
- Should you book the Wellington self-guided e-bike tour?
- FAQ
- How long is the Wellington self-guided electric bike tour?
- Where does the tour start and end?
- What’s included with the rental?
- Is the tour fully self-guided?
- Do I need to pay extra for Weta Cave?
- Is water provided?
- What fitness level do I need?
- What is the cancellation policy?
Key things to know before you ride
- Quality e-bikes that make hills manageable so Mt Victoria feels like a climb, not a punishment
- Self-guided, with a city cycle map—follow the suggested flow or build your own stops
- Coastal cycling with lots of easy “pause points” at bays and viewpoints
- The shop setup matters: you’re given instructions, plus a helmet, lock, and bike suited to your group
- High-visibility vests available if you want extra visibility on the ride
- Optional Weta Cave time adds culture and movie-world storytelling, but it’s not included
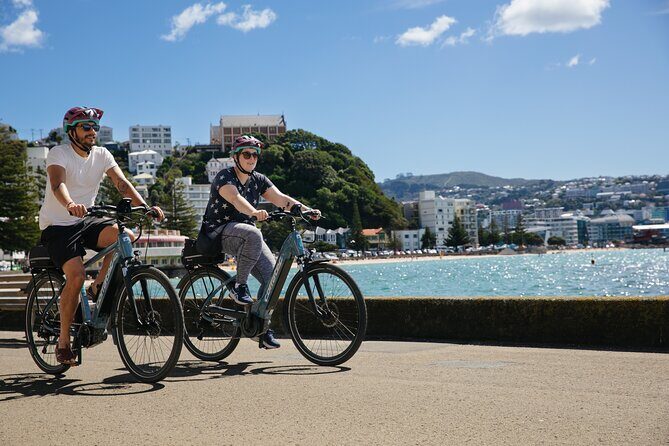
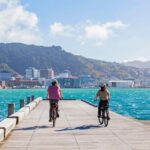
E-bikes in Wellington: easy hills and big views

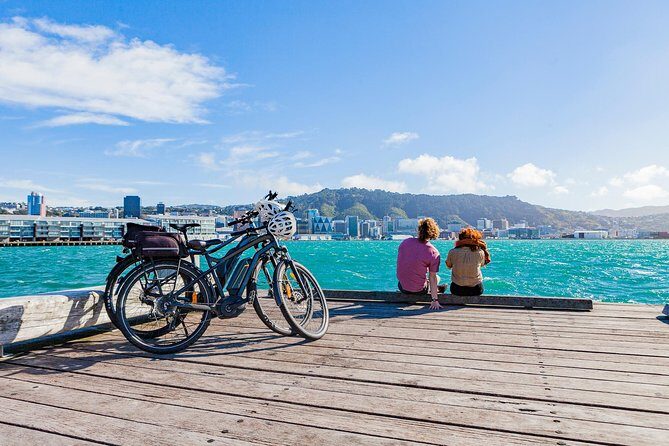
Wellington is built for short rides with dramatic rewards. You can cross from downtown to the waterfront fast, then spend the rest of your time moving through bays, viewpoints, and residential coastlines. That’s exactly why an e-bike rental works here so well.
The e-bike aspect matters because Wellington’s terrain can turn a “quick cruise” into an exhausting grind—especially if you’re riding a regular bike. The assist helps you keep a steady rhythm on flatter stretches and still get yourself up hillier bits when the route points you that way. One practical tip: the ride includes a moment where you’re encouraged to switch to TURBO on the way up to the lookout, which is a helpful “use it when you need it” feature.
If you want to see multiple neighborhoods without spending hours on foot, this format gives you that. You’re not waiting for a tour group to decide when to stop. You’re also not trapped in a rigid route. You can ride, stop, snack, and keep rolling.
You can also read our reviews of more cycling tours in Wellington

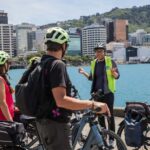
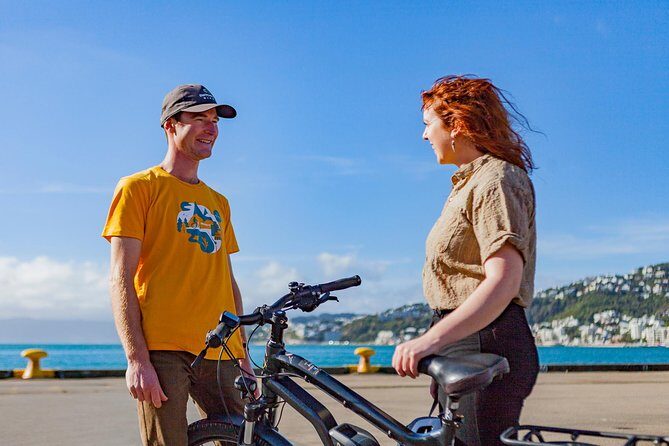
Switched on Bikes handoff: helmets, locks, and a map you’ll actually use
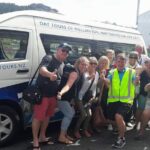
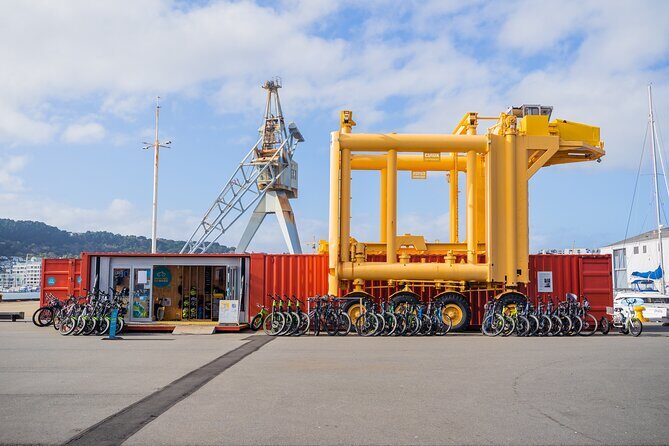
Your starting point is the Switched on Bikes shop at 15/22 Herd Street, Te Aro. The good news is that it’s centrally located, and the ride links quickly into major sights without a complicated staging process.
Here’s what you should expect to be provided:
- Use of an e-bike
- Helmet and lock
- Wellington City Cycle Map
- Local tips and insights
- Hi-vis available if you want them
The shop is focused on making sure you can ride confidently. The vibe from the experience style is practical: you get instructions, time to get oriented, and a route approach that makes the self-guided part feel simple instead of stressful. In particular, people really value the way the team helps with setup and navigation so you don’t spend your best riding energy guessing.
Two practical extras that affect your day:
- Phone holder is optional (not included), so if you want easy navigation, consider bringing your own mount or plan to rely on the provided map.
- Gel seat cover is optional (not included). If you’re sensitive to saddle time, it’s worth thinking about.
Also note there’s a bike weight limit of 150 kilograms (330 lbs). If your group includes anyone near that limit, ask before you go forward.
How the self-guided format works (and how to build a winning route)
This is truly self-guided. You’ll receive a city cycle map and instructions, then you can:
- Follow the recommended flow, or
- Create your own itinerary.
That choice is what makes the ride useful for different travel styles. If you want the “best of Wellington” arcs, stick close to the suggested coastal story. If you want museums, longer cafe stops, or a slower pace, you can shape the day around your mood.
Time-wise, the ride can run from about 2 hours to up to 1 day depending on your option. There’s also a full-day or 2-day selection. Since the stops are spread across bays and viewpoints, the self-guided nature lets you match the duration to your energy level.
A tip based on how this route plays out in real life: you can easily end up riding a lot more distance than you expect if you keep adding bays. One rider-style loop described an outing with 25+ km along the seawall plus extra city-lane distance back. So plan your day like this: decide how many “beach stops” you truly want, then commit.
Stop-by-stop ride: Parliament, the waterfront, and the coastal bay run
Below is the practical “what to expect” for each highlight stop, plus where the tradeoffs are.
Stop 1: New Zealand Parliament grounds (easy start, great people-spotting)
You’ll reach the New Zealand Parliament area quickly via on-road cycle ways—more “arrive in minutes” than “major detour.” The grounds are publicly accessible, park-like, and pleasant for a first stretch of the ride.
Why it’s worth a stop: it gives you an immediate Wellington anchor before you start following the coastline. It also works well if you want a short pause without losing momentum.
Possible drawback: if your timing is tight, it’s easy to spend longer wandering than you planned. Keep it to a quick loop and move on.
You can also read our reviews of more guided tours in Wellington


Stop 2: Switched on Bikes pickup at the Wellington Waterfront (your basecamp)
This is where you grab your bike and get set up. The shop is described as centrally located on the waterfront, which makes the whole day feel smoother.
What I like operationally: the bike handoff isn’t treated like a vending machine. You get instructions, plus you can ask questions about routes and pacing. People also mention friendly, patient service and a “get you going properly” mindset.
Possible drawback: if you’re starting from the port area, you may face a short hike to reach the shop location. It’s usually doable, but it’s not instant. Build that into your timing.
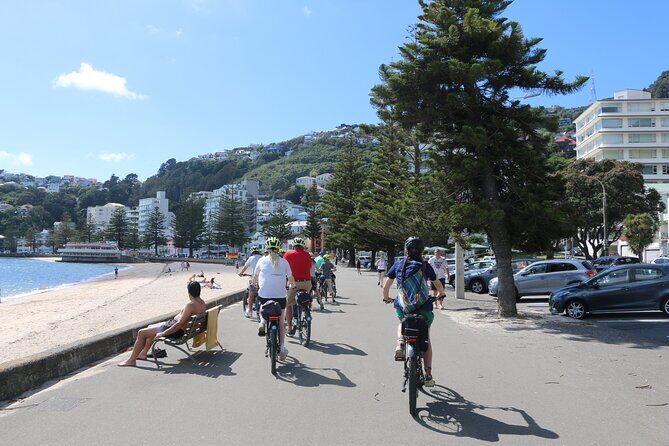
Stop 3: Oriental Bay waterfront (the postcard moment)
A ride past Oriental Bay is a straightforward coastal treat. It’s the kind of waterfront stop that makes you want to slow down—easy to enjoy from the bike, with the option to pause depending on how much time you’ve given yourself.
Why it’s valuable: it breaks up the ride visually and gives you a popular Wellington bay feel early on.
Possible drawback: if you hit it during busier periods, you might want to keep your stop short so you don’t feel swallowed by foot traffic.
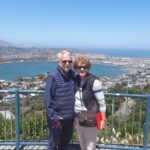
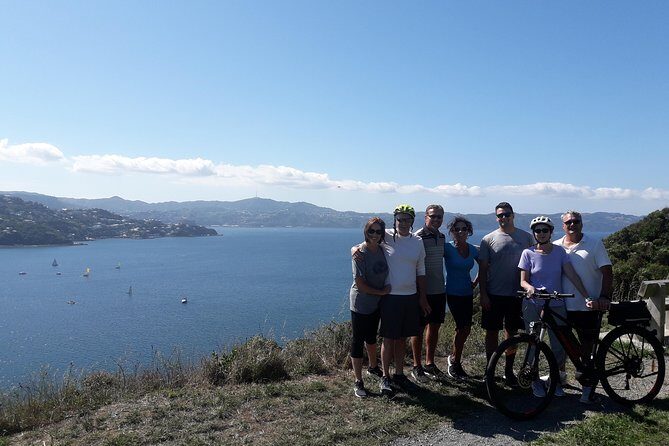
Stop 4: Mount Victoria lookout (where TURBO earns its keep)
This is one of the standout “payoff climbs.” You set the e-bikes to TURBO and head up to a major lookout over Wellington City.
Why it’s worth it: viewpoints are the payoff for all the biking. Even if you’re not the type to sit still for long, this is a stop that justifies the effort.
Possible drawback: the climb is still a climb. The bike helps a lot, but if you’re not comfortable with active riding, this is the moment where it will feel most physical.
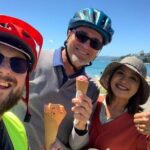
Stop 5: Shelly Bay + Chocolate Fish Cafe stop (snack like a local)
At Shelly Bay, there’s a cafe stop that many people single out: Chocolate Fish Cafe. The idea here isn’t just food—it’s a comfortable place to reset, stretch your legs, and enjoy the coastal vibe before you head to the next bays.
Why it’s valuable: it gives your ride a “real break,” not just a quick photo stop. It’s also a good point to check your remaining time and decide whether you’re doing the optional museum stop later.
Possible drawback: cafe time can sneak up on you. If you want to keep pace for the later bays and Weta Cave, set a time limit before you sit down.
Stop 6: Lyall Bay (beach energy, planes and surfers as background)
Lyall Bay is described as a beach scene with cafes nearby and plenty to watch. You might see planes taking off and landing from the nearby airport, plus surfer activity and dogs running around with sticks.
Why it’s valuable: it’s a “living postcard.” Even if you’re not heading into the water, there’s enough happening that you’ll enjoy the pause.
Possible drawback: wind off the water can make it feel cooler even when you’re moving. Give yourself a quick plan—snack, photos, then back on the bike.
Stop 7: Scorching Bay (sheltered swimming vibes and picnic room)
Scorching Bay is positioned as Wellington’s best swimming beach, with white sand and a sheltered feel. There’s also a cafe option for ice cream and lunch, plus grass and beach space where picnics can work.
Why it’s valuable: if your day includes beach time, this is a logical “longer stop” because it’s more about relaxing than just passing through.
Possible drawback: it’s easy to over-pause. If you’re also trying to fit in Weta Cave, watch your timing so you don’t turn the final section into a rushed sprint.
Stop 8: Weta Cave at Weta Workshop (movie-world stop, optional extra time)
Weta Cave sits at Weta Workshop. The ride includes time to pop in, and there’s also an optional guided one-hour tour you can add on if you want deeper film-history context.
What makes it valuable: this gives your cycling day a brain-and-story component. It’s not only scenery; it’s Wellington’s film and creative identity.
Possible drawback: admission for Weta Cave is not included, so you’ll want to budget for it separately. Also, you’ll need to decide whether the optional guided tour fits your remaining time after the bays.
Comfort, safety, and what to bring (so the ride stays fun)
The setup covers the basics that keep e-bike days stress-free: you’ll get a helmet and a lock, plus hi-vis availability if you want it. The map and local tips are meant to reduce wrong turns and stop you from wasting time.
Still, there are a few real-world considerations that you should handle personally:
- Bring water, since it isn’t included.
- If you’re tall or short, pay attention to the fitting note: heights must be advised if less than 152 cm (5 foot), so the team can guide you to the right setup.
- Optional items like a gel seat cover or mobile phone holder can matter if you plan to ride longer than a casual cruise.
- You must be able to ride a regular bike. The e-bike helps with effort, but balance and steering are still on you.
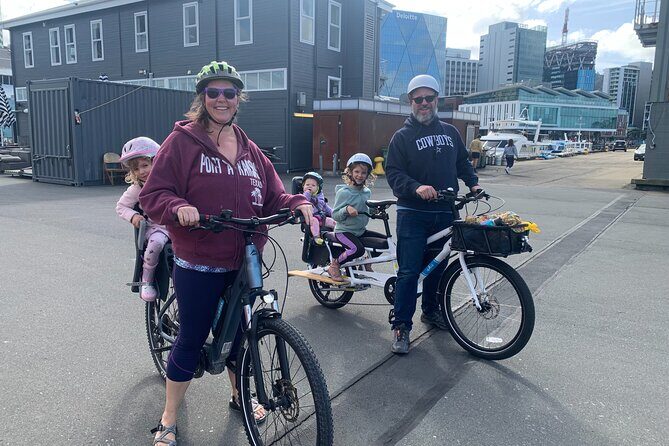
If you’re riding as a group, this is a solid activity because the team can fit bikes to your group and you’re not stuck waiting for everyone to finish a guided lesson. It keeps the pacing flexible.
Price and value: why $52.75 can actually feel like a bargain

At $52.75 per person, the headline cost is easy to understand. What’s harder—and more important—is the value math.
You’re not just renting a bike. The package includes:
- the bike
- helmet and lock
- a Wellington City Cycle Map
- local tips and insights
- self-guided tour structure that connects multiple worthwhile areas
That turns the price into “transport + planning help” rather than just “wheels.” And because the experience can run from about 2 hours to up to 1 day, you can match the cost to how much time you actually use. If you want a quick taste of coastal Wellington, do a shorter route. If you’re the type who loves lingering at bays and cafes, go longer and let the day expand.
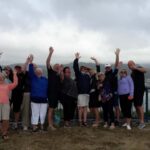
One more value angle: small-group scale is part of the experience style, with a stated maximum of 25 travelers. Even though it’s self-guided, the lower ceiling generally helps the shop manage setups smoothly.
Should you book the Wellington self-guided e-bike tour?
Book it if you want an efficient, flexible way to see Wellington’s coast without turning your day into a workout. It’s especially worth it when you want multiple stops—Parliament, bay views, viewpoints, and the movie-world option at Weta Cave—without relying on a fixed tour schedule.
Skip it (or think twice) if you don’t feel comfortable riding a regular bike, even with electric help. Also plan ahead for basics like water, since nothing drinks-wise is included.
If you’re visiting for the first time and you want your bearings fast, this is a strong choice. The key is simple: give yourself enough time for the pauses, but don’t let cafe-and-beach time eat the whole day.
FAQ
How long is the Wellington self-guided electric bike tour?
It runs from about 2 hours up to 1 day (approx.). You can also select a full-day or 2-day option.
Where does the tour start and end?
You start at 15/22 Herd Street, Te Aro, Wellington 6011, New Zealand, and the activity ends back at the meeting point.
What’s included with the rental?
You get use of the bicycle, a helmet, and a lock. You’ll also receive a Wellington City Cycle Map, local tips and insights, and local taxes. High-visibility vests are available if you want them.
Is the tour fully self-guided?
Yes. You can follow the cycle map’s recommendations or create your own itinerary.
Do I need to pay extra for Weta Cave?
Yes. Weta Cave admission is not included. The option to take a guided one-hour tour is also not included.
Is water provided?
No. Water is not included, so you should plan to bring your own.
What fitness level do I need?
You should have a moderate physical fitness level. You must also be able to ride a regular bike.
What is the cancellation policy?
Cancellation is free if you cancel up to 24 hours in advance for a full refund. If you cancel less than 24 hours before the start time, the amount paid is not refunded.